
- Nvidia High Definition Audio issues seem to affect plenty of users these days, in spite of their ultra-performing hardware.
- We investigated this particular problem too, so you’ll find listed below the best solutions to apply. Start by changing the audio output device.
- Do you often experience similar issues? Take a look at our Driver Troubleshooting section.
- For more quick tips, take your time and visit our PC Software Troubleshooting Hub as well.
As we already know, even ultra-performing hardware will fall short in the absence of appropriate software.
In the best-case scenario, you’ll be able to run everything well even with generic or outdated drivers.
However, most of the time you’ll experience lots of issues that occasionally affect more than just GPU performance.
One issue quite common with faulty drivers is related to sound, like the issue where some users completely lose system sound after installing NVIDIA GPU drivers.
Not having sound on your PC can be a big problem, and many users reported that their sound is missing after updating Nvidia drivers.
There are a few possible workarounds for this problem, as you’ll see below.
Many users are complaining their Nvidia graphics cards are not detected. Here’s how to fix that!
How can I fix Nvidia High Definition Audio not working?
1. Change the audio output device
- Right-click Sound icon in the Notification area and open Playback devices.

- Highlight the preferred device and Set as Default.
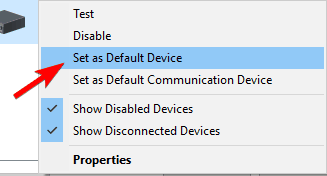
- Right-click Digital Audio/Monitor/HDMI and select Disable from the menu.
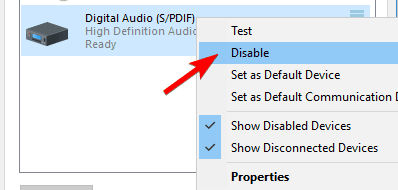
- Click OK and check for changes.
Once you set your speakers as the default playback device, the issue should be completely resolved.
2. Rollback audio drivers
- Right-click the Start button and choose Device Manager from Win + X menu.
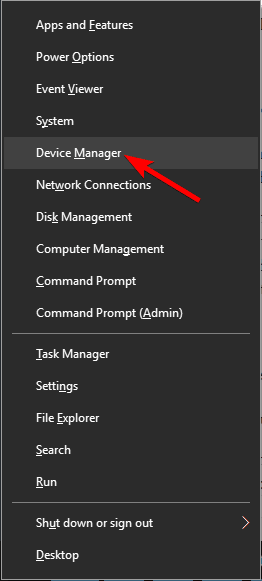
- Navigate to Sound, video and game controllers. Right-click Realtek HD Audio driver and choose Properties from the menu.
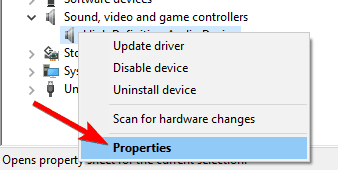
- In the Driver tab, click the Roll Back Driver button.

- That should bring back the previous version and possibly fix your sound issues.
Sometimes, GPU drivers will change the default audio output device to HDMI instead of speakers or headphones. Luckily, you can easily recover default settings by applying the above steps.
However, if the problem is persistent, move down to the next solution.
3. Update or reinstall audio drivers
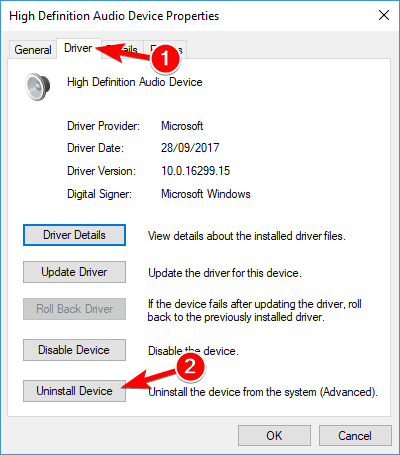
- Go back to the Device Manager and double click your audio driver to open its properties.
- Under the Driver tab, click the Uninstall.
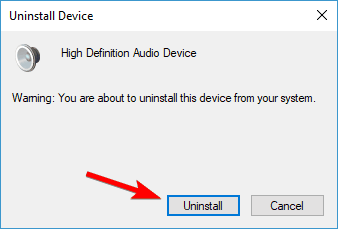
- When the confirmation window appears, click on Uninstall.
- Now you can install the downloaded driver.
- After installation is complete, restart your PC.
If your sound is still out or there are no previous versions you can roll back to, your best bet is to reinstall the driver.
To download the latest driver you need to visit your motherboard or sound card manufacturer’s website and download the latest driver for your device.
After doing that, you need to uninstall your current driver by doing the following. Few users reported that they fixed the problem entirely simply by uninstalling both Nvidia audio and the main audio drivers from their PC.
After doing that, Windows will install the default audio driver and the problem should be resolved.
Several users claim that you don’t have to uninstall your original audio driver. Instead, you just have to remove Nvidia audio driver and the issue should be resolved completely.
Many users didn’t manage to install their drivers. Here’s how to do that in a few easy steps!
Update drivers automatically (suggested)
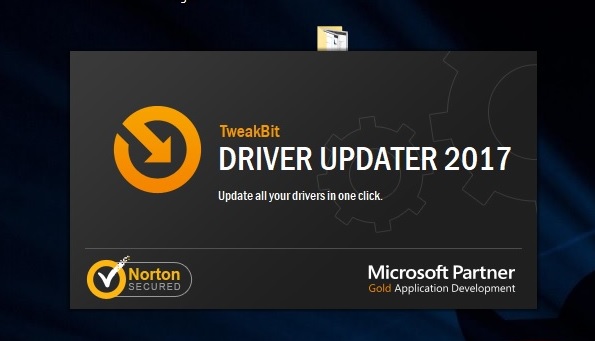
- Download and install TweakBit Driver Updater.
- Once installed, the program will start scanning your PC for outdated drivers automatically. Driver Updater will check your installed driver versions against its cloud database of the latest versions and recommend proper updates. All you need to do is wait for the scan to complete.
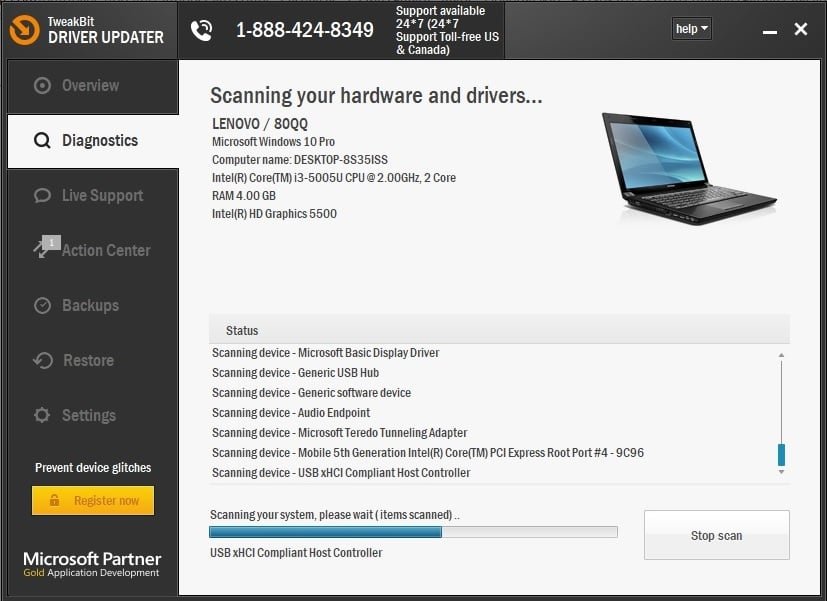
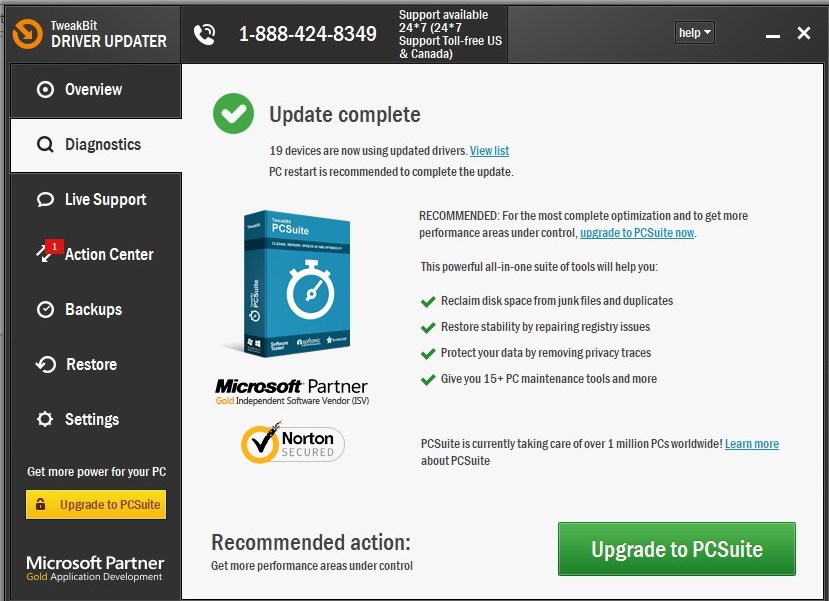
- Upon scan completion, you get a report on all problem drivers found on your PC. Review the list and see if you want to update each driver individually or all at once.
- To update one driver at a time, click the Update driver link next to the driver’s name or simply click the Update all button at the bottom to automatically install all recommended updates.
Note: Some drivers need to be installed in multiple steps so you will have to hit the Update button several times until all of its components are installed.
If the previous method doesn’t fix the issue, try a third-party tool. Downloading drivers manually is a process that carries the risk of getting the wrong driver installed, which may lead to serious malfunctions.
The safer and easier way to update drivers on a Windows computer is by using an automatic tool such as TweakBit Driver Updater.
Driver Updater automatically identifies each device on your computer and matches it with the latest driver versions from an extensive online database.
Drivers can then be updated in batches or one at a time, without requiring the user to make any complex decisions in the process. Use the above steps in that regard.
Disclaimer: Some functions of this tool are not free.
4. Reinstall GPU drivers

Besides audio drivers, another solution can be reinstalling GPU drivers. In some cases, the installation process can corrupt or erase vital files.
In this case, reinstall the latest drivers for your NIVIDA graphic processor. You can find them here. If your card runs on legacy drivers, you can locate them by searching.
We recommend you to use full instead of beta versions for better stability. If you want to completely remove all files associated with your graphics card, you can do so using Display Driver Uninstaller.
We already wrote a short guide on how to use Display Driver Uninstaller, so be sure to check that article for detailed instructions.
6. Enable onboard sound device in BIOS

- Restart your PC and press Delete continuously until the BIOS Settings are shown. This may differ from configuration to configuration and it depends on your motherboard. Most of the time. you’ll see the valid command in the bottom left corner.
- Navigate to Onboard Sound Device and switch to ON instead of Auto.
- Save changes and exit BIOS.
- You should hear the well-known startup sound.
Most of the motherboard settings that cover sound-related options can cause errors after the installation of GPU drivers. Fortunately, the problem may be solved within BIOS settings.
This issue is common and specific for NVIDIA Graphics but should be resolved if you’ve tried a few of these workarounds.
7. Perform a clean installation of Nvidia drivers

- Download the latest Nvidia drivers.
- Double click the setup file in order to run it.
- Once you get to the Installation options menu be sure to select Custom (Advanced) and click on Next.
- Now, tick the Perform a clean installation option and click on Next.
- Follow the instructions on the screen to complete the installation process.
Many users reported that sound was missing after installing Nvidia drivers. However, you can fix that problem simply by performing a clean installation of your drivers.
This is relatively simple and you can do it by following the above steps. After performing them, your original drivers will be removed and Windows will install the latest drivers instead.
Several users reported that this solution worked for them, so feel free to try it out.
8. Disable Nvidia HDMI Sound Adapter in BIOS

If you have no sound after installing Nvidia graphics drivers, the problem might be related to your BIOS and its settings.
According to users, they managed to fix this issue after disabling Nvidia HDMI Sound Adapter.
To do that, enter BIOS and go to Advanced > Onboard Devices. There you should be able to find Nvidia HDMI Sound Adapter and disable it.
This is relatively simple, but if you need more information on how to access BIOS and how to disable this setting, we advise you to check your motherboard manual.
9. Update your BIOS

Few users claim that you can fix this problem by updating BIOS to the latest version. Before we start, we have to mention that BIOS update is a potentially dangerous procedure.
We’re not responsible for any damage that might occur. Updating BIOS is different for each motherboard.
Since there’s no universal guide, we strongly suggest that you check your motherboard manual for detailed instructions.
We also wrote a short guide on how to flash your BIOS, so feel free to check it out.
Additionally, don’t forget to share your alternative solutions or ask subject-related questions in the comments below.
Speaking of solutions, the ones listed above may be applied as well when dealing with any of the following problems:
- Nvidia HDMI audio not working – This is a relatively common problem encountered by many users eager to enjoy Nvidia with their home theater receiver. If you’re one of them, you should be able to fix it by using one of our solutions.
- Nvidia audio driver not working – Since GPU drivers often override audio drivers, such errors do pop up out of the blue as well.
- Nvidia High Definition audio driver Windows 10 no sound – Using the HDMI for streaming audio and video to any other screen often leads to this issue. However, you should be able to fix that by using one of our solutions.
- No sound Nvidia High Definition audio – This also happens when using HDMI to stream audio and video to other displays. Faulty drivers and a potentially disabled onboard sound device in BIOS are often the culprits.
- No sound after Geforce update – Many users reported that their sound was gone after updating their Geforce drivers or after installing a Geforce graphics card.
- No sound after installing graphics card Windows 10 – According to users, this error can sometimes appear after installing a new graphics card. This is most likely caused by incompatible drivers.
- Nvidia High Definition Audio not working Windows 10 – Several users reported that their High Definition Audio isn’t working. This can be caused by your drivers or by BIOS settings.
- Nvidia video card no sound – Users reported that their sound is completely missing while using Nvidia graphics. To fix the issue, you might have to reinstall both your Nvidia and audio drivers.
FAQ: Learn more about Nvidia High Definition Audio
- How do I enable Nvidia HD Audio?
To enable Nvidia HD Audio, enter into NVIDIA Control Panel navigation tree pane and click Set up digital audio under Display.
- How do I fix Nvidia High Definition Audio?
If you’re eager to quickly fix Nvidia High Definition Audio issues, you should change the audio output device or update the audio drivers.
- How do I update audio drivers?
To update audio drivers, right-click on the Start button, then click Device Manager, and choose Sound, video, and game controllers. Under the Driver tab, just click Update Driver Software.