
Crapware

We’ve all been there. You find a great little utility on the internet that you can’t live without. You eagerly download it and begin the installation, and what’s this? It wants to also install a copy of Sammy Smith’s Super-sassy Sim demonstration? Or maybe it’s a McAfee browser extension? Well, whatever it is, you don’t want this crapware infesting your computer.
These nefarious additions are known as PUPs (Possibly Unwanted Programs), PUAs (Possibly Unwanted Applications), and my favorite, PUS (Possibly Unwanted Software). PUS by any other name, stinks the same.
Some shady developers have gotten very sneaky and even the most inveterate computer users will sometimes miss the barely legible “skip” link or the “checked by default” box accepting the offer. Windows Defender has the ability to “defend” you against these little beasts, and in this week’s Quick Tips article we’re going to show you how to make that happen.
Note: If you have a third-party anti-virus program installed, then this tip will be of no use to you since Windows Defender is not activated in these circumstances.
PowerShell
PowerShell is the more powerful cousin of the Command Prompt. We will be using it to set Windows Defender to watch for and block crapware.
Enable/Disable The PUS Blocker
- Use the Windows Key + X to open the WinX Menu
- Choose PowerShell (Admin) (see the note below if PowerShell is not on this menu)
- To enable this setting, type, or copy and paste, the following and hit Enter: Set-MpPreference -PUAProtection 1
- To disable this setting, type, or copy and paste, the following and hit Enter: Set-MpPreference -PUAProtection 0
Note: If PowerShell is not showing up on your WinX Menu, then…
- Click the Windows Start button
- Type PowerShell and right-click the Desktop App entry, and choose Run as administrator
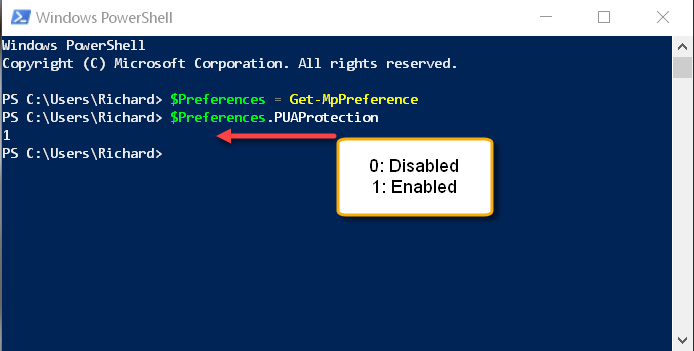
Is It Enabled?
You can confirm the status of this setting. To do so, in the PowerShell window, do the following:
- Type, or copy and paste, the following and hit Enter: $Preferences = Get-MpPreference
- Type, or copy and paste, the following and hit Enter: $Preferences.PUAProtection
If the returned value is 1 (one), then it is enabled; 0 (zero) means it is disabled.
Tip: To paste copied text into PowerShell, you only need to right-click at the prompt and the most recent Clipboard entry will be inserted. Try it… you’ll like it.
Please keep in mind that Windows Defender will do a fairly good job, but it will not catch everything. MalwareBytes AntiMalware, for instance, will be more thorough.