
If you are using Google or Nest Wifi, make this small change from the Google Home app to make everything feel faster than before.
The Default Google and Nest Wifi Settings are Sort of Slowing You Down, Make this Change Today and Make Everything Faster
We are huge fans of Google and Nest Wifi, but the entire system does come with its own set of problems, like any other consumer product. Thankfully, those problems are something which a lot of people shouldn’t be worried about at all.
But, I will point out just one thing which I later realized is something which everyone should ‘fix’ right away. See, when you set up Google or Nest Wifi for the first time, the DNS setting is set to ‘Automatic.’ What this means is, depending on the situation, your mesh system will decide which DNS is performing better – your ISP’s or Google’s – and use the better, faster one.
While this is fantastic, but I noticed that it doesn’t work that well and adds a slight delay to everyone you do. For example, you type in a website name and hit enter, there’s a slight delay before the page loads up. Honestly, this delay is so negligible that most of you would simply write it off as ‘nothing.’
However, once that delay is removed you start to realize how much faster your Wi-Fi actually is. And the setting you have to change is extremely simple. Here’s what you have to do.
Note: This will only make your internet more responsive than before. Do not expect it to transform your 10Mbps connection into a 100Mbps one.
Step 1. Launch the ‘Google Home’ app. Download it from the App Store or Google Play if you haven’t on your device already.
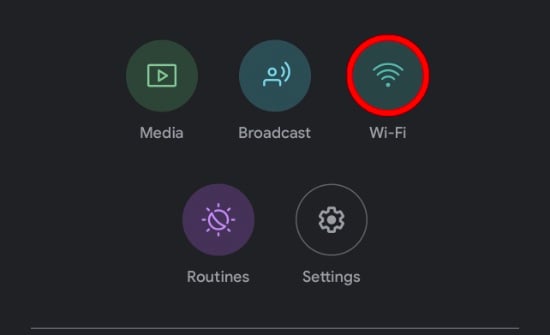
Step 2. Assuming you are signed into the Google Home app, tap on the ‘Wi-Fi’ button at the top.
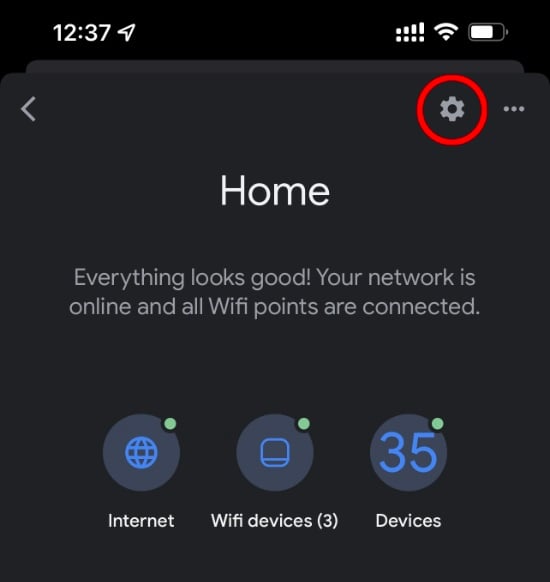
Step 3. Now tap on the ‘Settings’ button on the top right hand corner.
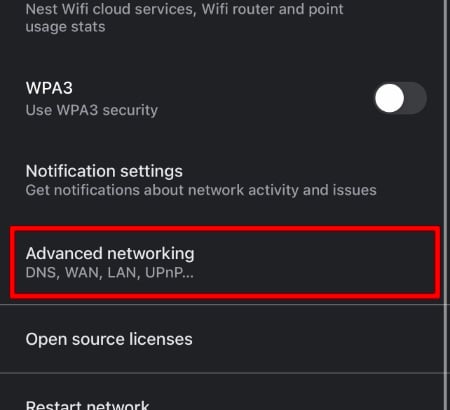
Step 4. Scroll down and tap on ‘Advanced networking.’
Step 5. Tap on ‘DNS Settings’ at the top.
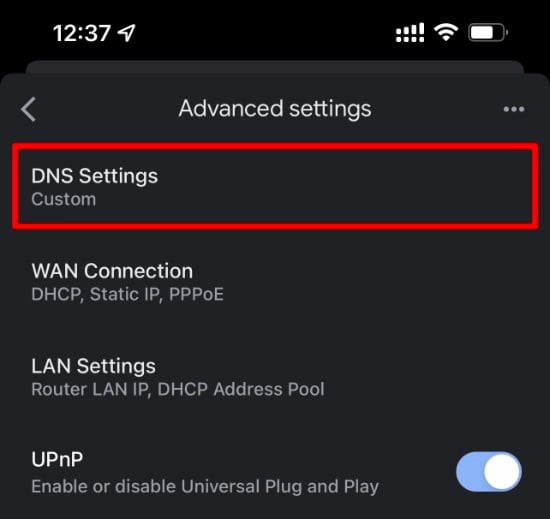
Step 6. Tap on ‘Custom.’
Step 7. Enter 8.8.8.8 under ‘Primary server’ and 8.8.4.4 under ‘Secondary server.’ Please note that Google DNS might not perform the best on your ISP. In certain cases, the ISP’s own DNS server works best, therefore tap on ‘ISP’ on the last page instead of ‘Custom’ in order to test it out. But, if Google works better, make sure you enter it in the ‘Custom’ field rather than setting the router to work on full automatic mode.

Step 8. Save everything and take the internet for a spin.
In plain words – do not use the Automatic DNS setting while using Google / Nest Wifi. Make sure you set the DNS yourself or set it to ISP if it performs better.
The post Make Google / Nest Wifi Instantly Faster with this One Change appeared first on Wccftech.