
Installing Linux Mint is not a big deal.
It’s the things to do after installing Linux Mint that could feel tiresome.
And if you have to do the same on more than one system, it gets frustrating.
Imagine having several computers in your home, lab, or institution. And all of them need to have similar configurations and applications.
Now imagine this. You download Linux (Mint), make a live USB and install it on all the systems. And then you have to do the same configuration and install the same set of applications on all of them.
What if I tell you there was a way to save your time from doing these repetitive tasks? How about creating a modified ISO and put this customized Linux Mint on the live USB? This way it installs the same customized Linux distro on all the systems.
There is a handy GUI tool called Cubic that allows you to pre-configure your installs in the easiest way possible.
Let me walk you through its features and how you can use it to customize Linux Mint 21 ISO.
Do note that Cubic should work with other distributions like Ubuntu, Fedora etc. I have tested it with Mint but you may try and follow the steps for other distros.
Cubic: The easiest way to create custom ISO images
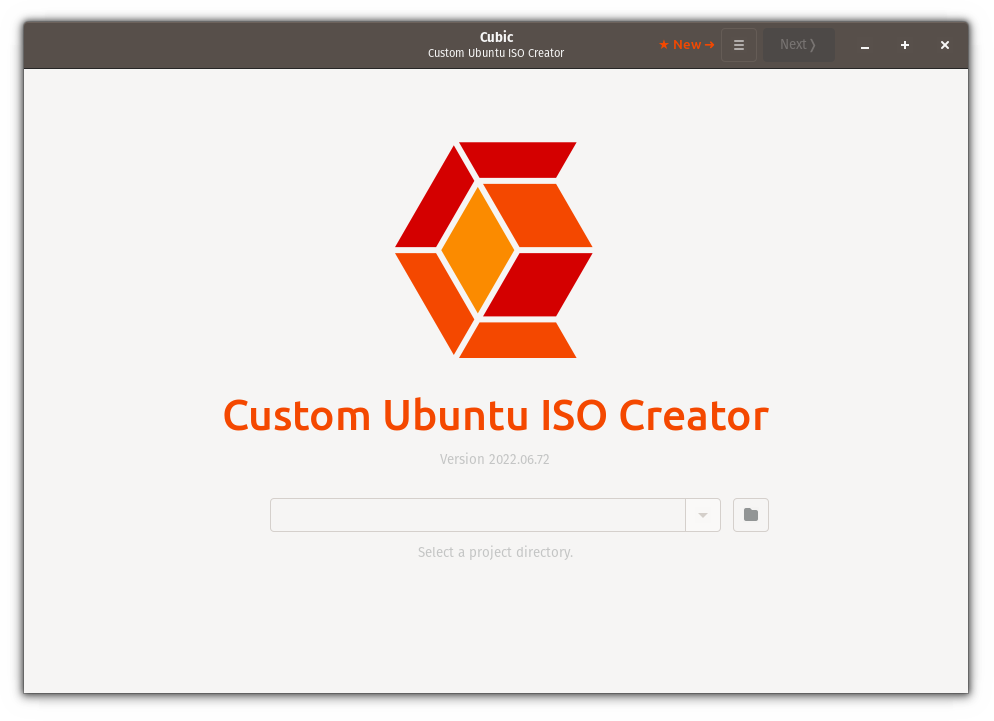
Cubic (Custom Ubuntu ISO Creator) is a GUI tool made to customize Ubuntu-based distros.
It lends you to the chroot environment of ISO where you will be making significant changes, and it also allows you to decide on packages separately for minimal and normal installation.
But before jumping to the procedure, let’s have a look at some features of Cubic.
Key Features of Cubic:
- Easy to use GUI.
- Allows you to select packages for minimal and normal installation separately.
- It has three tabs for specific reasons:
- Kernel Tab: If you went with installing multiple kernels, you can specify the boot kernel from here.
- Preseed Tab: From here, you can create, edit and remove preseed files. Using preseed files, you can skip the questions that are generally asked during installation, as preseed files will automate the process!
- Boot Tab: If you are interested in changing boot parameters, this is the place from where you can tweak how the modified ISO will boot.
- Offers various types of compression formats to compress modified ISO files.
- Comes with QEMU (open source machine emulator and virtualize) to test modified ISOs.
Seems too promising, right? So let’s go ahead with the installation process.
Installation of Cubic in Ubuntu-based distributions
Cubic is not available in the default repository of Ubuntu so you’d need to add PPA to install the software not available in the default repo:
sudo apt-add-repository ppa:cubic-wizard/releaseNow, let’s update the repository and install Cubic:
sudo apt update && sudo apt install cubicAnd that’s it!
So now, let’s move forward to how you can use Cubic to customize ISO.
How to use Cubic to create custom ISO Images
For this guide, I’m going to use Linux Mint 21 ISO. To make this guide more relevant, I’m going to perform the following operations:
- Removal of unnecessary packages, making it a minimal ISO of Linux Mint.
- Update remaining packages to the latest version.
- Add new background images.
- Install the latest Linux Kernel (6.0).
You can make your own modification based on your liking.
1. Adding/Creating a project directory
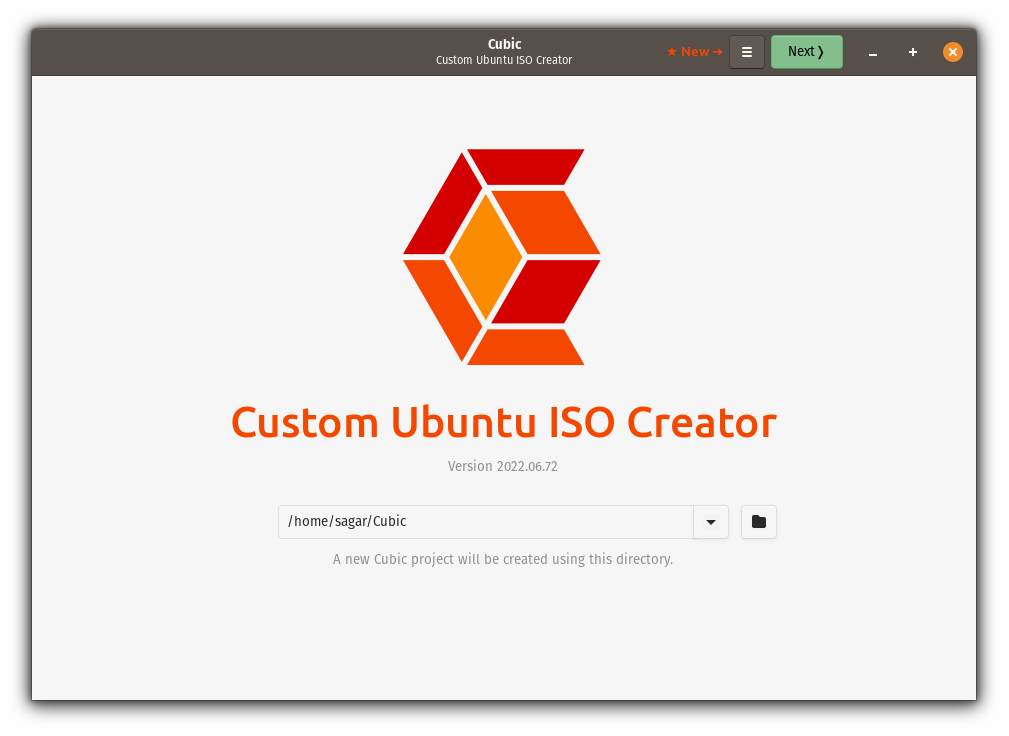
When you open Cubic, it will ask you to choose the project directory. That is nothing but where you want all the files related to creating custom ISO images.
Here, I made a new sub-directory inside my HOME directory. Make sure to have a separate directory for every Cubic project you make. Once you’re done selecting the project directory, click on the Next button.
2. Choose the original ISO image
Here, you have to choose the original ISO image that you want to work with.
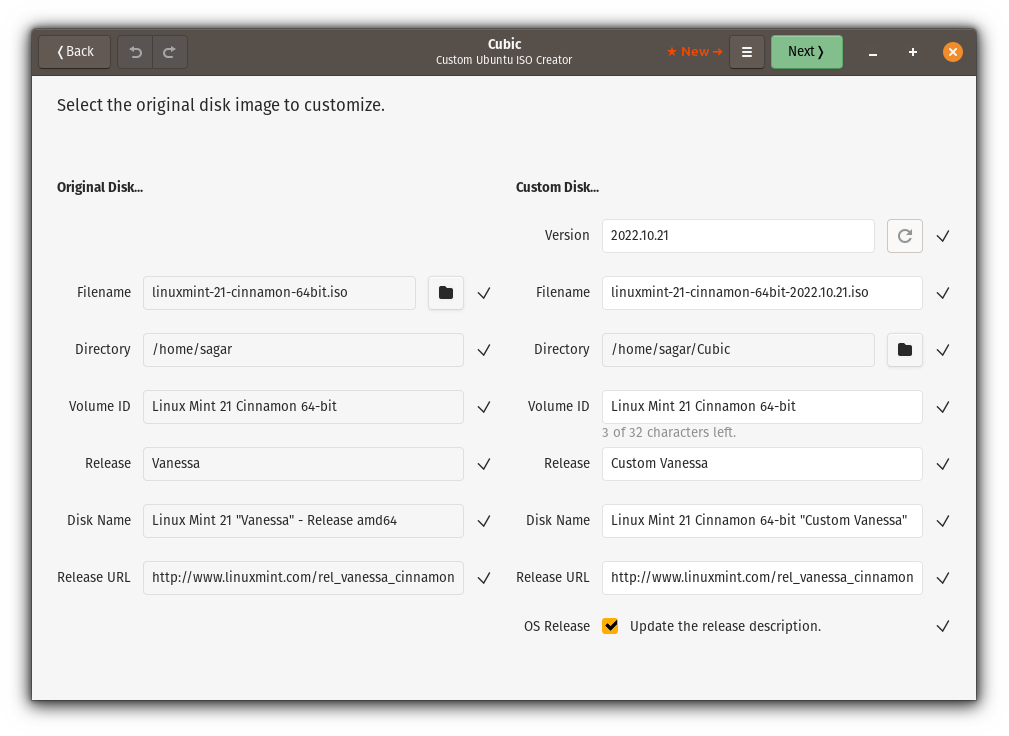
As you can see, I went with Linux Mint 21, and it fetched all the other information automatically.
3. Working with chroot environment
Once you select the ISO, it will extract the ISO image and you will enter into a chroot environment.
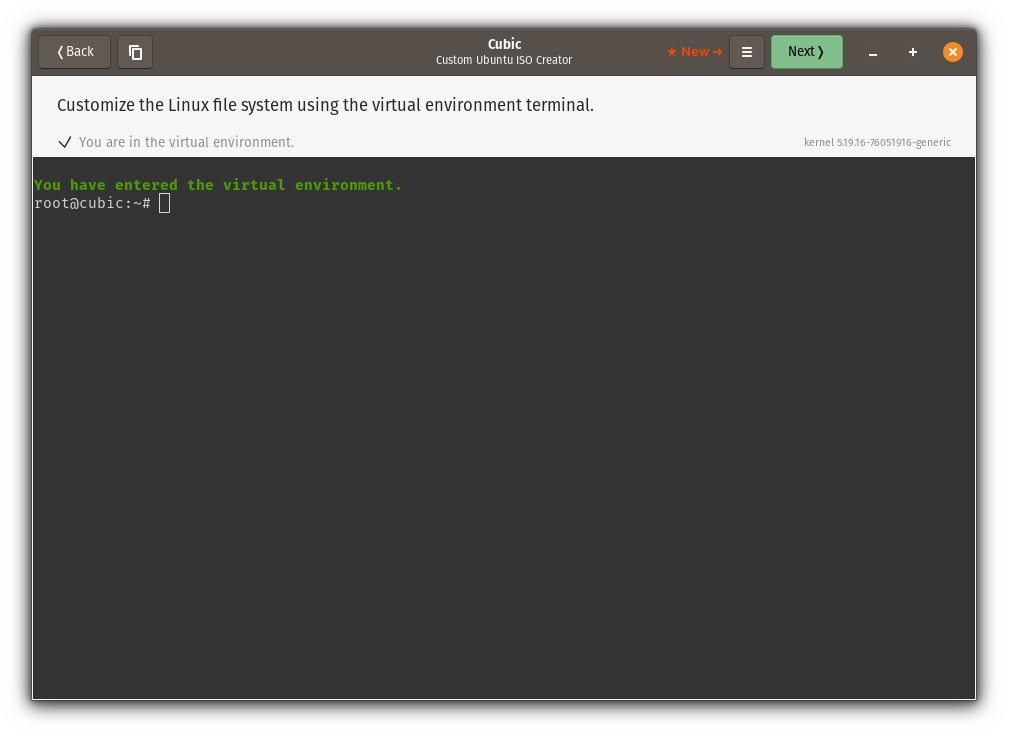
This will behave as a regular terminal and also this is the place where I’m going to perform most of the operations related to customizations.
Removing packages
It’s all up to you how many packages you want to remove or you may also skip the package removal section. To remove a package, you don’t have to use the sudo that you generally use as removal of packages needs superuser privileges.
So let’s suppose you want to remove thunderbird; then the following command should get the job done:
apt purge thunderbirdBut as I told you earlier, I’m going for a minimal desktop, I’ll be removing most of the additional GUI apps including Libreoffice. And if you want to do the same:
apt purge drawing gnome-calculator hexchat hypnotix libreoffice* onboard redshift redshift-gtk rhythmbox sticky thingy thunderbird warpinator webapp-manager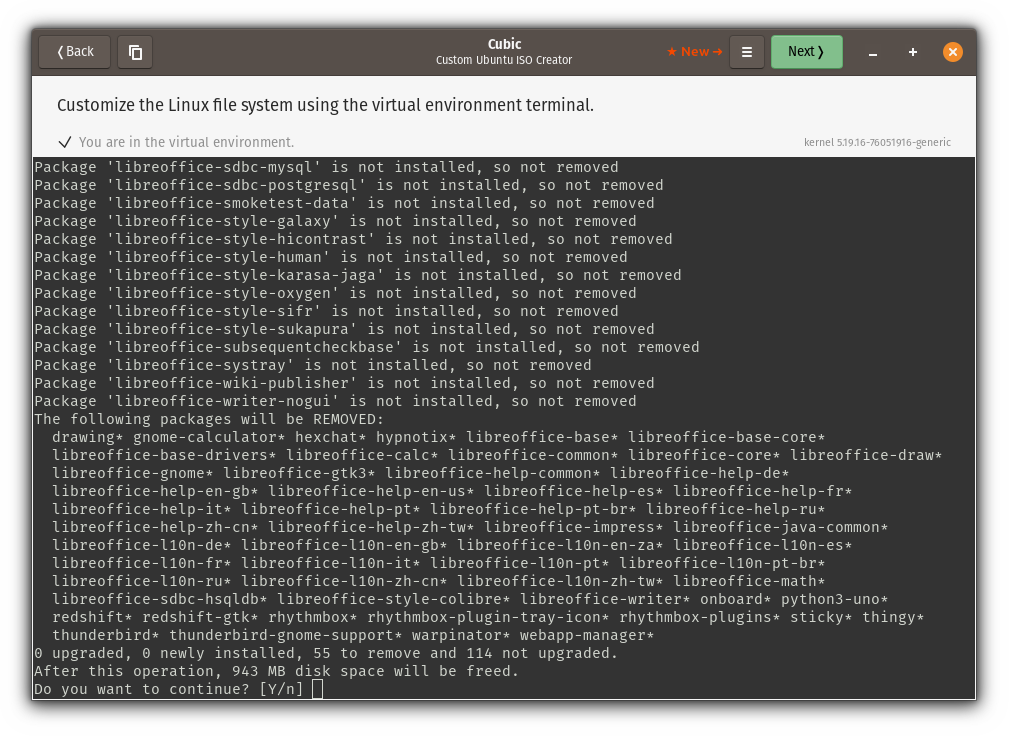
Yep, it’s that easy!
Update existing packages
If you want to have the most recent packages in your next Ubuntu install, this is the step you should consider following:
sudo apt update && sudo apt upgrade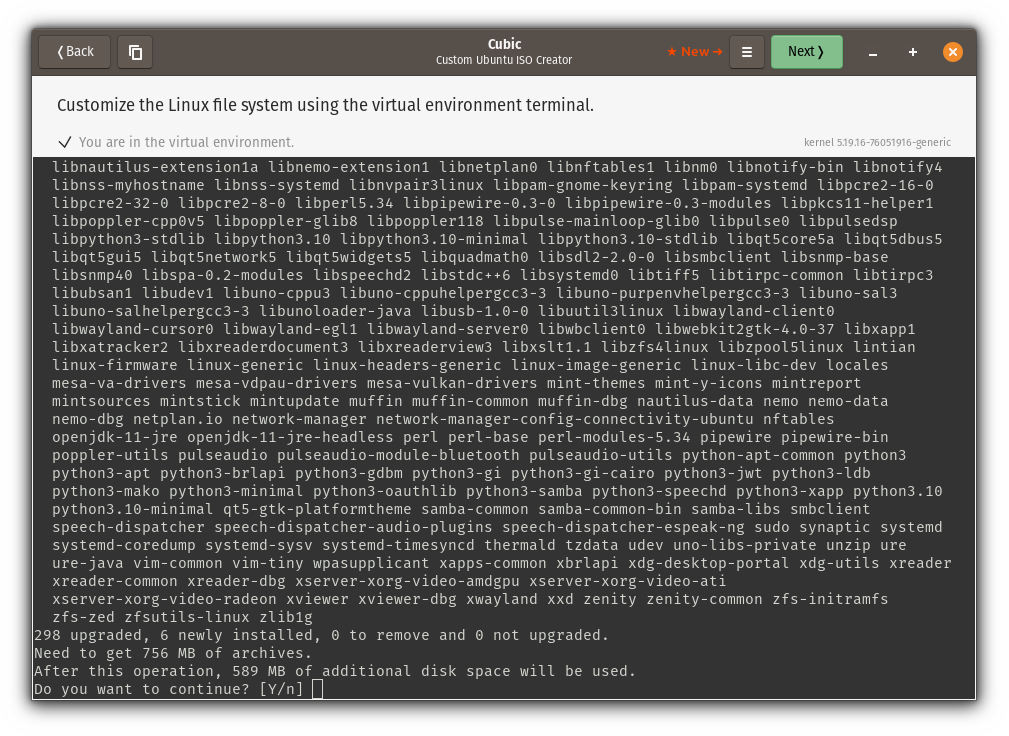
Adding background images
First, let’s change the current working directory to /usr/share/backgrounds:
cd /usr/share/backgroundsAs Cubic allows users to copy files by drag and drop in the current working directory (/usr/share/backgrounds in our case), I’m going to use copy my wallpapers (which I have locally downloaded).
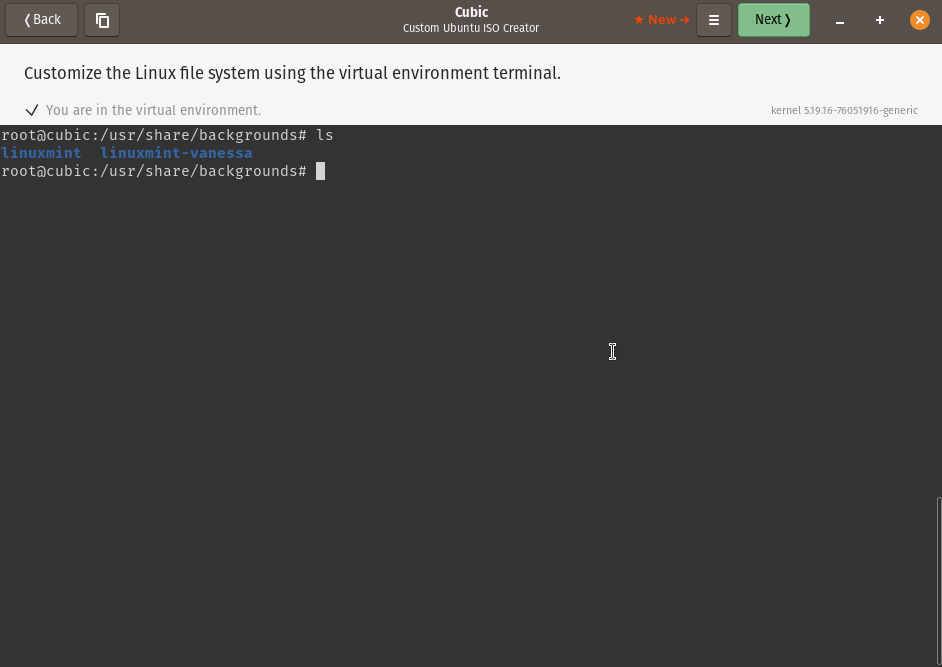
This must be it if you want to change the background from the file manager but if you want them to be listed in the change background dialog, you’ll have to add each one in an XML file located at /usr/share/gnome-background-properties.
Adding Linux Kernel 6.0
In this section, I’m going to download the .deb package of kernel headers and modules and then will install them using the dpkg command.
Use the given 4 commands one by one and it will download kernel modules and headers:
wget https://kernel.ubuntu.com/~kernel-ppa/mainline/v6.0/amd64/linux-headers-6.0.0-060000_6.0.0-060000.202210022231_all.debwget https://kernel.ubuntu.com/~kernel-ppa/mainline/v6.0/amd64/linux-headers-6.0.0-060000-generic_6.0.0-060000.202210022231_amd64.debwget https://kernel.ubuntu.com/~kernel-ppa/mainline/v6.0/amd64/linux-image-unsigned-6.0.0-060000-generic_6.0.0-060000.202210022231_amd64.debwget https://kernel.ubuntu.com/~kernel-ppa/mainline/v6.0/amd64/linux-modules-6.0.0-060000-generic_6.0.0-060000.202210022231_amd64.debOnce you are done with downloads, you can use the dpkg command to install them:
dpkg -i *.deb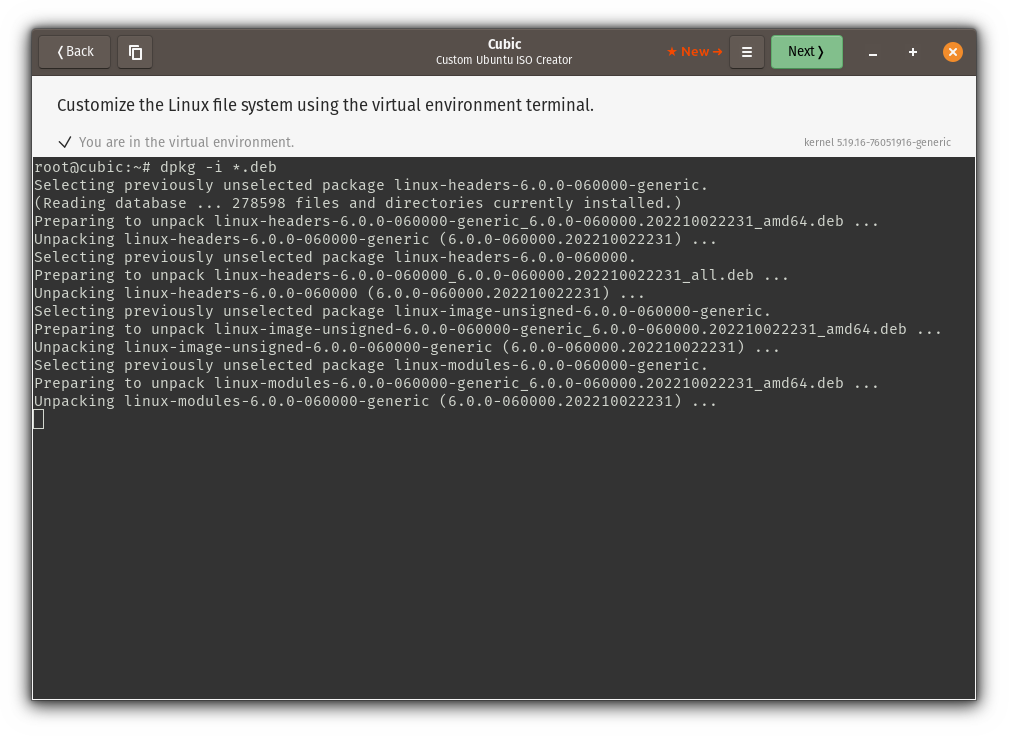
4. Select packages to be removed from a minimal and normal install
With Cubic, you can even specify the list of software for both minimal and normal installation.
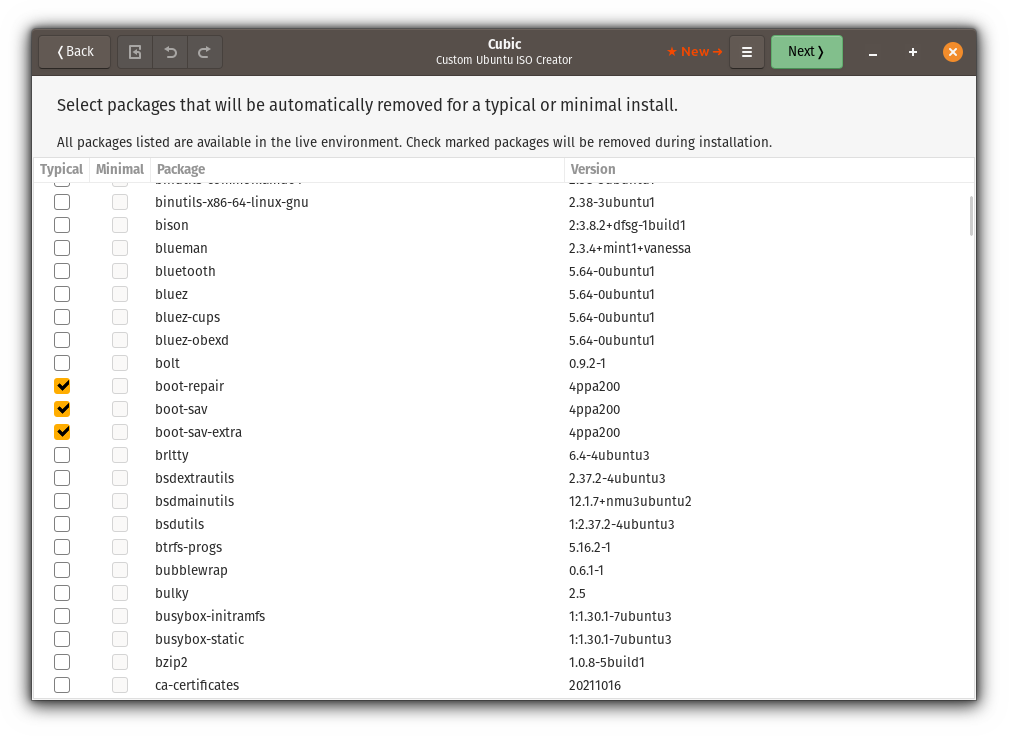
This is the place where you can be creative as you will be having 2 lists of software that you can use for different purposes.
For example, you can use the normal install option for desktop usage and the minimal install should be used for more minimal setups such as for servers.
Since I’ve already removed packages, there is not much left for me to do in this section.
5. Select boot Kernel
This section will bring the list of Linux kernels you have.
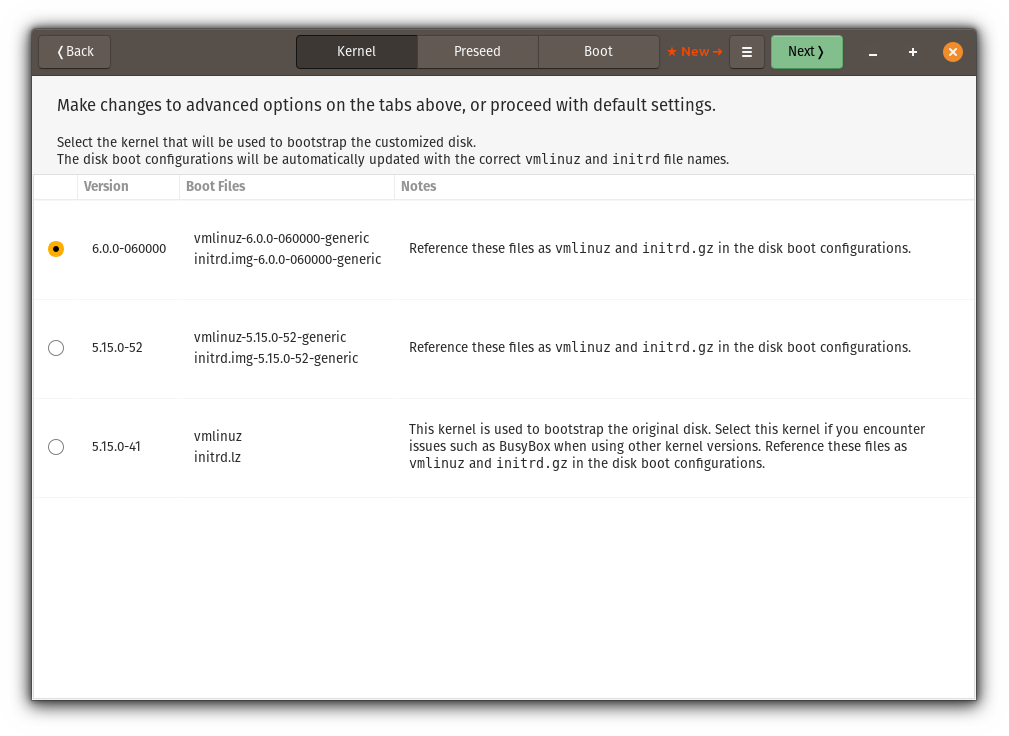
If you are wondering why it is showing 3 options, let me tell you how:
- 5.15.0-41 came pre-installed.
- 5.15.0-52 was installed when I updated existing packages.
- 6.0 was installed manually by me.
I’m going with Linux kernel 6.0 here!
6. Choose the ISO compression type
This is the last step in the configuration where you have to choose the compression algorithm.

You don’t have to have knowledge of every compression type as it has already given the graph by which you can choose the amount of compression.
And I’m going with the default one gzip option.
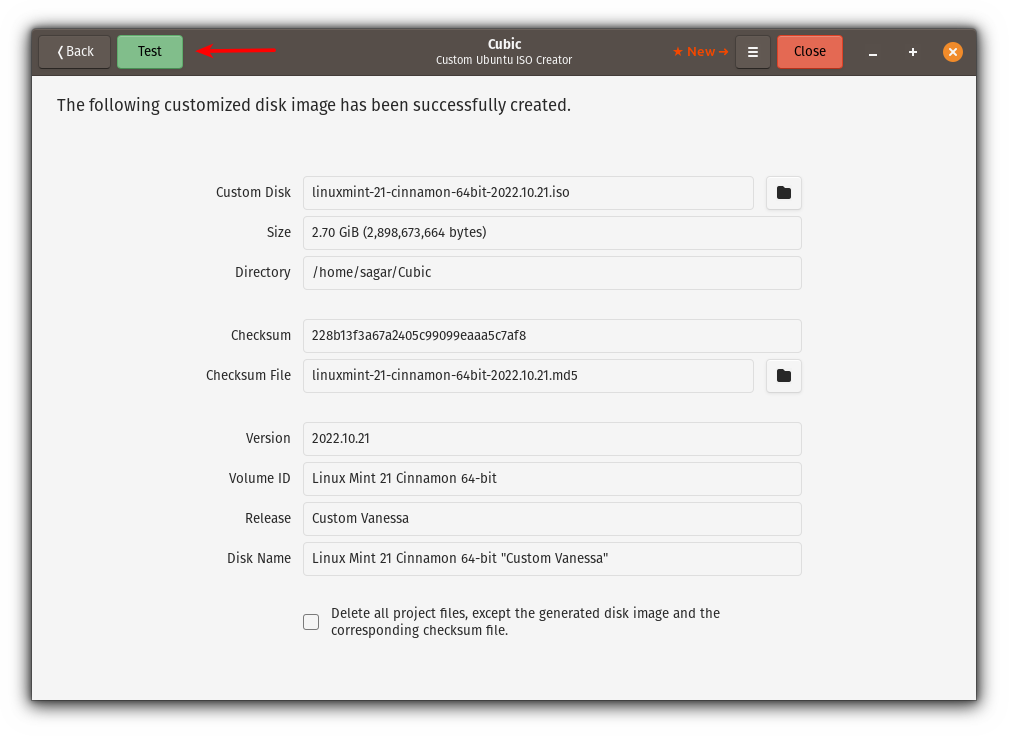
Once you’re done choosing compression type, click on the Generate button and your ISO will be created!
7. Testing ISO file with in-build QEMU Emulator
Once the Cubic is done with building the ISO that you instructed, It allows you to test the ISO file. To test the file, you have to click on the Test bottom located at the top left corner:
And it launched QEMU:
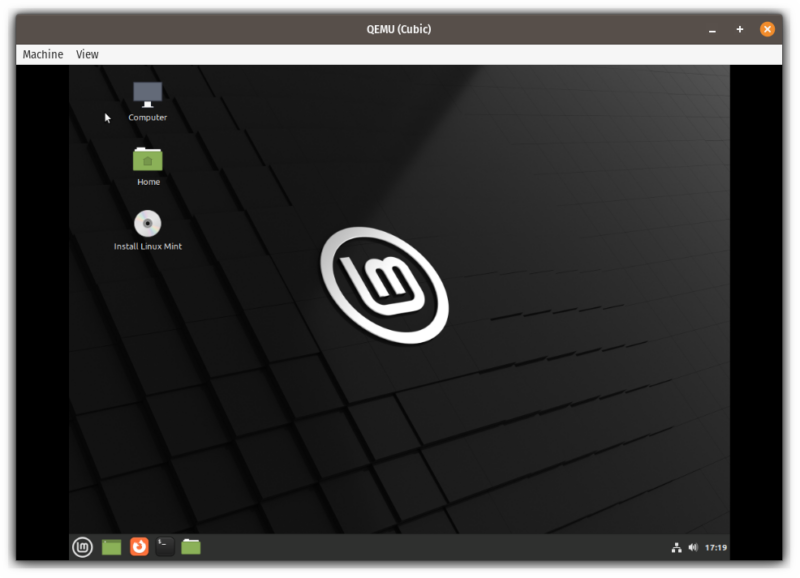
And I came across a problem while I tried updating repositories saying: Please use apt-cdrom to make this CD-ROM recognized by APT.
How to solve “please Use apt-cdrom to make this CD-ROM recognized by APT”
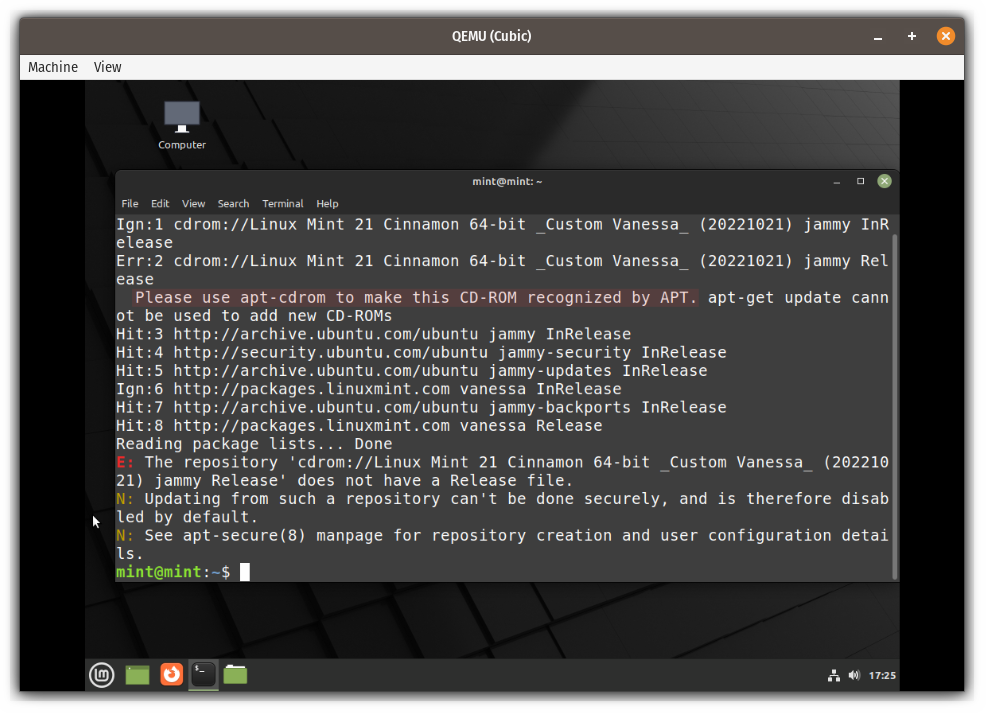
To solve this issue, you just have to disable the installation disk (CD-ROM) from software resources.
Open software resources in Linux Mint and if you’re using Ubuntu, you’ll have to use the Software and Updates tool.
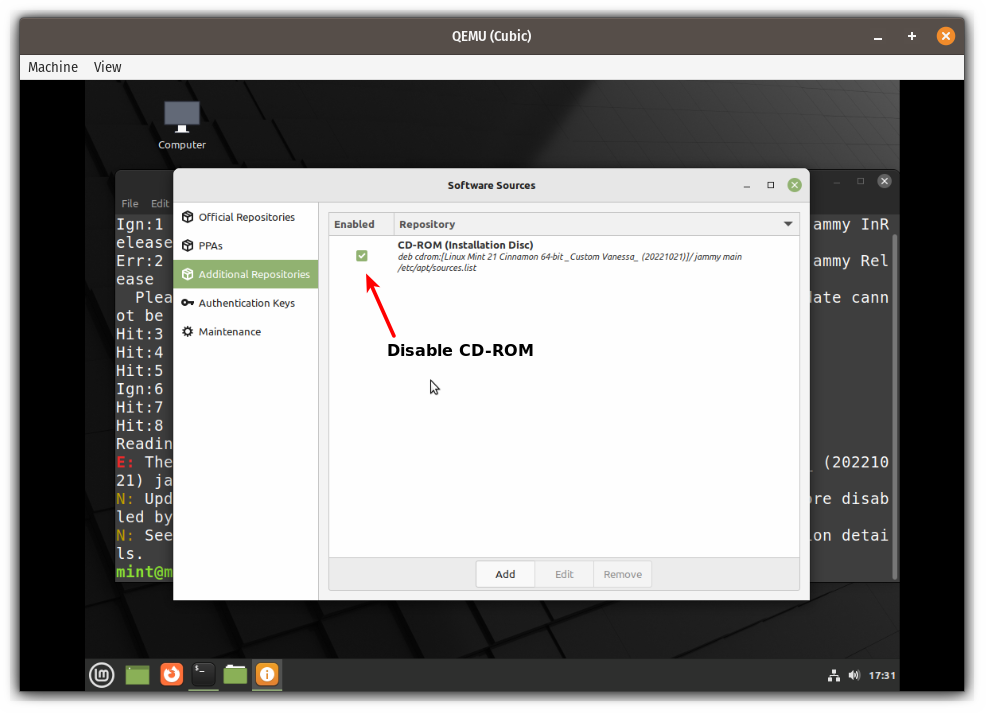
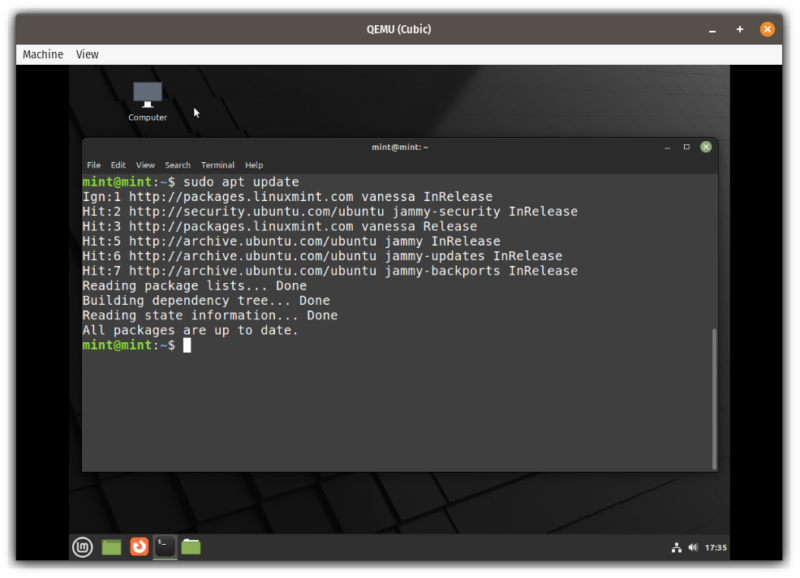
Once you disable CD-ROM, it should work as any general ISO you download from the official page!
That was a quick one. Right?
Final Words
This was my take on how you can easily create custom Ubuntu or other Linux distros’ ISO images using Cubic with its practical usage.
If this is something you could use, give it a try. Let me know in the comments if you are stuck, and I’ll try my best to help you.