
Want to create a bootable Windows USB on Linux? Ventoy is a pretty good option.
But before Ventoy, WoeUSB used to be the go-to tool for this purpose. The original WoeUSB project got discontinued around 2014.
Owing to its popularity, a new developer took the task of bringing the project back from the dead. And hence WoeUSB-ng was born. “ng” here stands for “new generation”. In other words, WoeUSB-ng is the new generation WoeUSB. But since the original tool doesn’t exist anymore, I’ll be referring WoeUSB-ng as WoeUSB.
In this tutorial, I’ll show you how to install WoeUSB on Ubuntu Linux. I’ll also share the steps for creating bootable Windows USBs with WoeUSB.
But before that, let’s quickly look at the features of this awesome tool.
WoeUSB

WoeUSB is a simple tool that has the sole purpose of creating bootable Windows USB on Linux.
The original WoeUSB is a shell script. This same WoeUSB is rewritten as WoeUSB-ng in python, which can be installed on your system and provides both a command-line and GUI interface.
Features:
- Support Legacy PC/UEFI booting
- Support FAT32 and NTFS filesystems
- Support using physical installation disc or disk image as source
- It can be used for Windows Vista and later with any language or edition variants
- Legacy/MBR-style/IBM PC compatible boot mode
- Native UEFI booting is supported for Windows 7 and later images (limited to the FAT filesystem as the target)
Installing WoeUSB on Ubuntu and other Linux distros
Arch Linux users can install WoeUSB-ng from AUR.
For other distros, WoeUSB can be installed using PIP. It’s a Python application, after all. I am going to provide commands for Ubuntu/Debian here.
To install WoeUSB-ng, you need to install PIP and other necessary dependencies first.
sudo apt install git p7zip-full python3-pip python3-wxgtk4.0 grub2-common grub-pc-binAfter this, you can install WoeUSB-ng by running:
sudo pip3 install WoeUSB-ngFor all other installations, you can refer to their instructions.
Prerequisite: Get Windows ISO and a compatible USB
This one goes without saying. You need to have the ISO file of the Windows version you want to install.
From the Microsoft website, you should be able to get the ISO for Windows 10 and 11.
If you have ISOs for older Windows versions, they can also be used.
Apart from that, you need to have a USB key/pen drive of at least 8 GB in size. You should format it in NTFS filesystem.
Method 1: Using WoeUSB to create a bootable Windows USB graphically (recommended)
Open woeusb-gui from the activity overview or menu.

In the application window, select the downloaded Windows ISO and the desired USB drive as shown in the screenshot and press Install.

There are also other tweaks available within the app, which can be accessed by the top menu bar.
After pressing install, the woeUSB will start formatting and copying files. You need to wait for some time because there are approximately 6 GB of files to be copied.
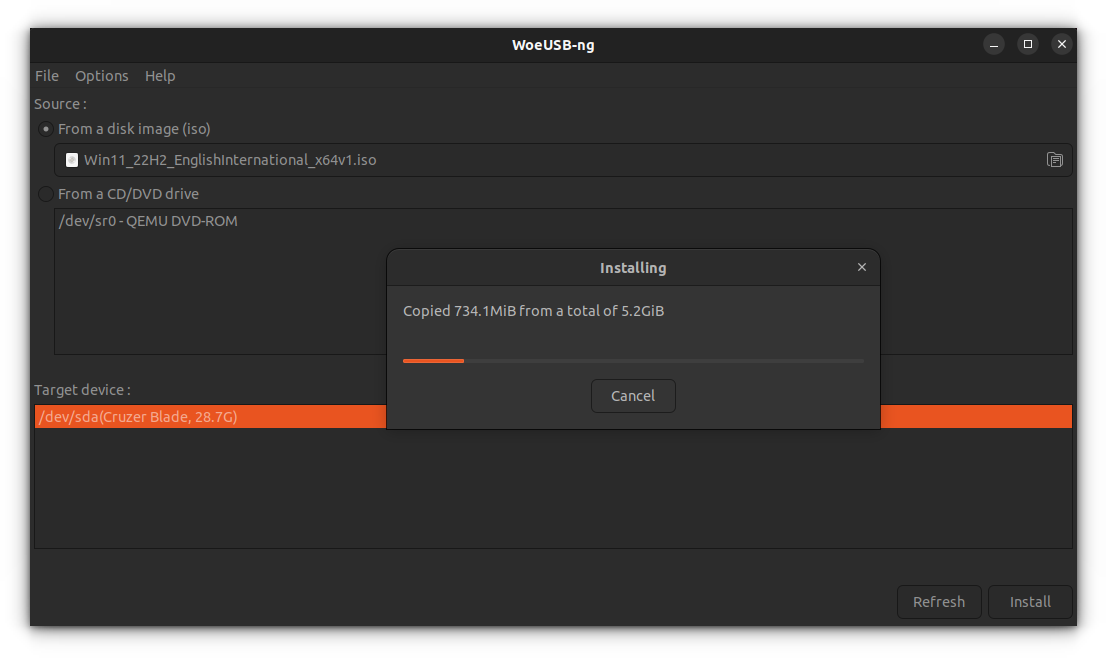
Once copying completes, WoeUSB will prompt a success dialog. You can now safely eject the USB and use it as a bootable USB.

Method 2: Using WoeUSB from the terminal (for experts)
WoeUSB-ng package also provides a command-line utility called woeusb.
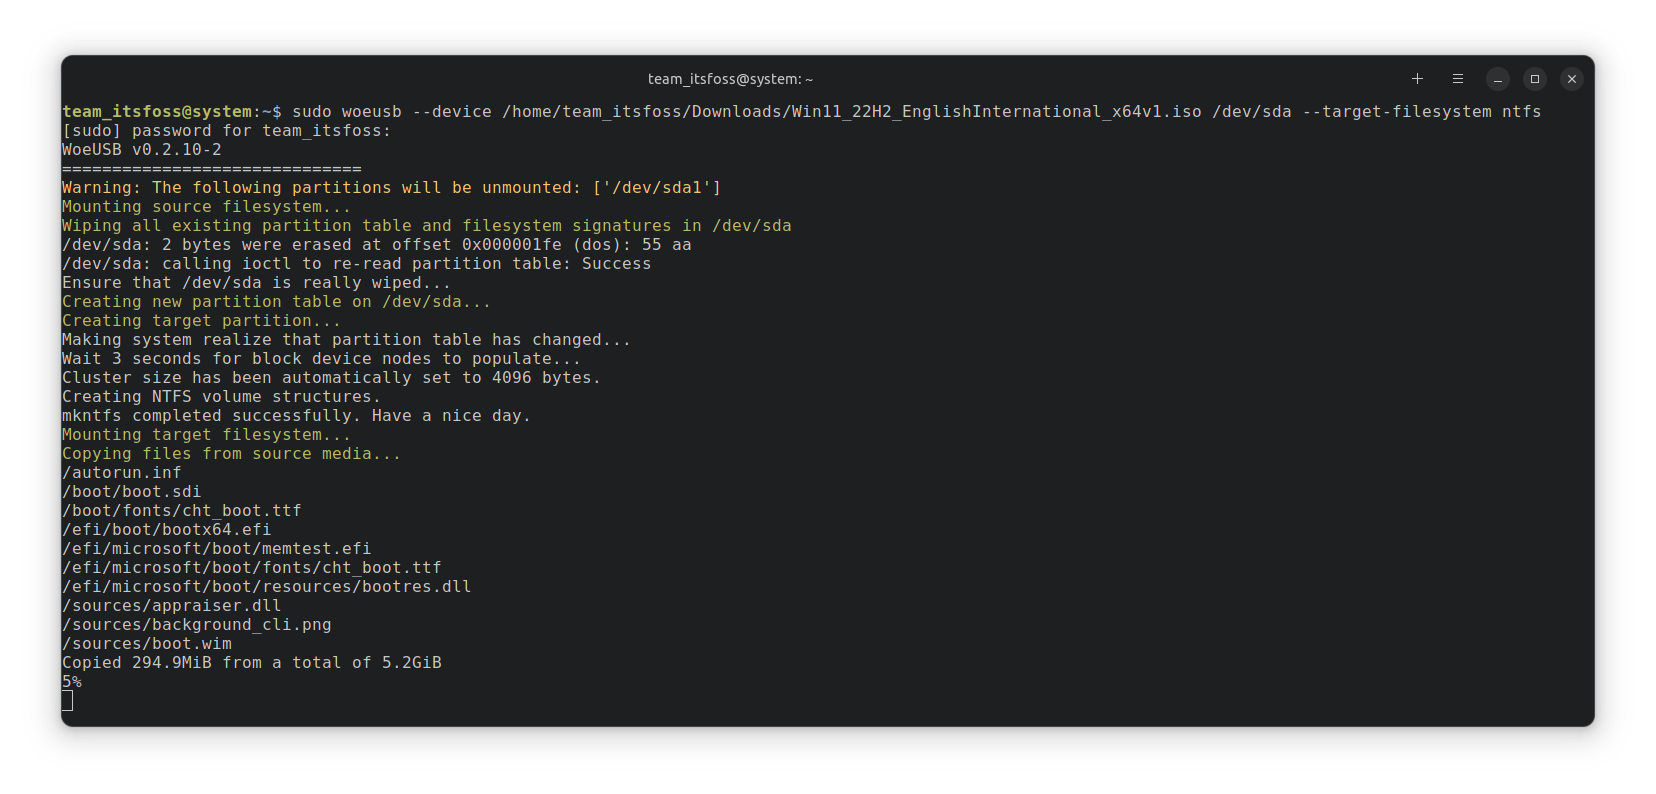
To create the bootable Windows USB using WoeUSb, you need to run the following command:
sudo woeusb --device <path/to/Windows/ISO> <name/of/the/USB/device> --target-filesystem ntfsHere, the --device flag is used to wipe the USB and create a bootable from scratch completely. Also, the –target-filesystem flag is set to NTFS, to avoid problems of copying files more than the size limits of the FAT system.
The process will take some time to complete copying. Once completed, it will display a success message.
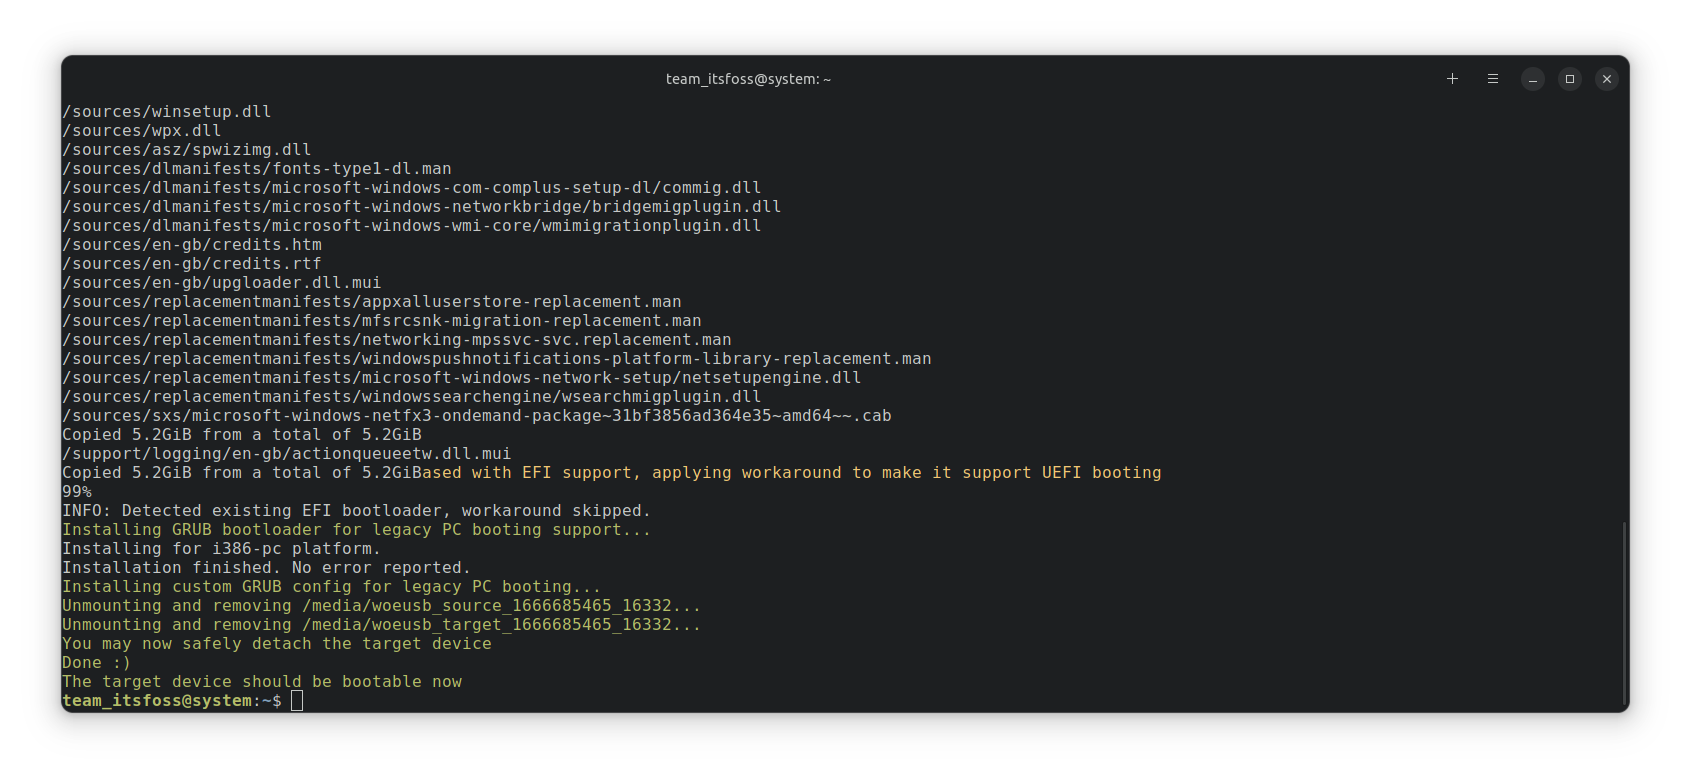
At this point, you can eject the USB safely and use it as a Windows bootable USB on other PCs.
Bonus: Using WoeUSB Bash shell script (for experts)
WoeUSB is also available as a bash shell script, which can be used without installing anything on your system.
First, you want to download the shell script from the releases page of the project.
Before executing the shell file, you need to get the required dependencies. To install, run:
sudo apt install wimtoolsNow make it executable either through file manager or through command-line.
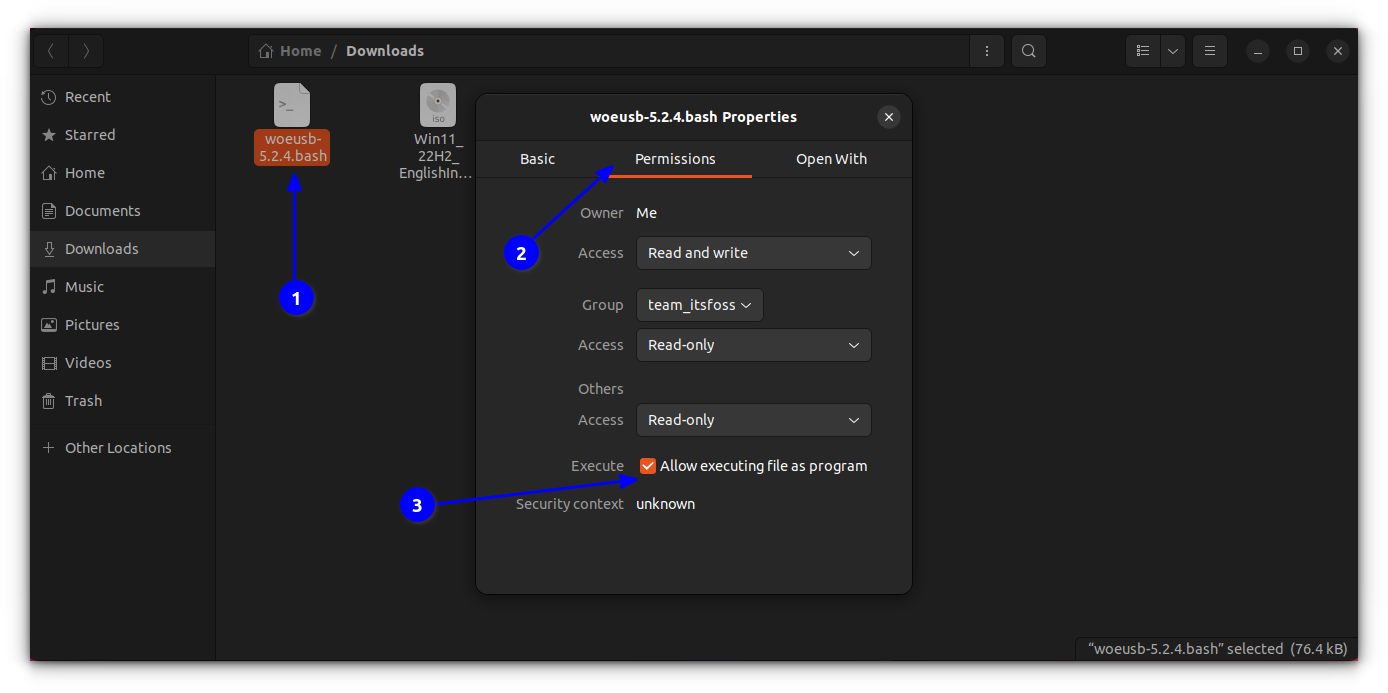
Or you can run chmod +x <path/to/script> to make it executable. Now, run ./woeusb-5.2.4.bash -h inside the downloaded directory to get help.
In order to create a live USB, the process is same as the command-line part of woeusb-ng, except, you are not installing anything.
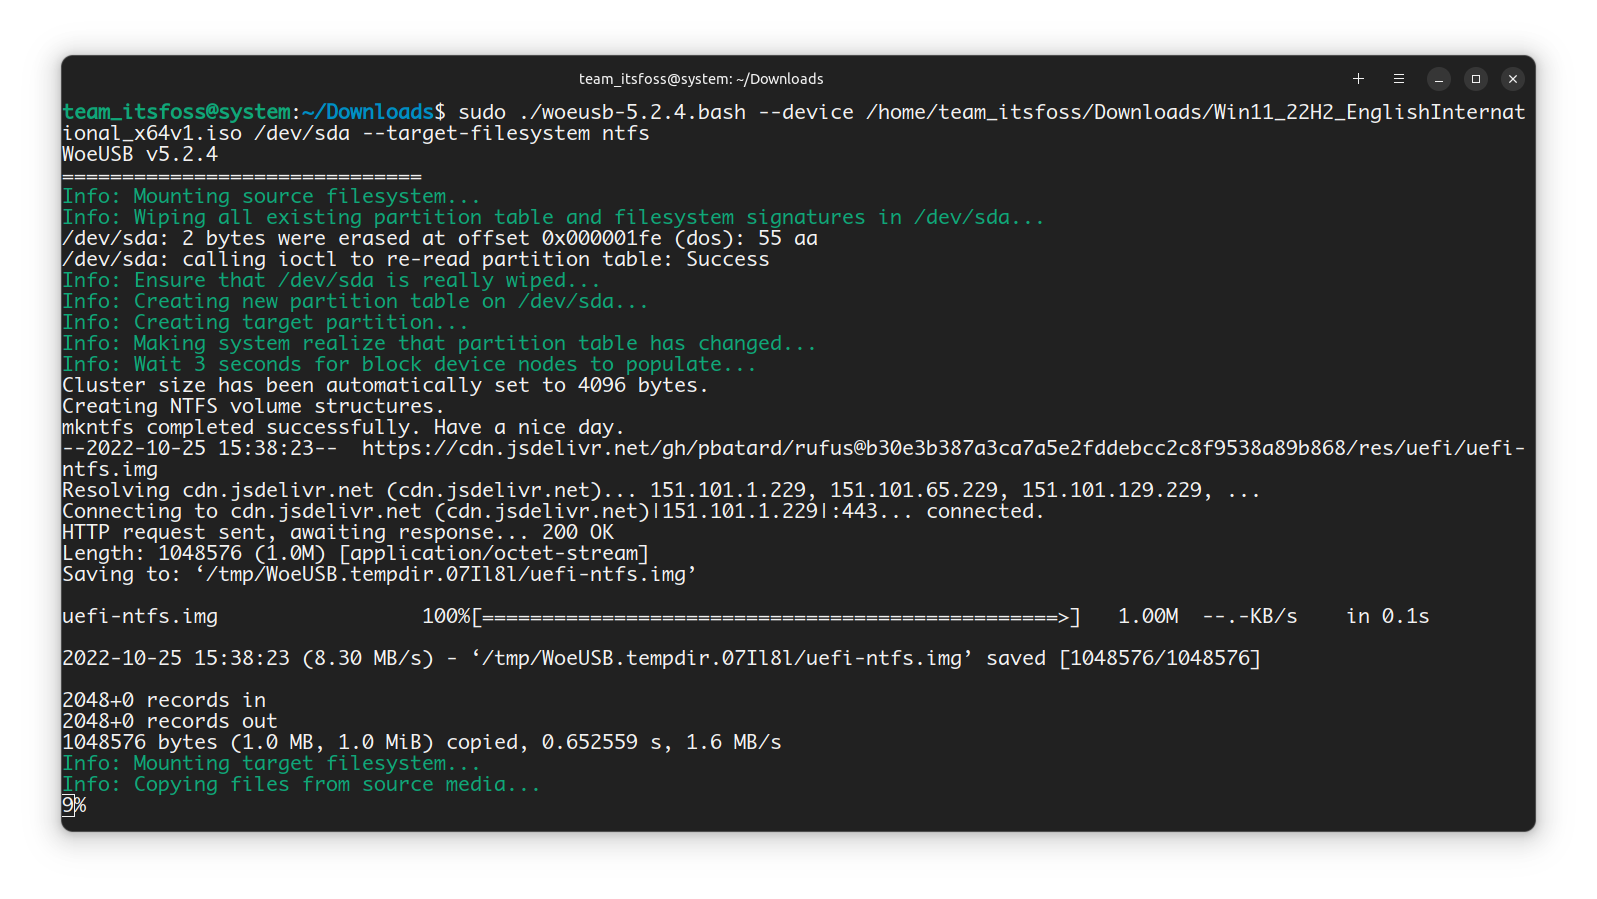
So, in a terminal, run:
sudo <path/to/downloaded/script/file> --device <path/to/windows/ISO> <name-of-USB-device> --target-filesystem ntfsThis will start writing the ISO to USB drive, as shown in the screenshot below:
Once completed, you can safely eject the USB and use it as bootable USB.
Removing WoeUSB
If you installed WoeUSB using PIP, you can also remove it similarly:
pip3 uninstall WoeUSB-ngYou can keep the installed dependencies on your system or remove them. That’s entirely up to you. I would suggest keeping them.
Wrapping Up
WoeUSB was an immensely popular tool around ten years ago. It’s good that it has been continued in another form by someone else. That’s the beauty of open source.
I hope this tutorial helped you. If somehow the Windows USB created by WoeUSB doesn’t work as expected, you may try using Ventoy. Enjoy it.