
0xC000021A STATUS_SYSTEM_PROCESS_TERMINATED is a significant challenge for any Windows user. It often signals critical system failures that demand immediate attention. Luckily, this guide offers practical solutions to get your system back to normal.
What Is 0xC000021A STATUS_SYSTEM_PROCESS_TERMINATED?
0xC000021A STATUS_SYSTEM_PROCESS_TERMINATED is a BSOD that occurs when Windows encounters a fatal system error. It happens when essential Windows system processes fail to load or operate correctly.
That means Windows can no longer guarantee the security and stability of the system, leading it to stop completely.
What Causes 0xC000021A STATUS_SYSTEM_PROCESS_TERMINATED Error?
- Incompatible External Devices: Devices with incompatible or faulty drivers can disrupt critical system processes.
- Corrupted Hard Drive Sectors: Damaged sectors on your hard drive can lead to inaccessible or corrupted system files.
- Outdated or Corrupted Drivers: Drivers act as the bridge between your hardware and software. If they’re outdated or corrupted, this can lead to major system errors.
- Problematic Programs and Windows Updates: Sometimes, newly installed software or updates can conflict with existing system settings or files.
- Malware: These malicious entities can corrupt or modify essential system files.
- Misconfigured Registry Entries: Incorrect changes in the Windows registry can cause conflicts and system errors.
How To Fix 0xC000021A STATUS_SYSTEM_PROCESS_TERMINATED Error
Encountering a BSOD error such as 0xC000021A STATUS_SYSTEM_PROCESS_TERMINATED can often lead to being locked out of your Windows system entirely. This makes troubleshooting notably more difficult.
Before delving into that, let’s explore some solutions that are applicable if you can still boot into your Windows OS. If you can’t, switch to the next section.
When Windows is Booting Normally
1. Restart Windows in Safe Mode
Safe Mode is a diagnostic startup mode that runs with a minimal set of drivers and services.
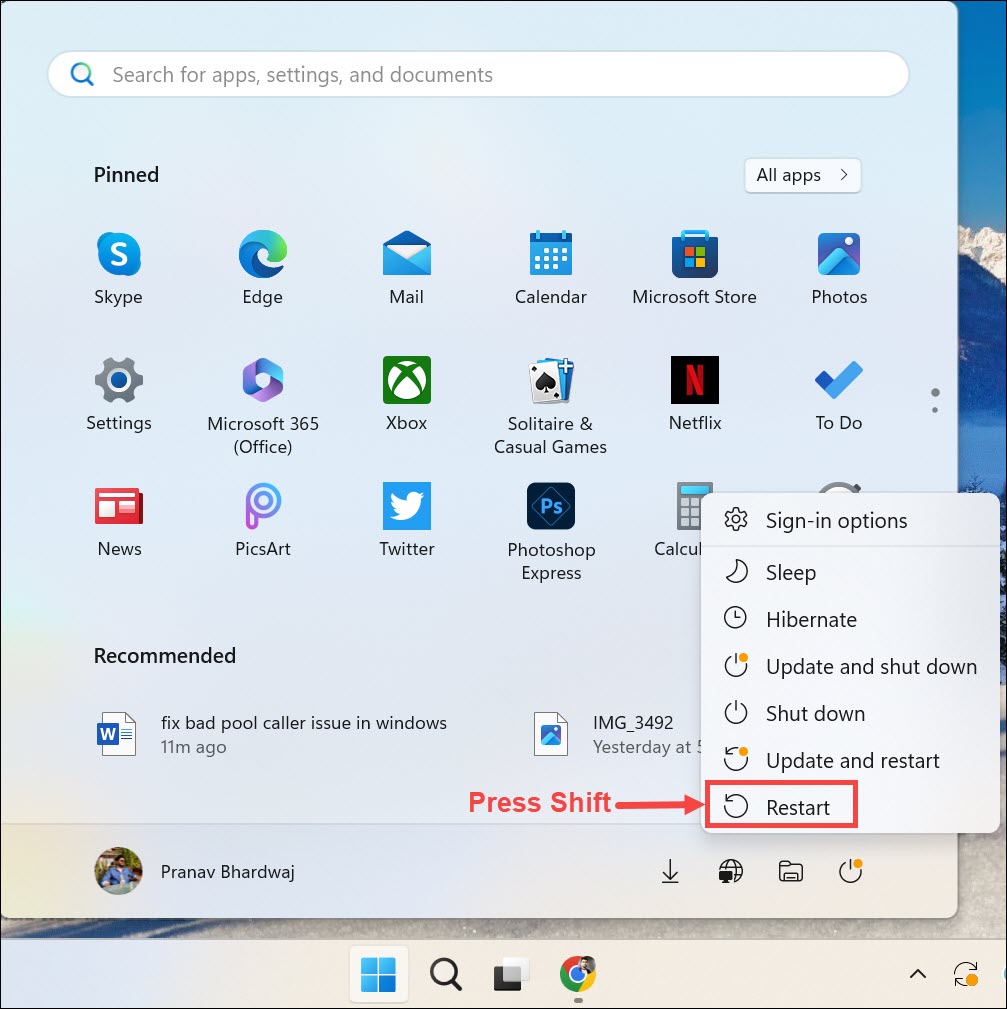
- Access the Start Menu, then while holding down the Shift key, select the Power icon and choose Restart.
- Upon the computer’s restart, choose the Troubleshoot option.
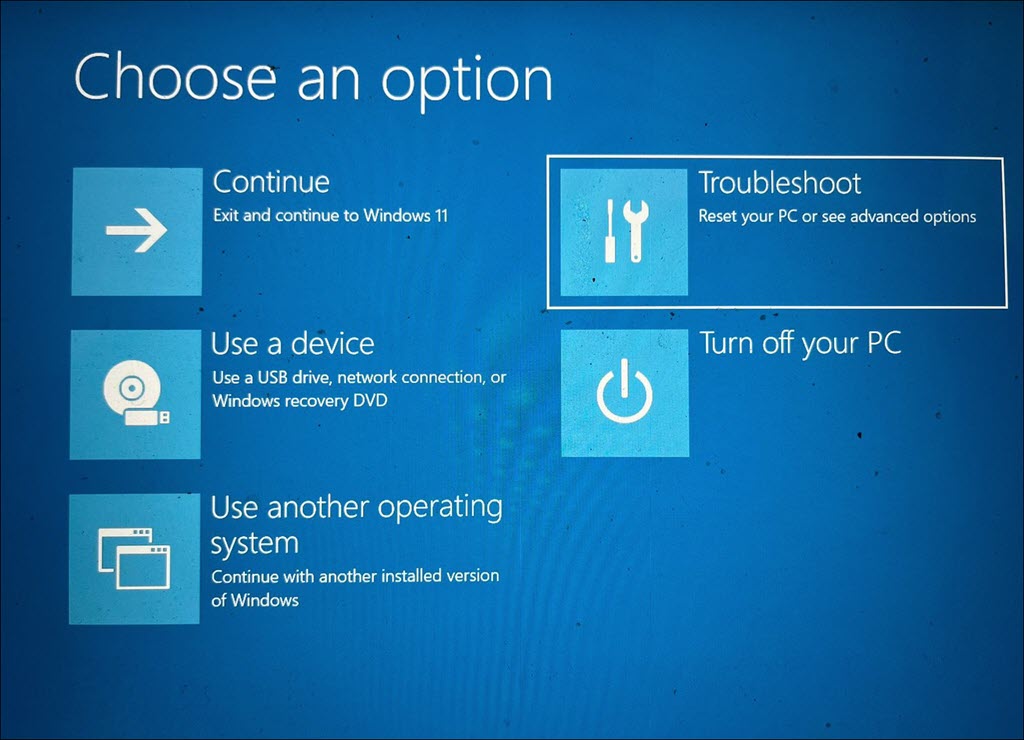
- Next, go to Advanced options.
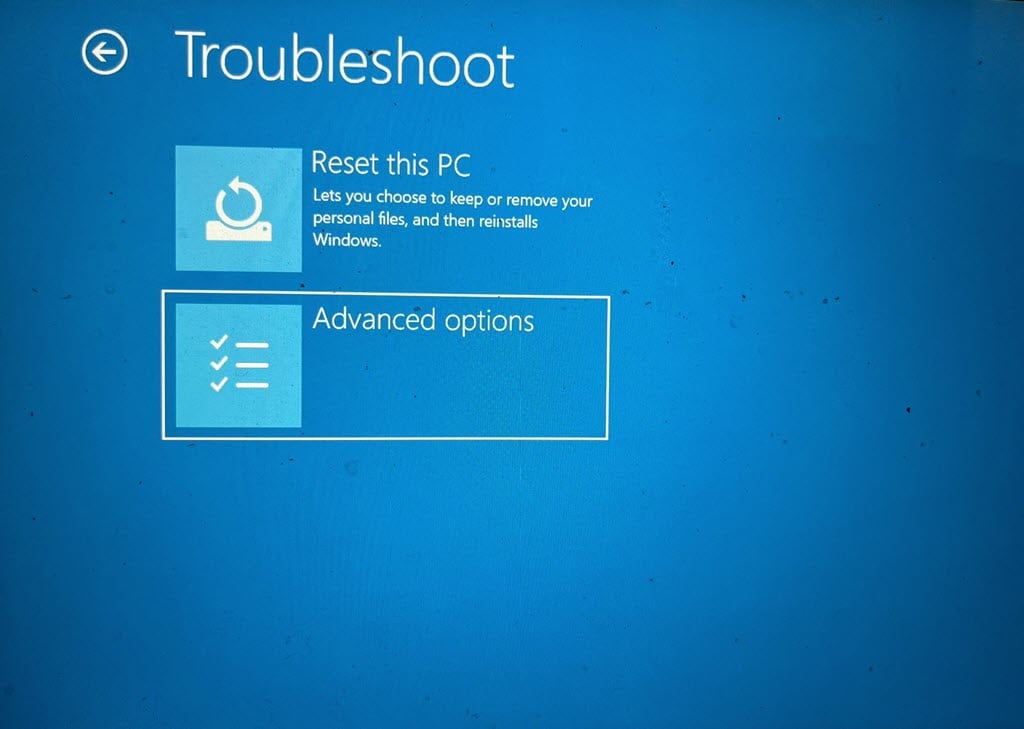
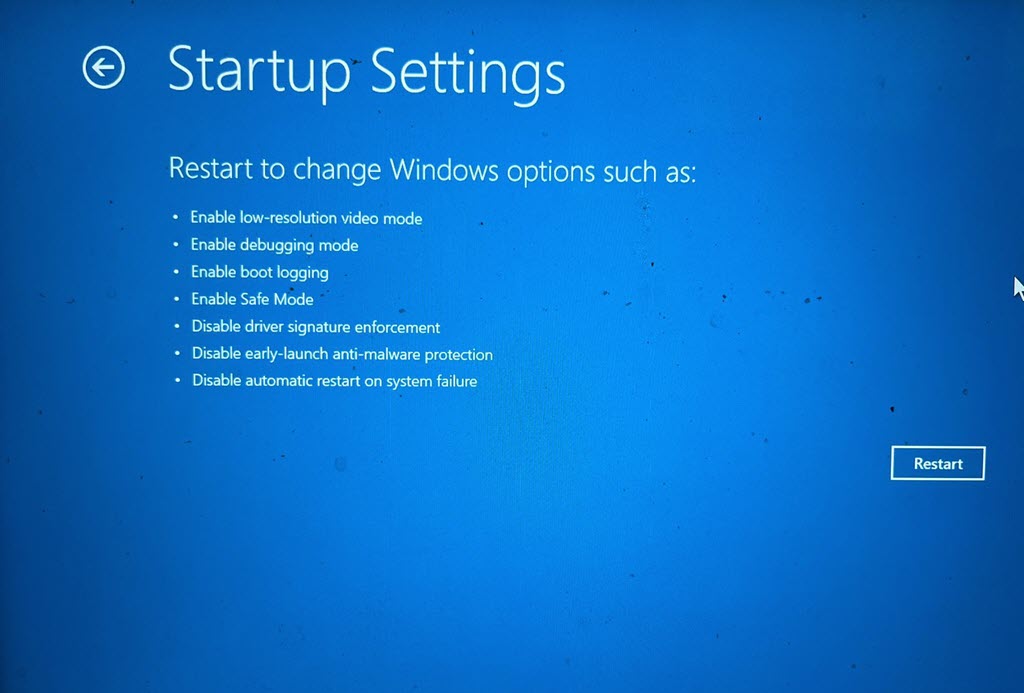
- In the Advanced options menu, select Startup Settings.
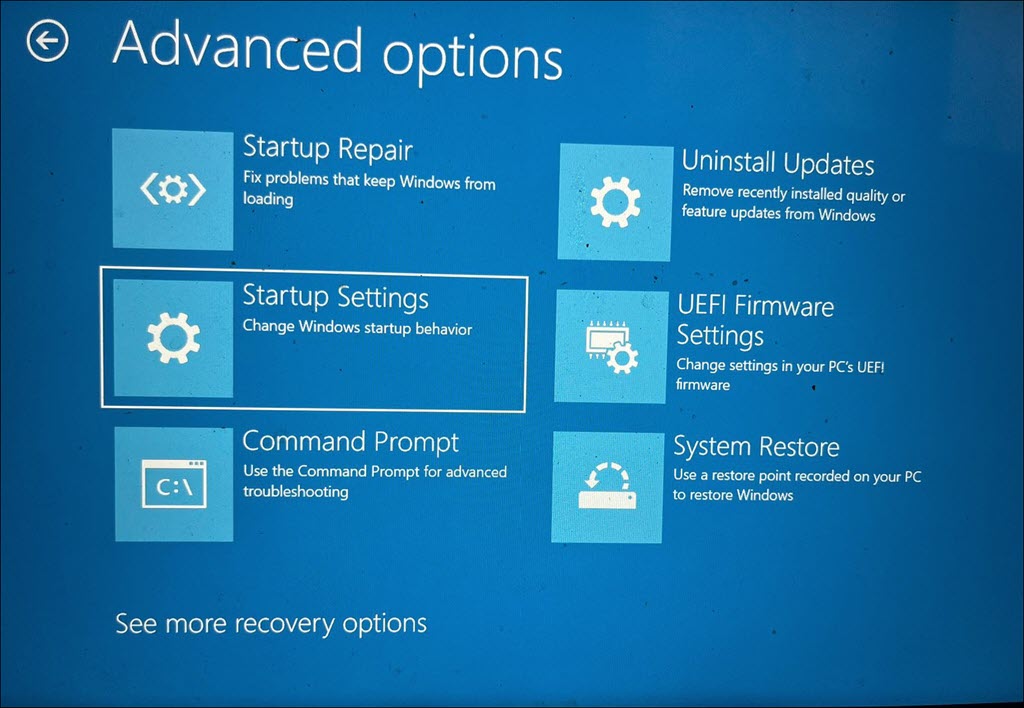
- In the Startup Settings screen, click on the Restart button.
- After the system restarts again, press the F5 key on your keyboard. This will boot your Windows into Safe Mode with Networking.
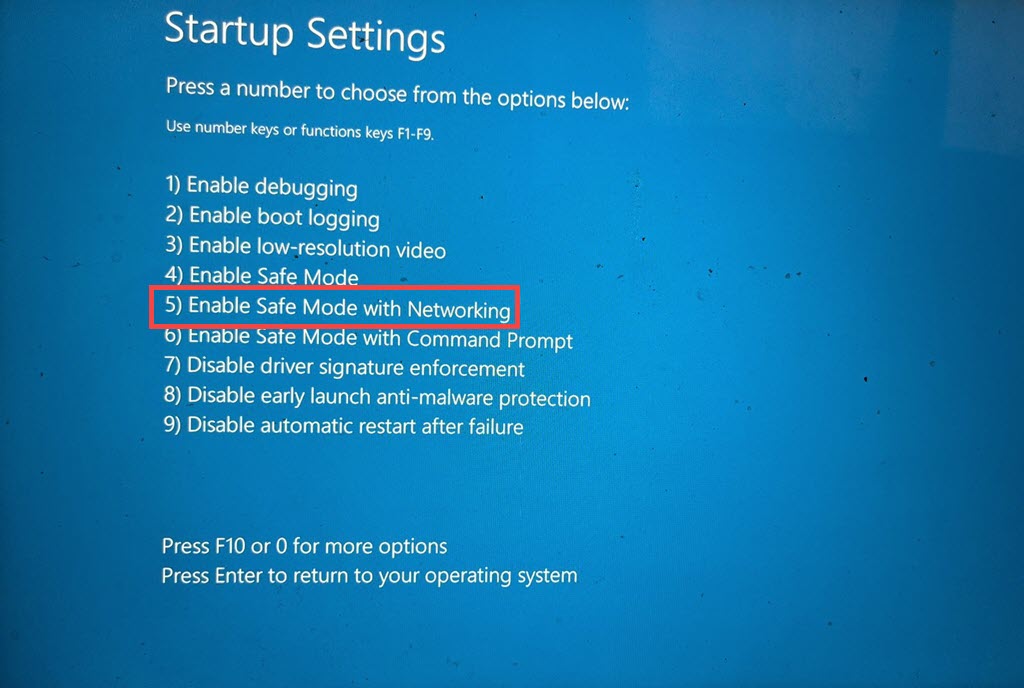
- Your device should now be running in Safe Mode.

2. Uninstall Recent Updates
Sometimes, updates can have unforeseen conflicts with existing system configurations.
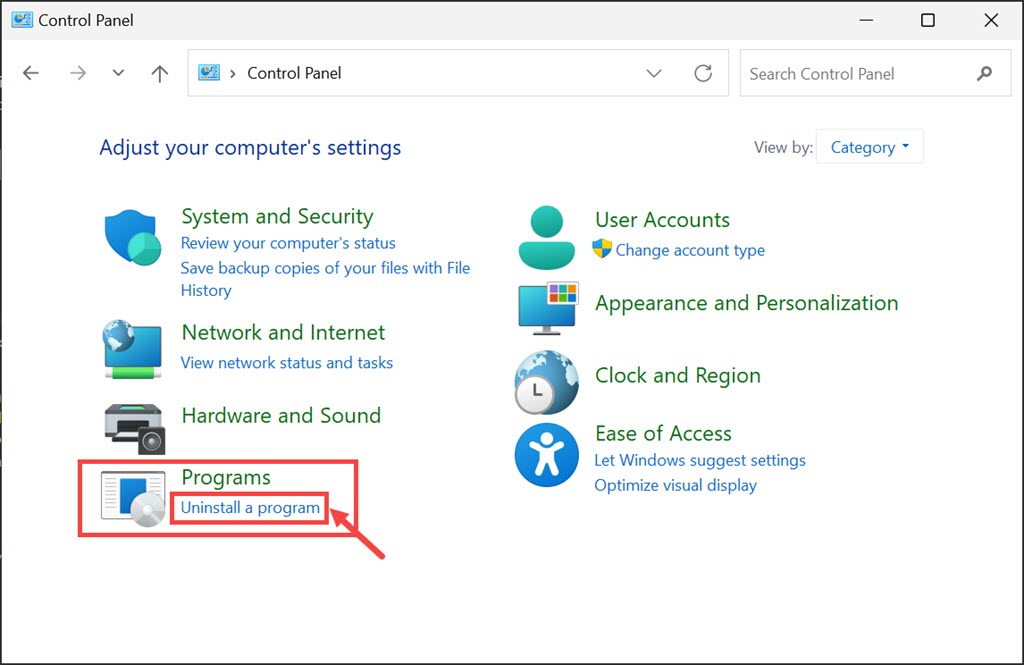
- In the Windows search bar, enter Control Panel and open it.
- Within the Control Panel, navigate to the “Programs” section and select Uninstall a program.
- On the left side of the window, choose View installed updates.
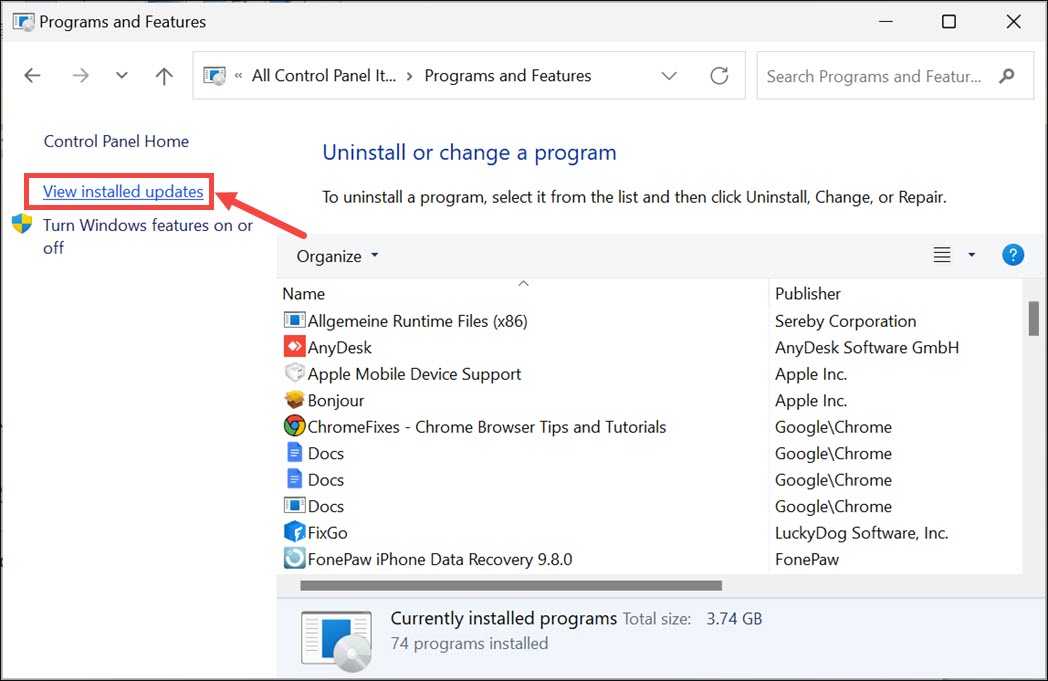
- Search for the updates that were recently installed and select them.
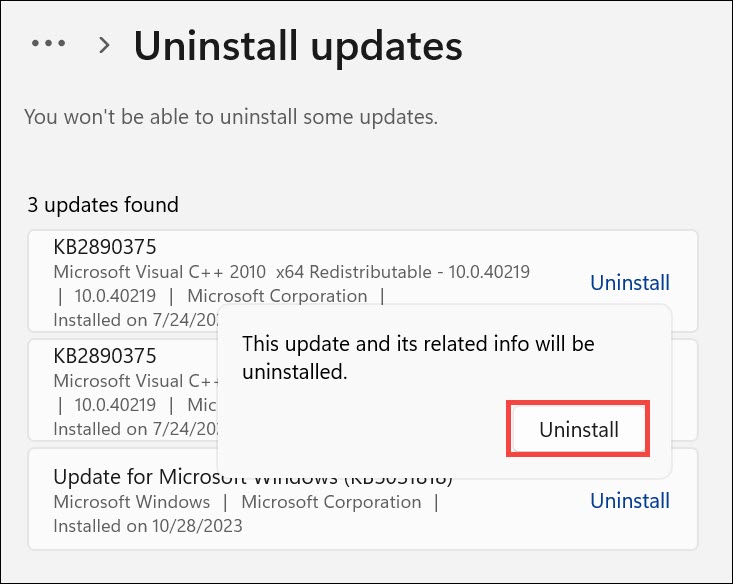
- Click on the Uninstall button for the chosen update.
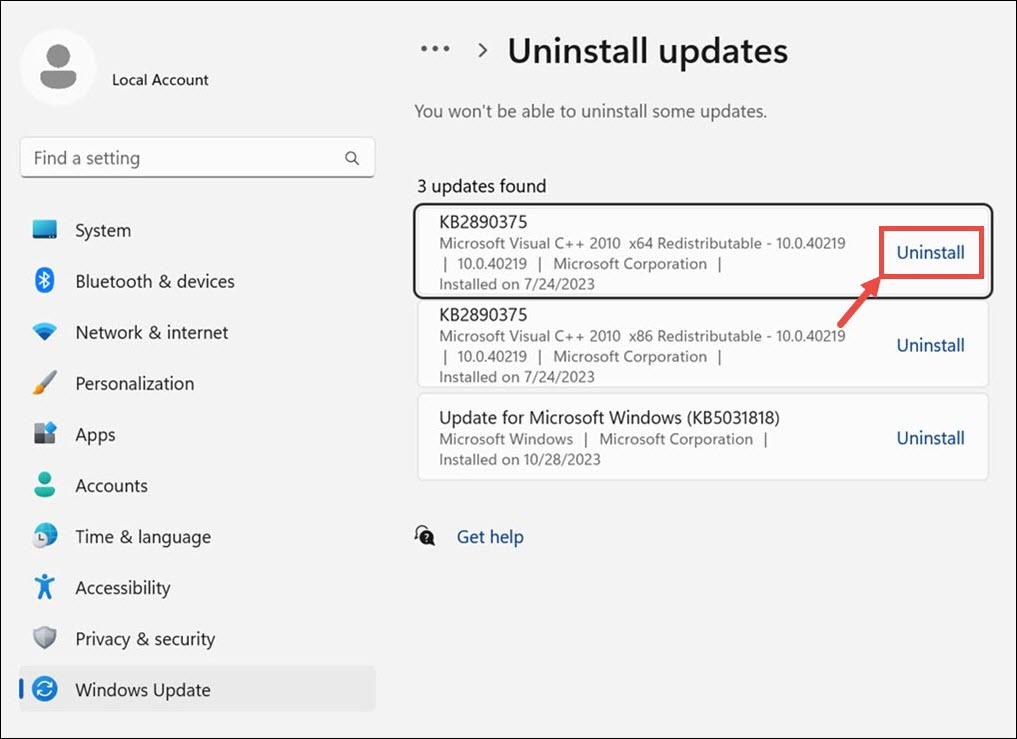
- A confirmation pop-up will appear; click Uninstall again.
3. Uninstall Recently Installed Apps
If you’ve recently installed new applications and then started facing this error, they might be the culprit.
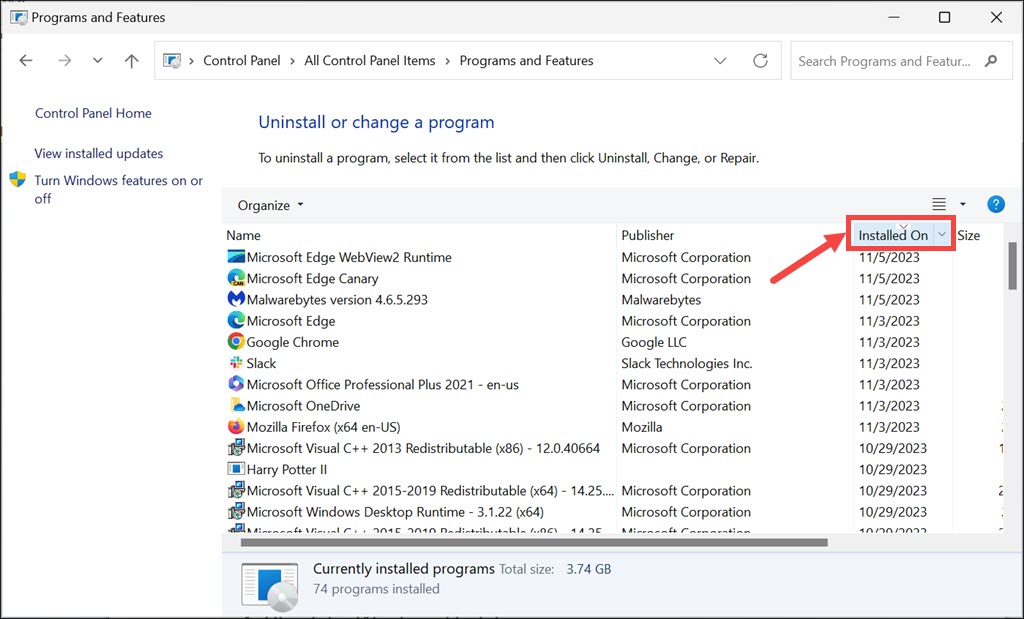
- Type “Control Panel” in the Windows search box and select it.
- Go to the “Programs” section and click Uninstall a program.
- Click the Installed on button to sort the programs by their installation date.
- Select one of the applications that were installed recently, then click the Uninstall button.
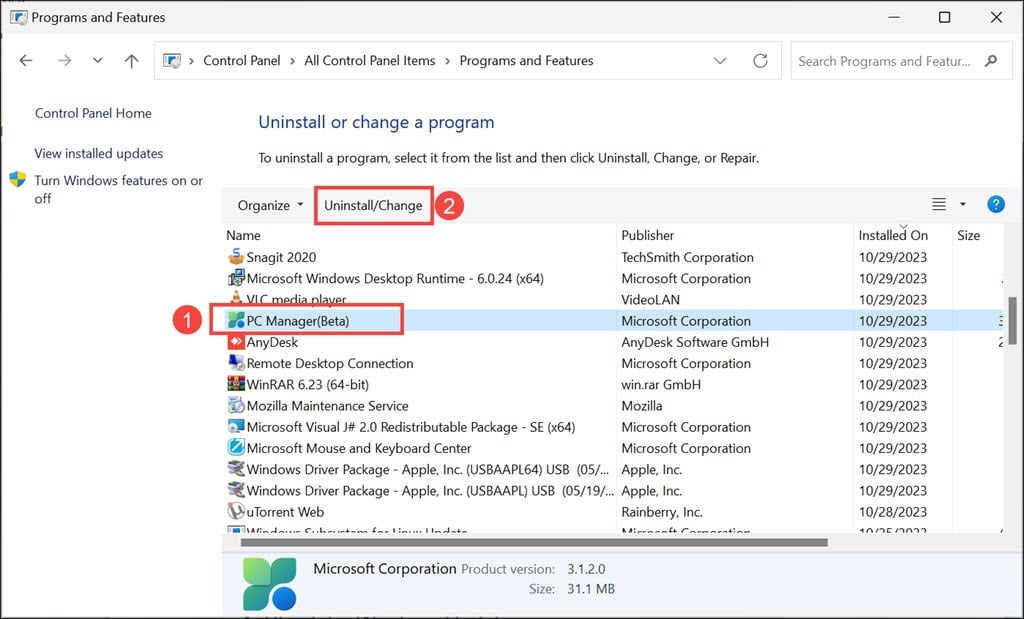
- Confirm the uninstallation when prompted.
- Repeat the above steps for each application you suspect might be causing the 0xC000021A STATUS_SYSTEM_PROCESS_TERMINATED error.
4. Check for Windows Updates
Updates often include patches that can resolve existing system errors.
- Open Windows settings by pressing the Windows + I keys.
- Navigate to the Windows Update section located on the left panel.
- On the right side of the window, click on Check for Updates.
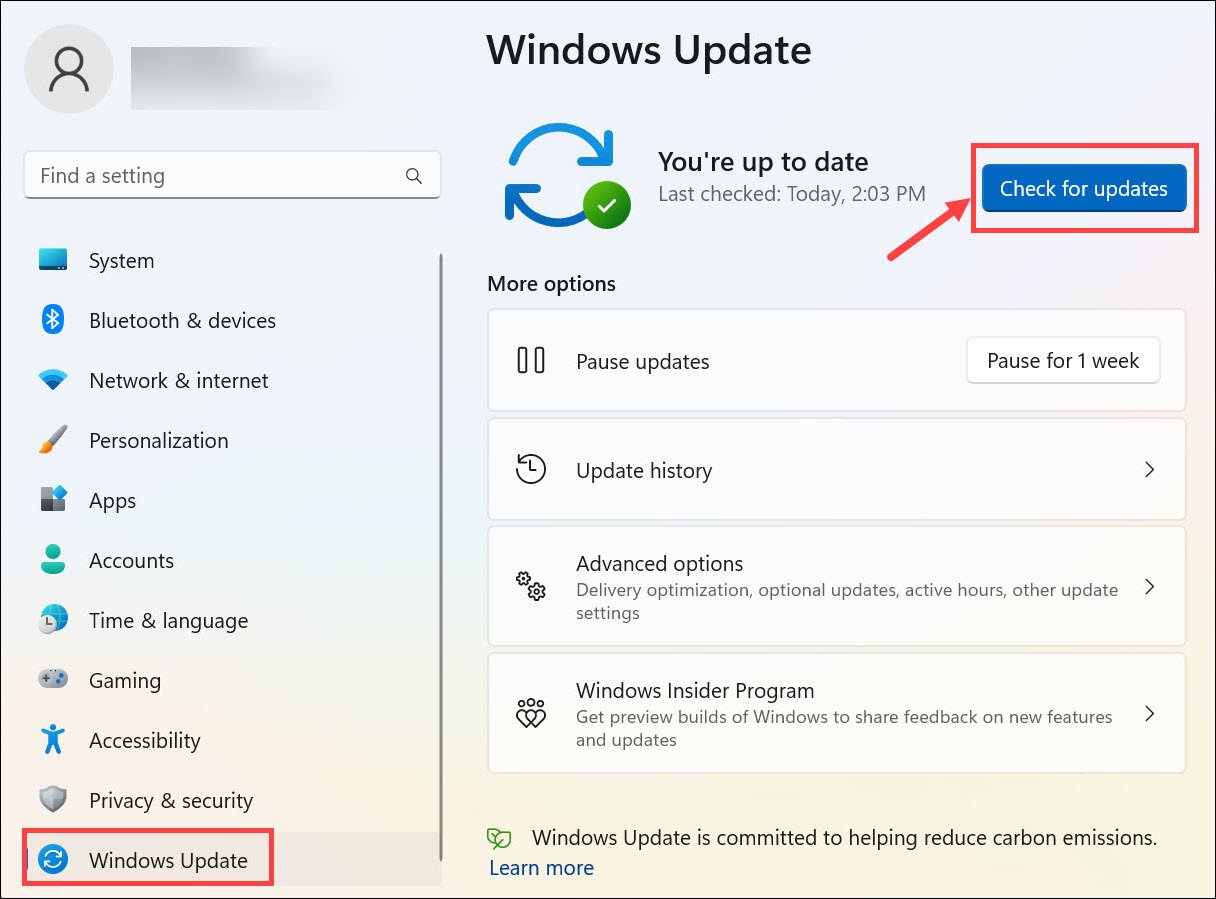
- If there are any available updates, proceed to download and install them.
5. Check for Disk Errors
Running a disk check with chkdsk can find and fix system errors.
- Right-click on the Start button and choose Terminal (Admin) from the menu that pops up.
- In the Terminal window, enter the command
chkdsk /f /rand hit the Enter key. - Wait for the command to complete its scan. Once finished, restart your computer to apply any changes.
6. Run SFC Command
The System File Checker (SFC) scan is a utility that checks for and repairs corrupted or missing system files.
- Launch Terminal (Admin) again.
- Type
sfc /scannowand press Enter.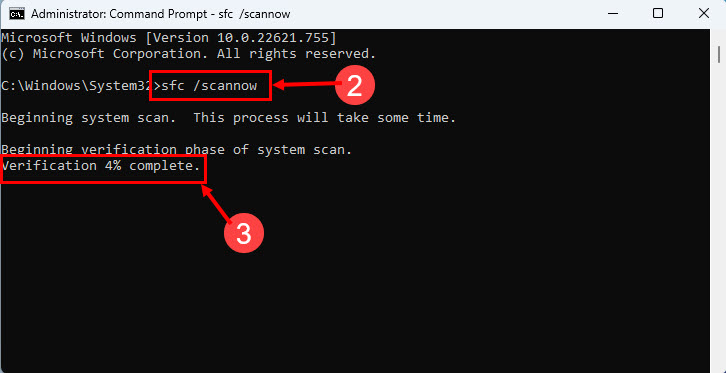
- Wait for the scan to complete and fix any corrupted files.
7. Scan for Malware
If you don’t have an antimalware solution on your system, you can run built-in Windows Defender:
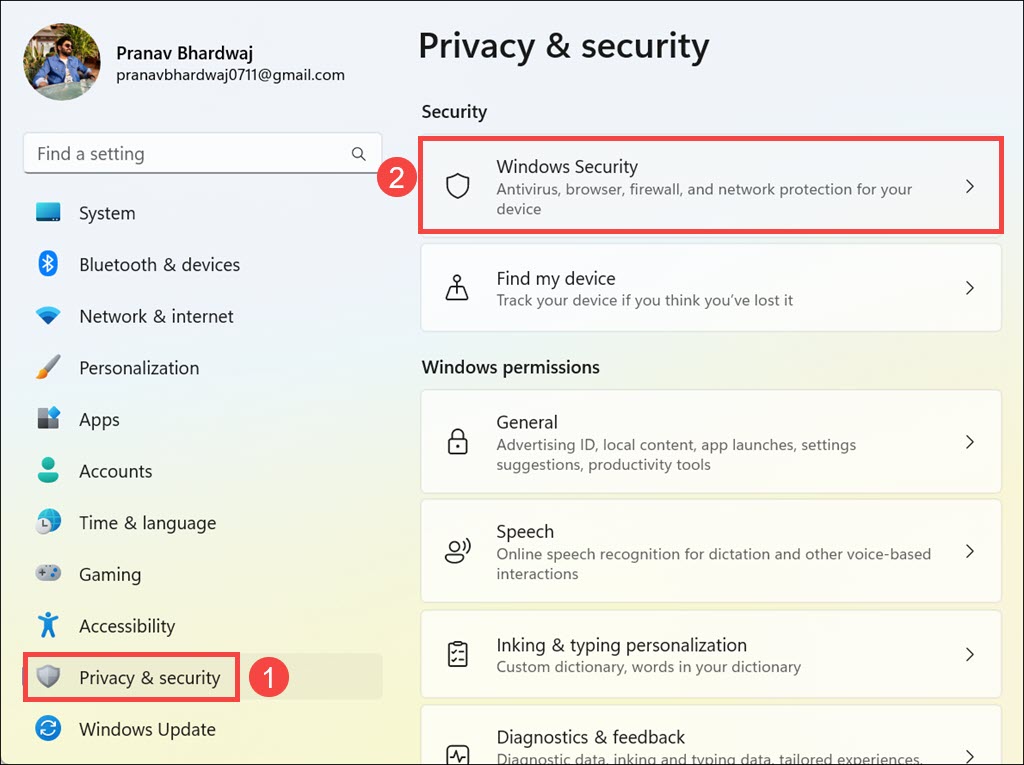
- Press the Windows + I keys to open Windows settings.
- In the settings menu, select the Privacy & security section from the options on the left.
- On the right side, click on Windows Security.
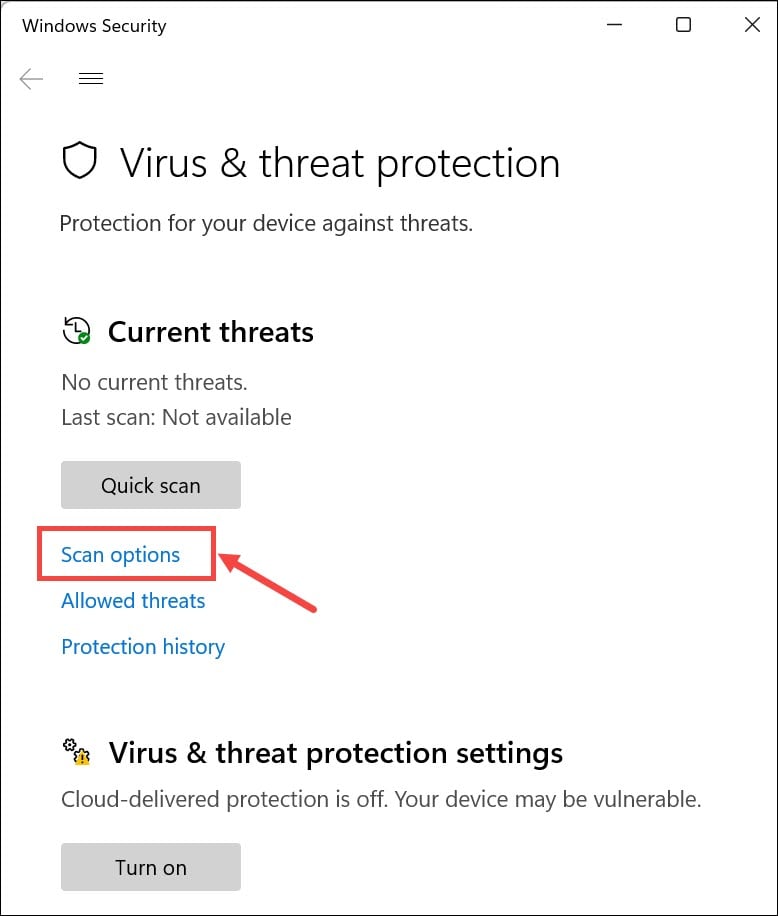
- Under Windows Security, find and click on the Virus & threat protection option.
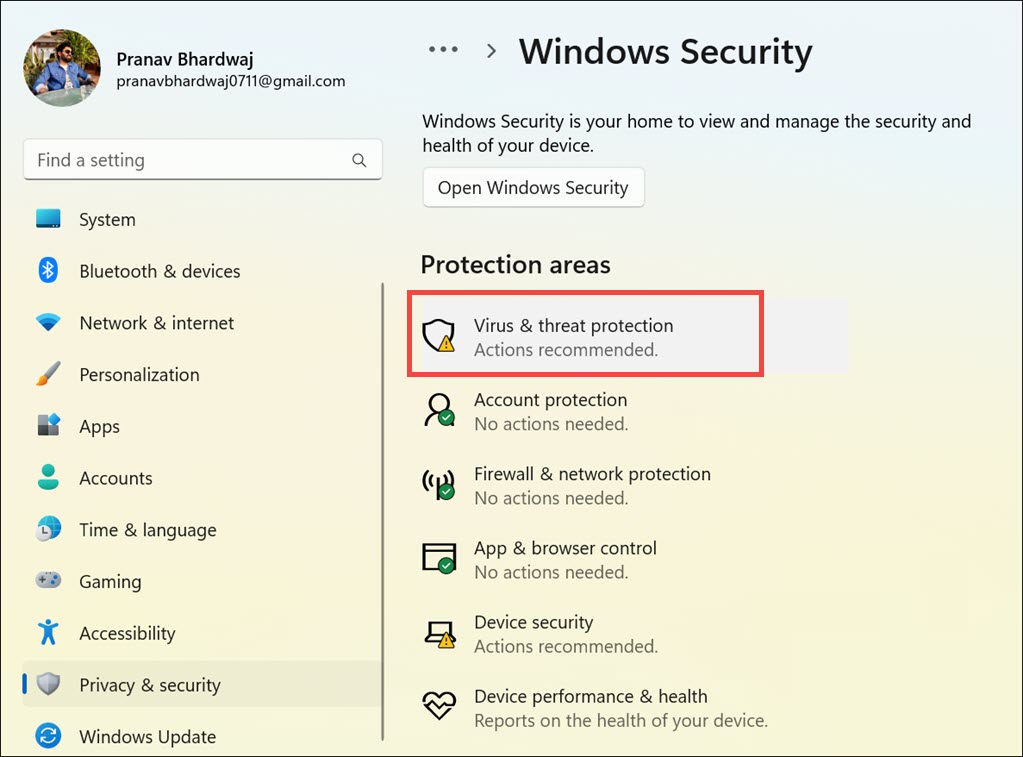
- Next, select Scan options.
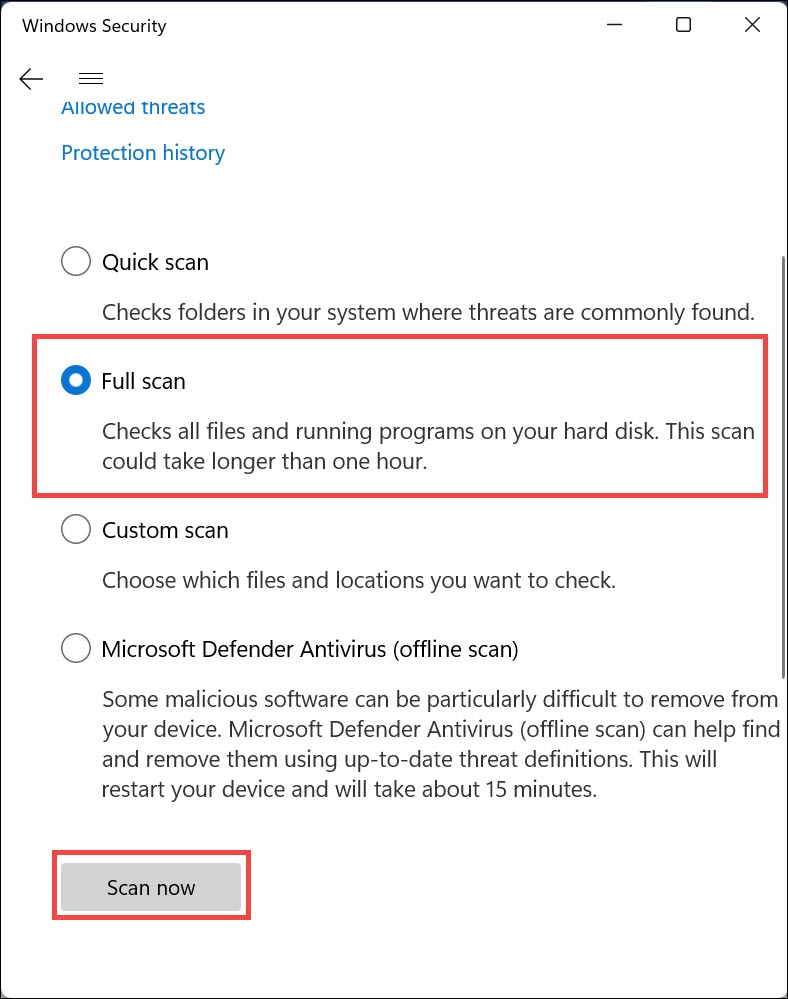
- Choose the Full scan option, then click the Scan now button.
When Windows is Unable to Load:
1. Check the Cable Connections
- Turn off your computer and disconnect it from the power source.
- Open the case of your computer to access its internal parts.
- Inspect the connections linking your hard drive or SSD to the motherboard.
- Re-attach any cables that aren’t securely connected.
2. Check Your HDD or SSD
- Inspect your storage device for physical signs of damage.
- Use a hard drive diagnostic tool to check for drive health and errors.
- If you can access another computer, connect the storage drive from the computer experiencing issues to it.
- If the drive functions correctly on the alternate computer, this suggests that the problem might be with another component.
- Conversely, if the drive demonstrates similar issues on the second computer, it may be time to consider replacing the hard disk.
3. Unplug Recently Added Hardware
- Turn off your computer.
- Remove any recently added hardware peripherals.
- Restart your computer to check if this resolves the issue.
4. Restart Your PC into Automatic Repair Mode
Automatic Repair is a Windows recovery tool that can fix certain system problems. Your PC should automatically enter this mode after several restarts.
If it doesn’t, you can manually boot using a bootable USB or DVD with Windows installation files.
- Insert the bootable USB into your device and then restart it.
- When prompted with “Press any key to continue…,” do so.
- Enter your preferred settings: select the language for installation, time and currency format, and keyboard or input method. Then click Next to proceed.
- In the following window, choose Repair your computer located at the bottom.
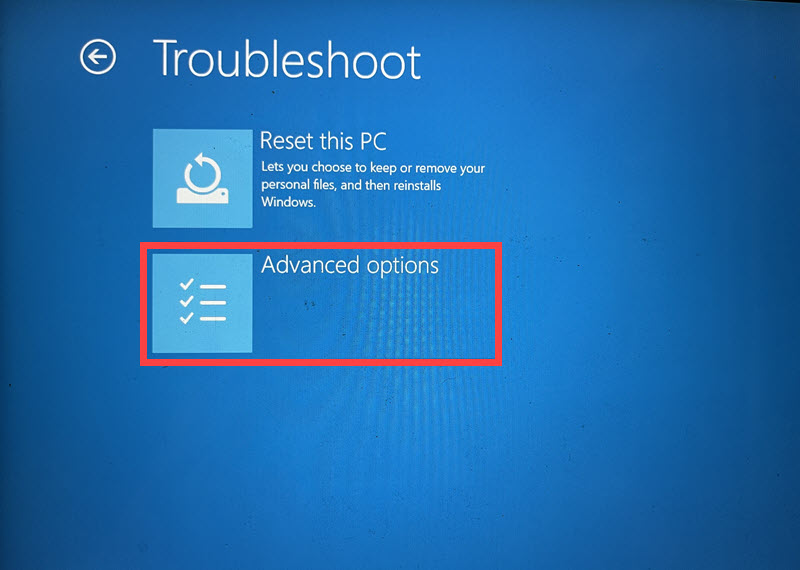
- Next, opt for the Troubleshoot option.

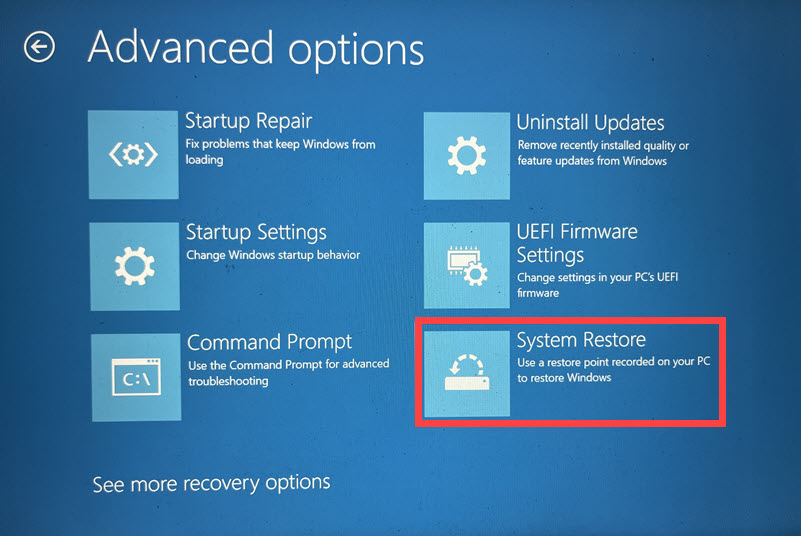
- Then, select Advanced options.
- You’re now in Repair Mode, where you can find various options for troubleshooting.
5. Run SFC and DISM Commands using Command Prompt
Running the System File Checker (SFC) and Deployment Image Servicing and Management (DISM) tools from the Command Prompt can repair system file corruption.
- Access the Advanced Boot Options menu.
- Navigate to the Troubleshoot > Advanced options > Command Prompt.
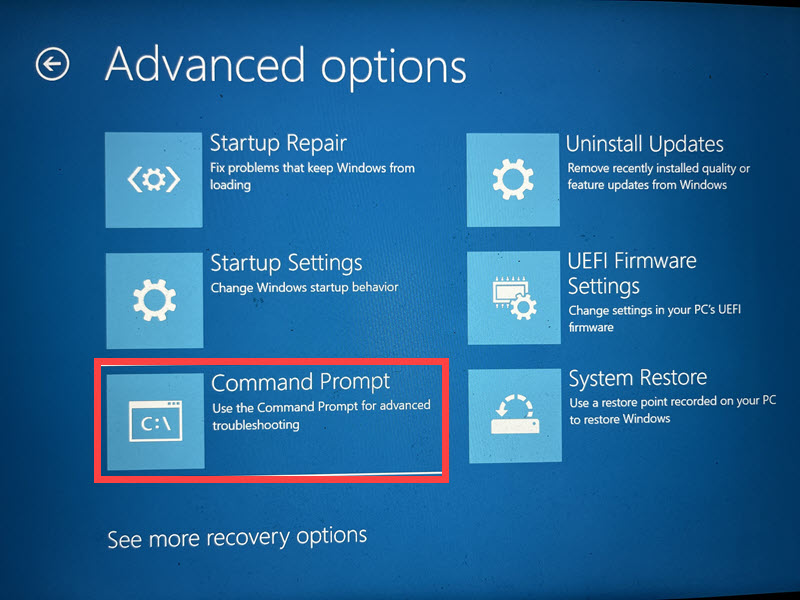
- Type
DISM.exe /Online /Cleanup-image /Restorehealthand press Enter.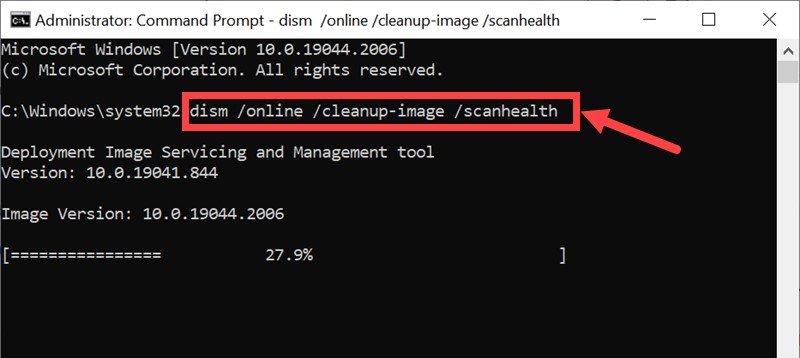
- After DISM is complete, type
sfc /scannowand press Enter.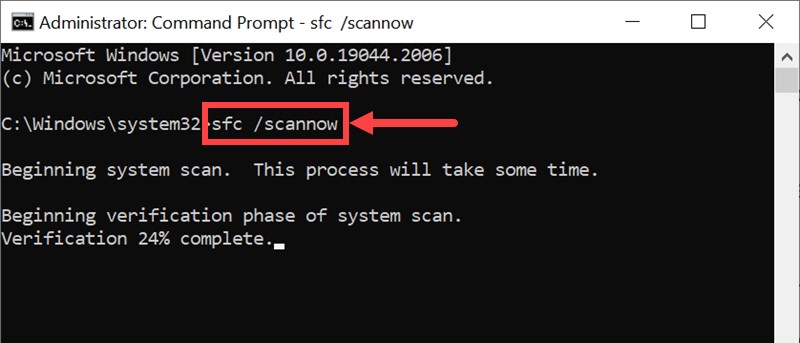
- Restart your PC after the commands are complete.
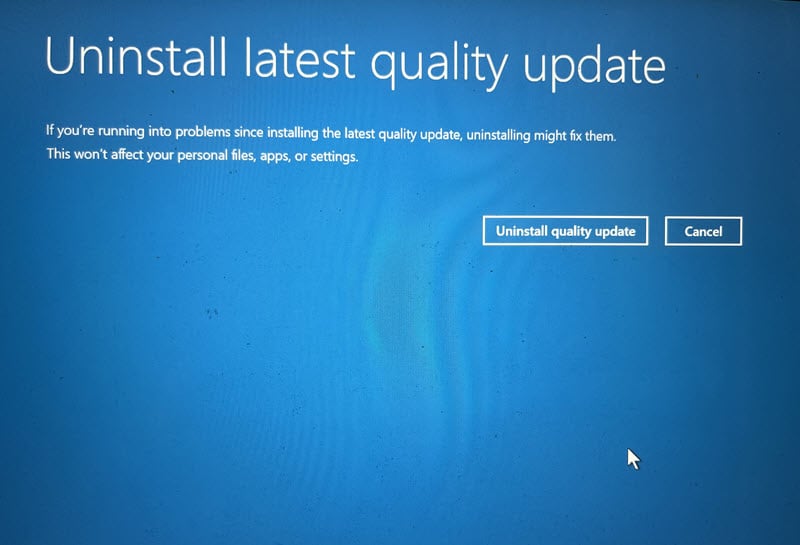
6. Uninstall Recently Installed Updates
Sometimes, recent Windows updates can cause system conflicts, leading to BSODs.
- While in Automatic Repair Mode, navigate to the Advanced options menu.
- From there, choose the Uninstall Updates option.
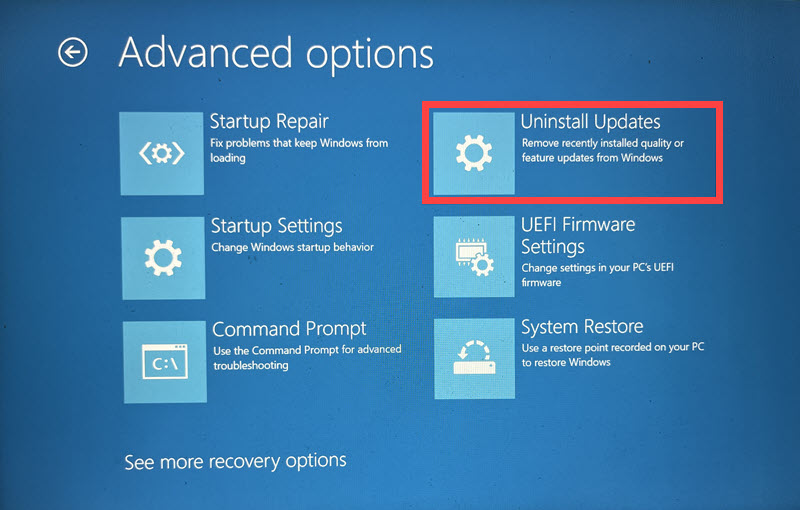
- Then, identify and select the specific update you suspect may be causing the issue.
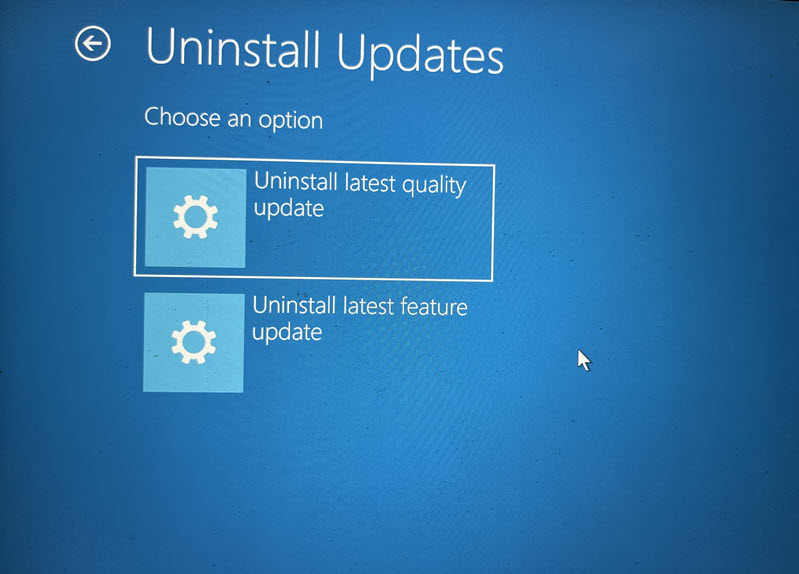
- Follow the on-screen instructions to uninstall the updates.
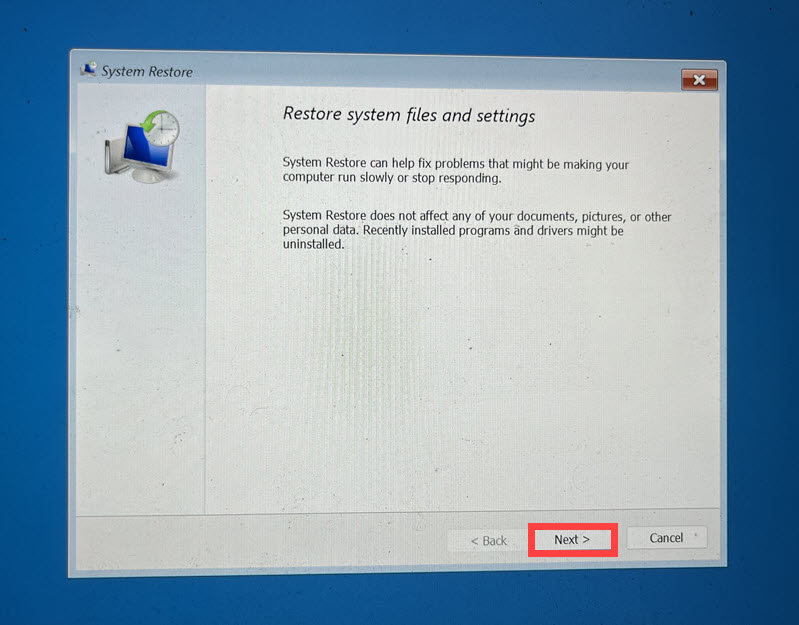
7. Restore Your Windows
Restoring Windows to a previous state can undo recent changes that might have triggered 0xC000021A STATUS_SYSTEM_PROCESS_TERMINATED.
- When in Automatic Repair Mode, go to the Advanced options menu.
- Select System Restore from the options available.
- In the System Restore window, click Next to initiate the process.
- Choose the desired restore point and click Next.
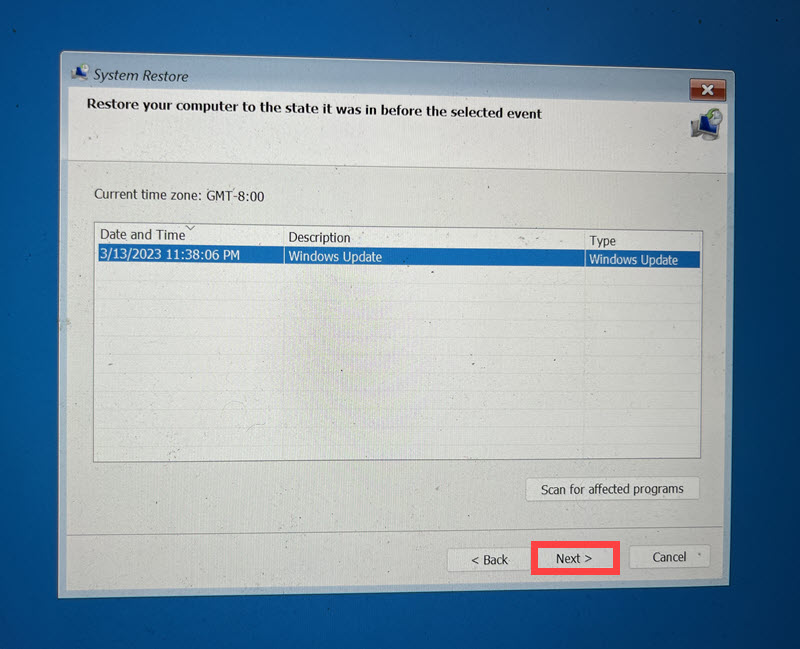
- Select Finish.

- Follow any additional instructions on the screen to finalize the System Restore procedure.
Summary
The 0xC000021A STATUS_SYSTEM_PROCESS_TERMINATED error is a critical system failure, but it’s fixable. Each method in this guide targets specific issues, helping you to diagnose and resolve the underlying problem.
Hopefully, one of those worked for you!