
OpenLiteSpeed is a lightweight and open source version of the popular LiteSpeed Server. It comes with its WebGUI based Administration panel which makes it different from other web servers as you can configure pretty much everything from the panel itself.
In this tutorial, we will learn about how to Install OpenLiteSpeed Server on Ubuntu 18.04 along with PHP 7.2 and MariaDB server.
Prerequisite
- Ubuntu 18.04 based Server
- User Account with Root Privileges
Step 1 – Install OpenLiteSpeed
Switch to Sudo User
Run the following command to switch to sudo user so that we can run our first command to add and update the OpenLiteSpeed repository.
sudo -i
The following command will add the necessary repository for Install OpenLiteSpeed server.
wget -O – http://rpms.litespeedtech.com/debian/enable_lst_debain_repo.sh | bash
Type ‘exit’ to switch back to the normal user.
This command will download and run the bash script to add and update the OpenLiteSpeed repository. Run the following command to install the latest version of the server.
sudo apt install openlitespeed
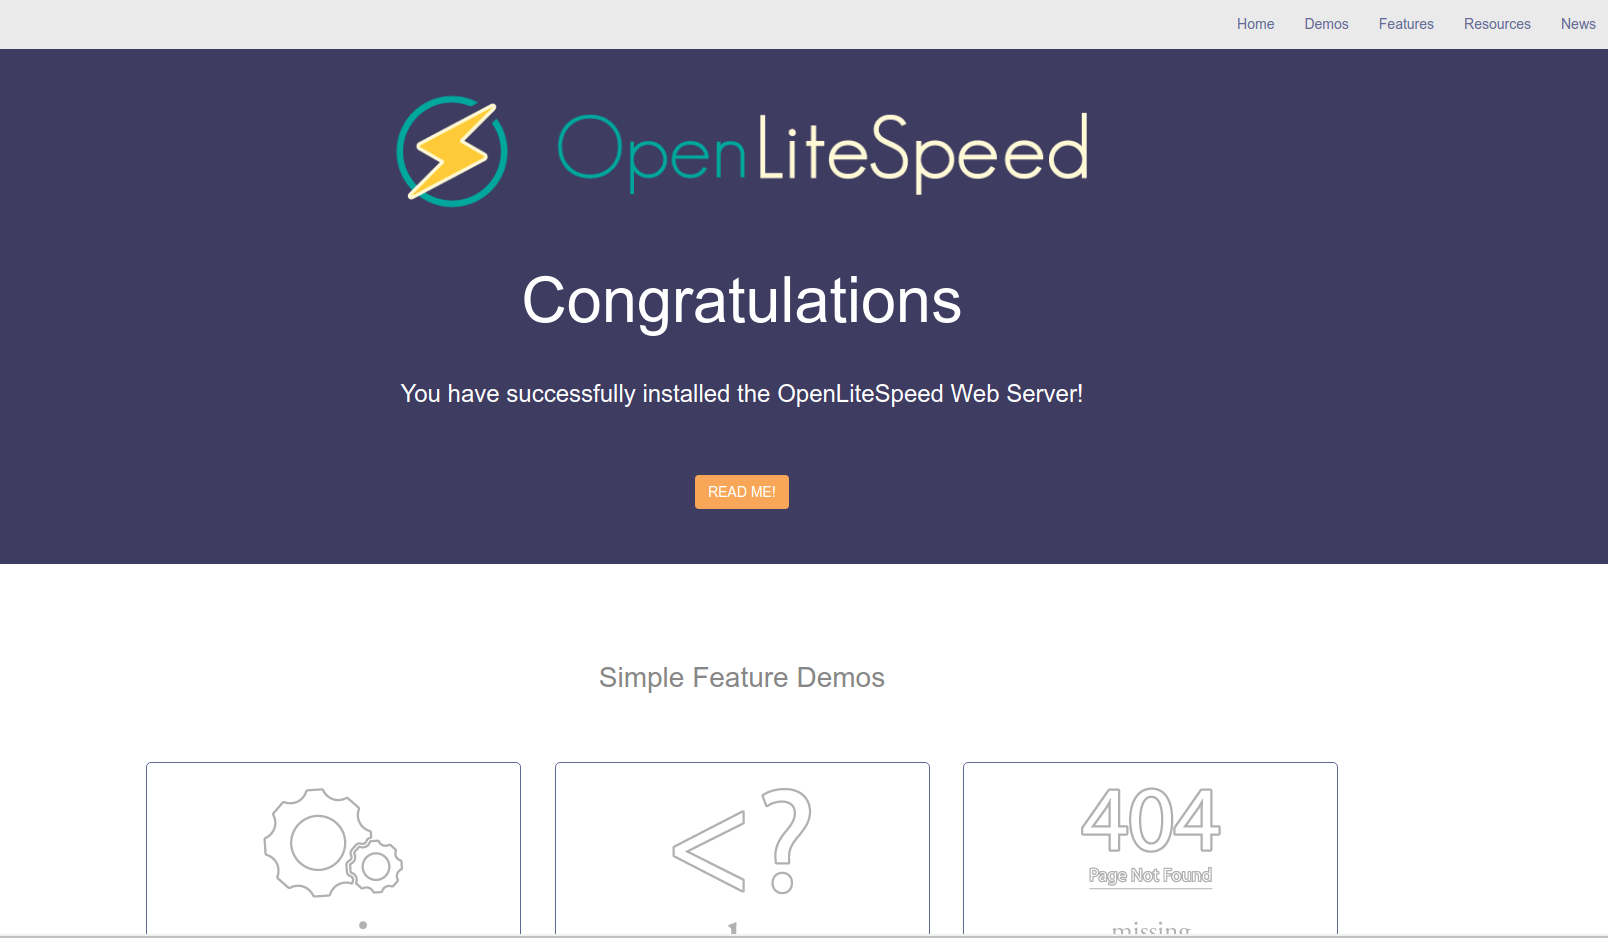
To check whether the server has been successfully installed, open your browser and visit `http://yourdomainname:8088` If the installation was successful, you should see the following webpage.
Note: OpenLiteSpeed server runs by default on port 8088 which can be later changed in the settings panel.
The default installation of OpenLiteSpeed comes with PHP 5.6.x version included. But we don’t want that. We will install our own copy of PHP 7.2 later on in this tutorial. So our next step would be to install PHP 7.2.
Step 2 – Install PHP
To install PHP, we need to install a package called lsphp which is basically PHP compiled to work with the OpenLiteSpeed Server. Run the following command to install PHP and several of its modules.
sudo apt install lsphp72 lsphp72-curl lsphp72-imap lsphp72-mysql lsphp72-intl lsphp72-pgsql lsphp72-sqlite3 lsphp72-tidy lsphp72-snmp
There are few more PHP packages available. Should you want, you can list all the available PHP packages by using the following command
apt-cache search lsphp72
You can pick and select the ones you want to install.
Step 3 – Install MariaDB Server
MariaDB is a drop-in replacement for MySQL which means commands to run and operate MariaDB are same as those for MySQL. To install MariaDB issue the following command
sudo apt install mariadb-server
Run the following command to perform default configuration such as giving a root password, removing anonymous users, disallowing root login remotely and dropping test tables. Press yes for everything and choose a strong root password.
sudo mysql_secure_installation
There is a caveat with setting up the root password. MariaDB by default allows system root users to log in to MariaDB without a password. But if you are going to use a 3rd party application to access via root, a password is a must otherwise apps such as PHPMyAdmin will fail. For this, you need to disable the plugin based authentication which is the default option on MariaDB.
To disable plugin authentication, enter the MySQL prompt first by using the following command
sudo mysql -u root
Now enter the following commands to disable the plugin authentication.
use mysql;
update user set plugin=” where User=’root’;
flush privileges;
exit
After this restart your MariaDB service.
sudo systemctl restart mariadb.service
That’s it. Next time you want to login to MySQL, use the following command
sudo mysql -u root -p
And you will be asked for your root password which you had set initially.
Step 4 – Configure OpenLiteSpeed
It’s time to configure the server. To access the admin panel, visit http://yourdomainname:7080/. And yes, that means admin panel resides at port 7080 by default. The default username is admin and the default password is 123456.
On logging in, you will be greeted by the following screen.

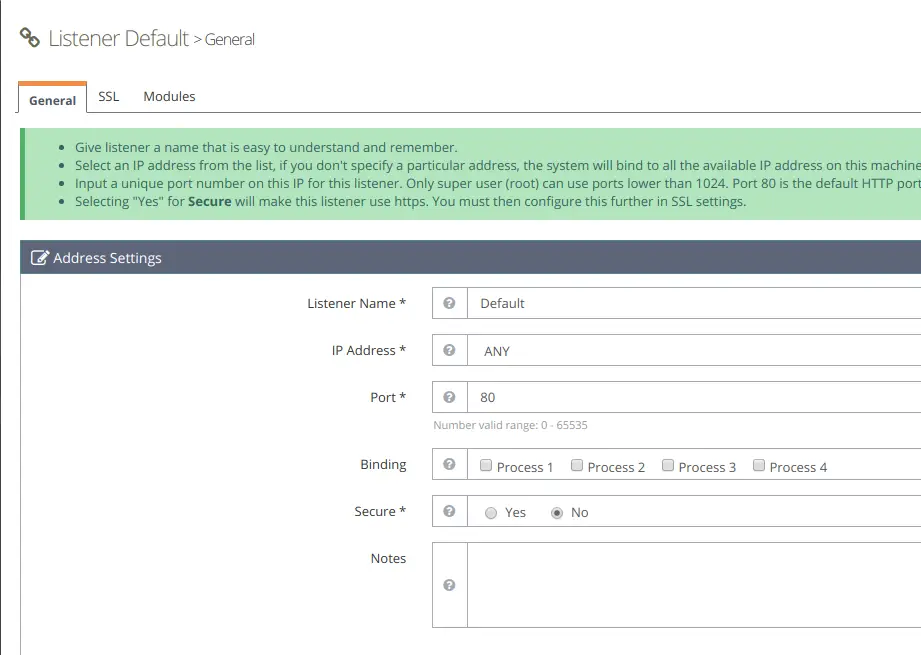
The first thing we need to change is the default ports.
Visit Listeners category and click View button against Default. On the next page under Listener Default > General page, click Edit icon on the right and change the port from 8080 to 80. Click Save and then perform a Graceful restart.
If you want to change the port of the administration panel, visit WebAdmin Settings >> Listeners section and Click the view button against adminListener. Click Edit button on the next page and you can choose a port of your choice here. Click Save and Graceful restart on completion.
You should also change the default password for the Administration Panel. To do that, visit WebAdmin Settings section and Click the Users tab. Click edit button listed against admin and change the password. Click Save and then Graceful restart to make the change.

In case you forget the administration password, you can reset by running the following command
sudo /usr/local/lsws/admin/misc/admpass.sh
This script allows you to use a new administration id and password.
OpenLiteSpeed by default ships with PHP 5.6 which we definitely don’t want so we will have to make the switch manually to PHP 7.2 which is the latest at the time of writing this tutorial.
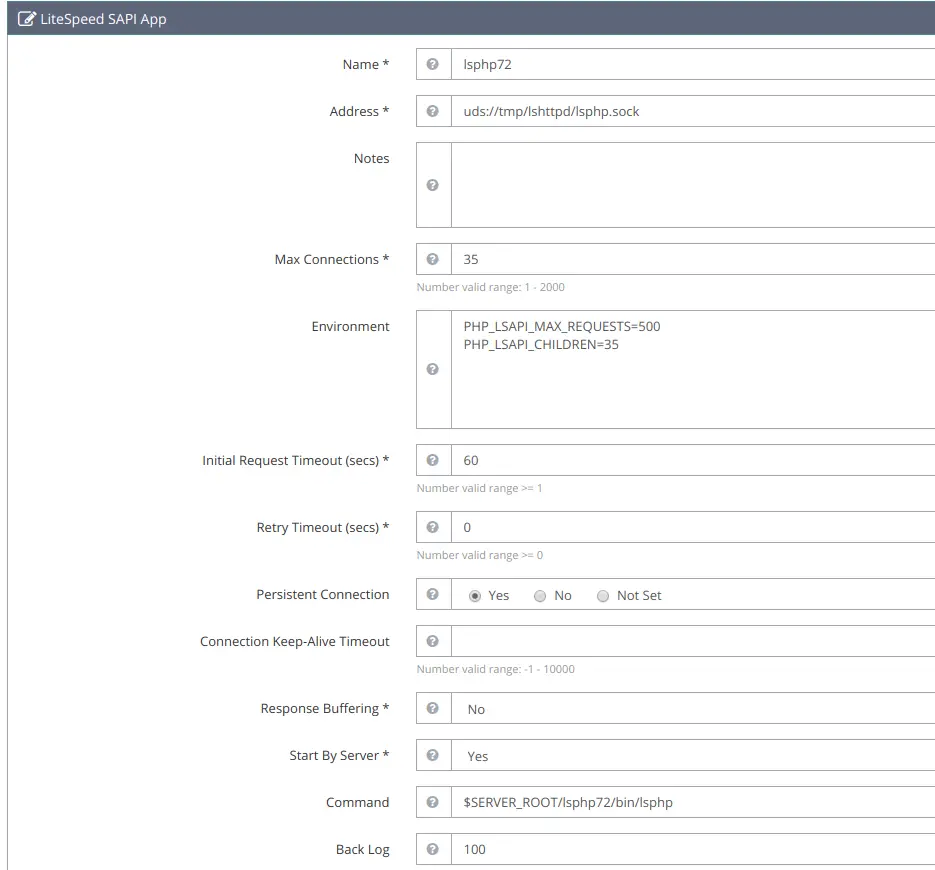
Go to Server Configuration Section and click the External App tab. Under it, you will find LiteSpeed SAPI app named lsphp. Click the edit button on the right(middle button) and a new page will open. Make the following changes
- Name: lsphp72
- Address: uds://tmp/lshttpd/lsphp.sock
- Max Connections: 35
- Environment:
- PHP_LSAPI_MAX_REQUESTS=500
- PHP_LSAPI_MAX_REQUESTS=500
- Command: $SERVER_ROOT/lsphp72/bin/lsphp
Leave everything else as default. Now switch to the Script Handler tab and click Edit against LiteSpeed SAPI and make the following change
- Handler Name: lsphp72
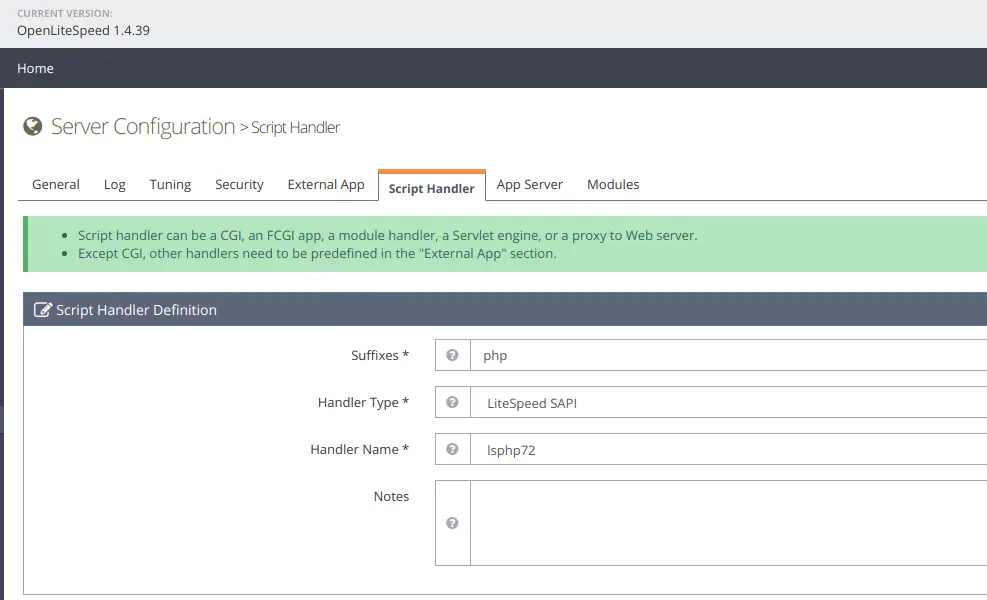
Click Save. Now click the **Graceful restart** button on the top right to save the changes. This should setup PHP 7.2 to work with OpenLiteSpeed server. To check if PHP is working properly, visit http://yourdomainname/phpinfo.php from your browser.
That’s all folks to this tutorial. If you have any questions, post it in the comment box. To learn more about the server, visit OpenLiteSpeed.org