
There are brands with which we have a special relationship, and for me, this is the case with EVGA. When I started my OverCleX website and made my first tests, more than fifteen years ago, EVGA followed me straight away and gave me their support. Unfortunately, EVGA has been focusing almost exclusively on the American market for several years now. For instance, even though it is still possible to find EVGA’s graphics cards in Europe, particular models like the « DARK » or « KingPiN » series are nowhere to be found.
Therefore, I would like to thank Jacob from the EVGA US team for giving us the opportunity to review their EVGA X570 DARK motherboard.

The other problem we have to deal with, is when we want to order some EVGA hardware from the European website. As a matter of fact, everything is shipped directly from Taiwan. The issue is that you will systematically have additional customs fees. Anyway, let’s end it there and look at the bright side because right now, the EVGA X570 DARK is actually available for 729 euros on Alternate Germany.
The DARK series and this unexpected AMD version :
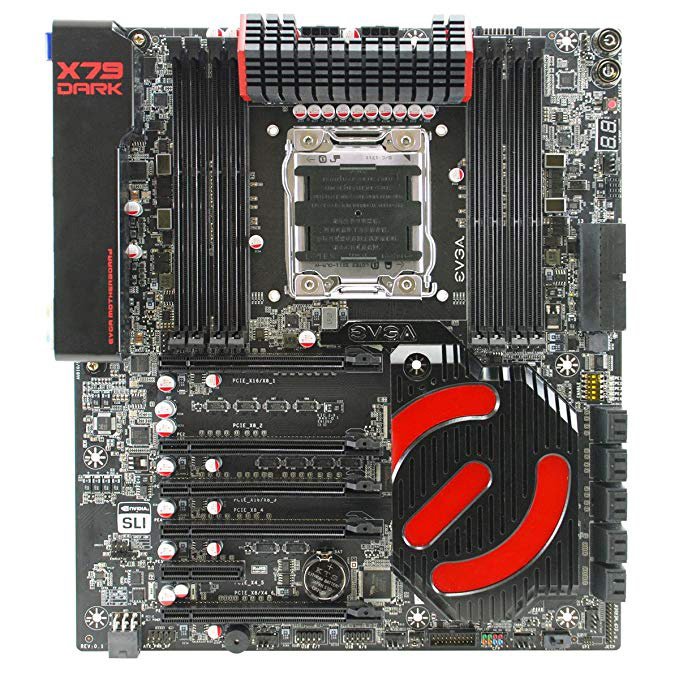
Before we go into detail about the X570 DARK, let’s take a quick look back at what has been the “DARK” series over the years. In 2013, EVGA released the first model, the X79 DARK, which put EVGA back on track after disappointing motherboards which especially lacked in BIOS support and updates.
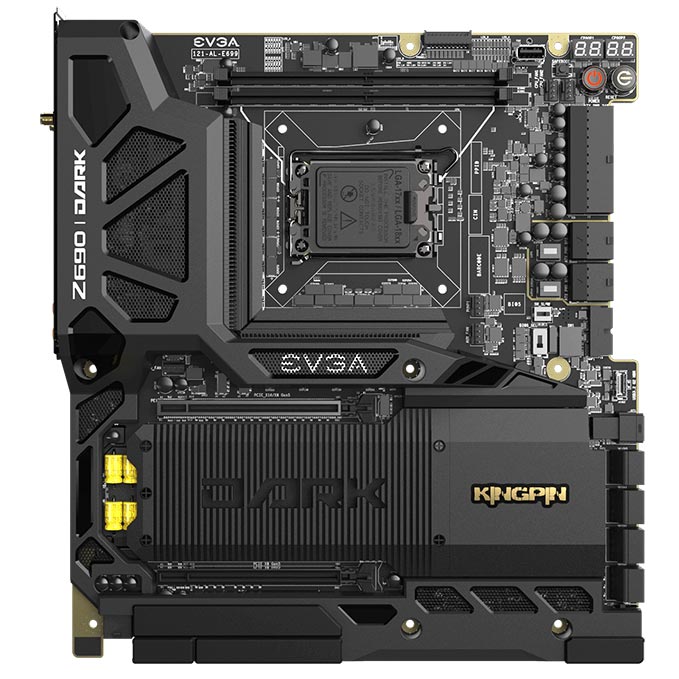
This series has been imagined and designed to a large extent by Vince, aka KingPiN, and TiN. Since 2013, EVGA has regularly offered unique models that are part of this series. The latest one is the EVGA Z690 DARK.
The « DARK » series motherboards are designed following the same spirit as the « KingPiN » graphics cards. And that is to achieve the best performance and also to provide dedicated tools for testing them under liquid nitrogen. The availability of these cards is often very low because of limited supply.
In all of these DARK models, the X570 is a bit of a UFO. Indeed, you have to look back more than twelve years ago to find a motherboard with a chipset that isn’t from Intel. Now let’s move on to the presentation of this EVGA X570 DARK.
The architecture :
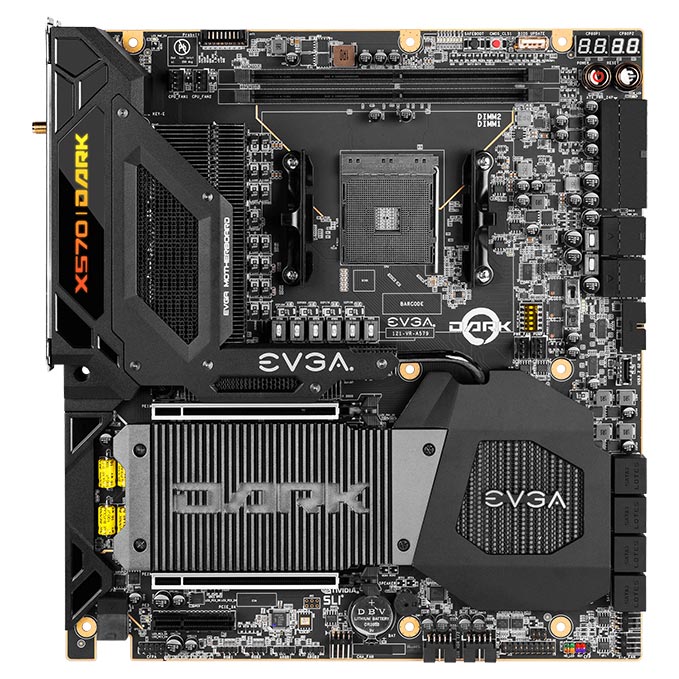
This EVGA X570 DARK is built on AMD X570S chipset (passively cooled chipset). This motherboard has an AM4 socket which can accommodate third generation Ryzen, as well as second generation Ryzen processors. Yet, it is mainly built for the Ryzen 5000 processors lineup. As it is always the case, we advise you to update your BIOS directly with the latest available on the manufacturer’s website.
This has been the first chipset to support PCIe 4.0, offering higher storage performance than the previous generation. The PCIe 4.0 in this X570 chipset doubles the bandwidth compared to PCIe 3.0. As a reminder, in order to take advantage of PCIe 4.0, you’ll need at least a third-generation Ryzen processor.
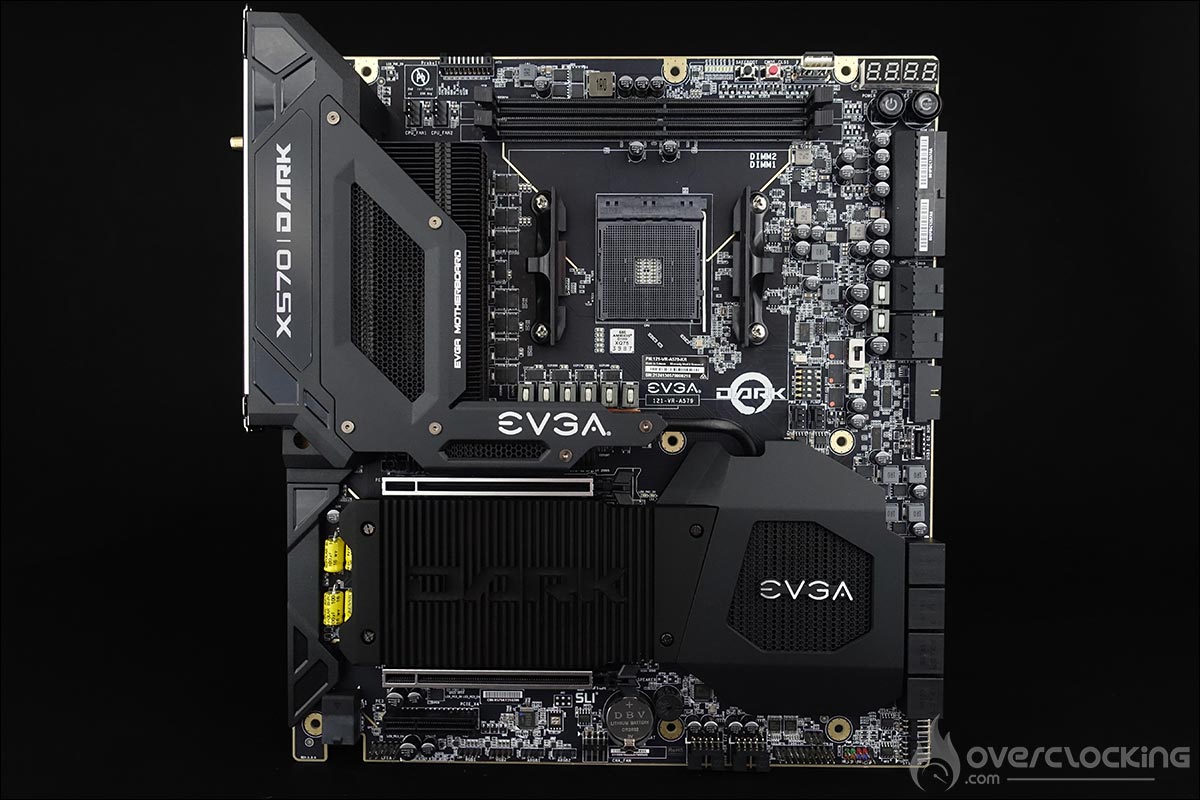
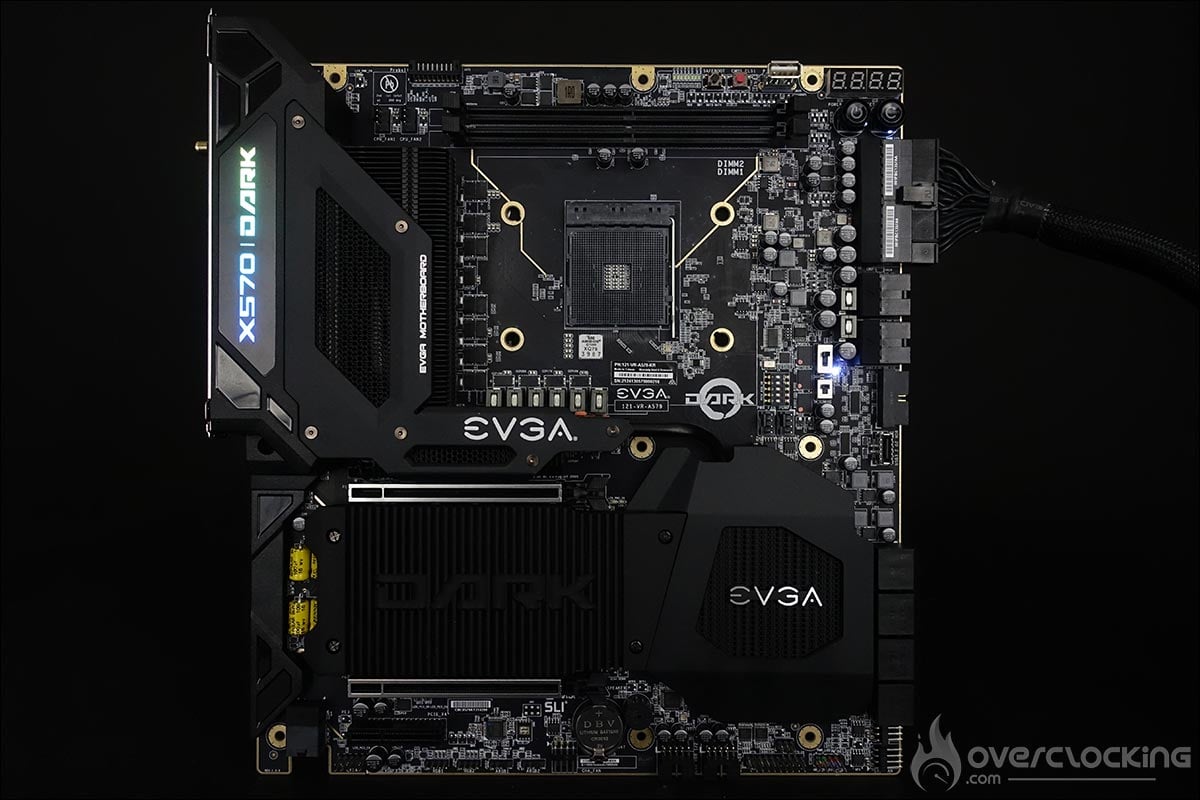
The dimensions of the board are getting larger as we are now on an E-ATX format, i.e. dimensions of 305 mm x 277 mm. The dominant colors on the PCB are black and grey. A design that preserves the spirit of the DARK series, even if the PCB is for once, less cut out.
The bundle :
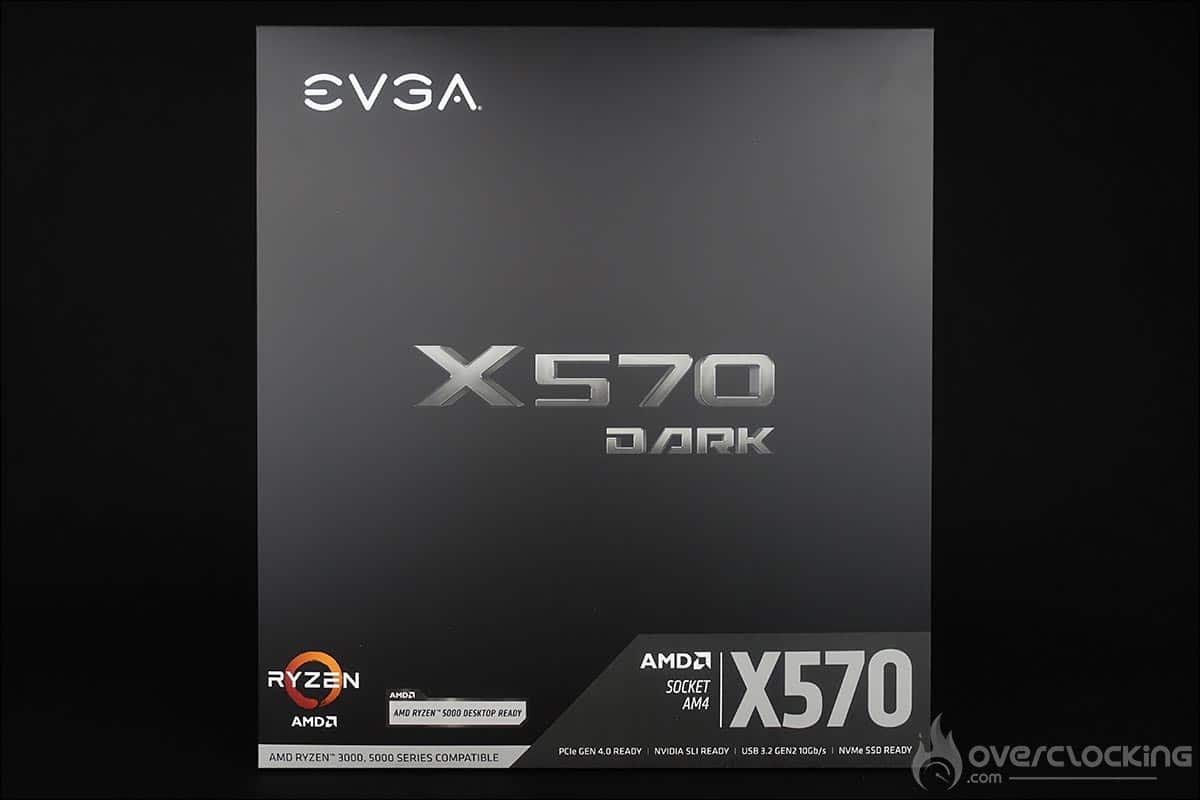
Now let’s take a quick look at the EVGA X570 DARK bundle to see if it has any « special features ». Overall, we find a fairly standard bundle : the usual SATA cables, a Wi-Fi antenna, some stickers, the motherboard manual, etc. However, the design of the box is really well done. When you first open the box, you will find a USB key containing the motherboard drivers.
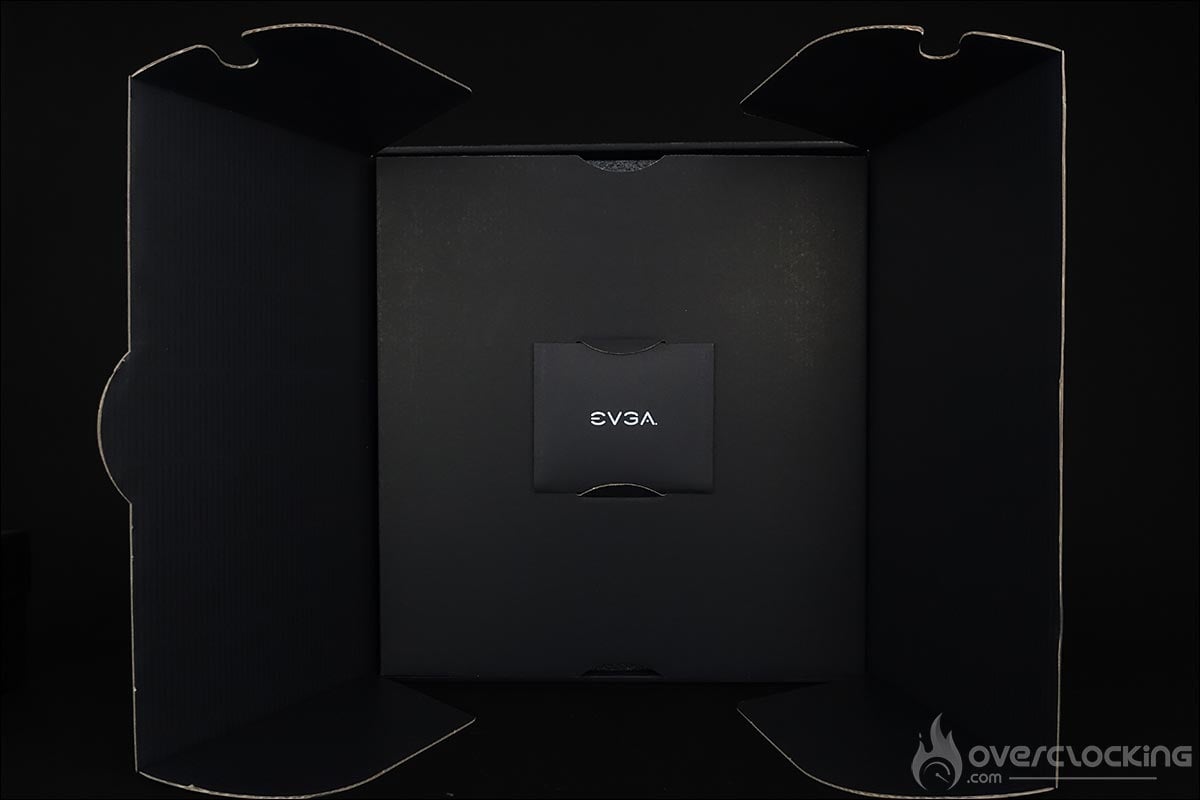
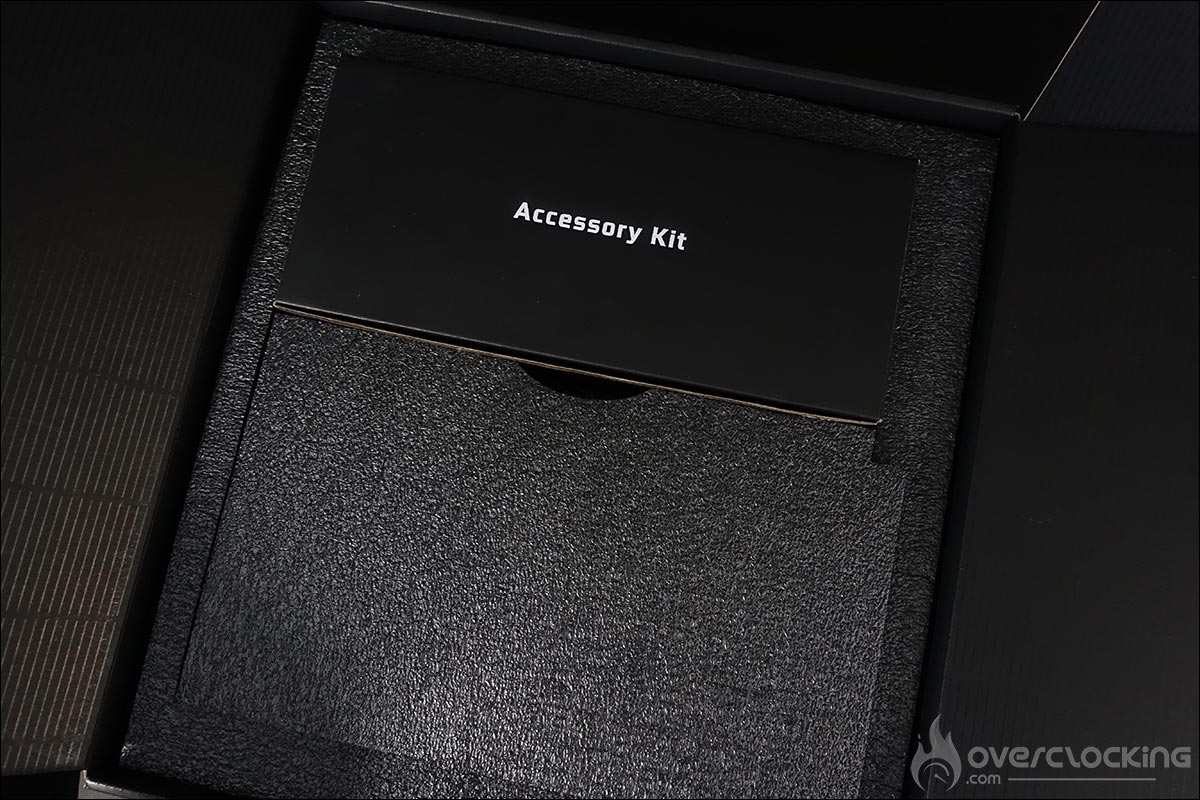
Underneath contains the motherboard and below, we find the box with the accessories but also we also discover a full size plastic PCB copy of our EVGA X570 DARK. This is really an item we like as it provides a lot of useful information.
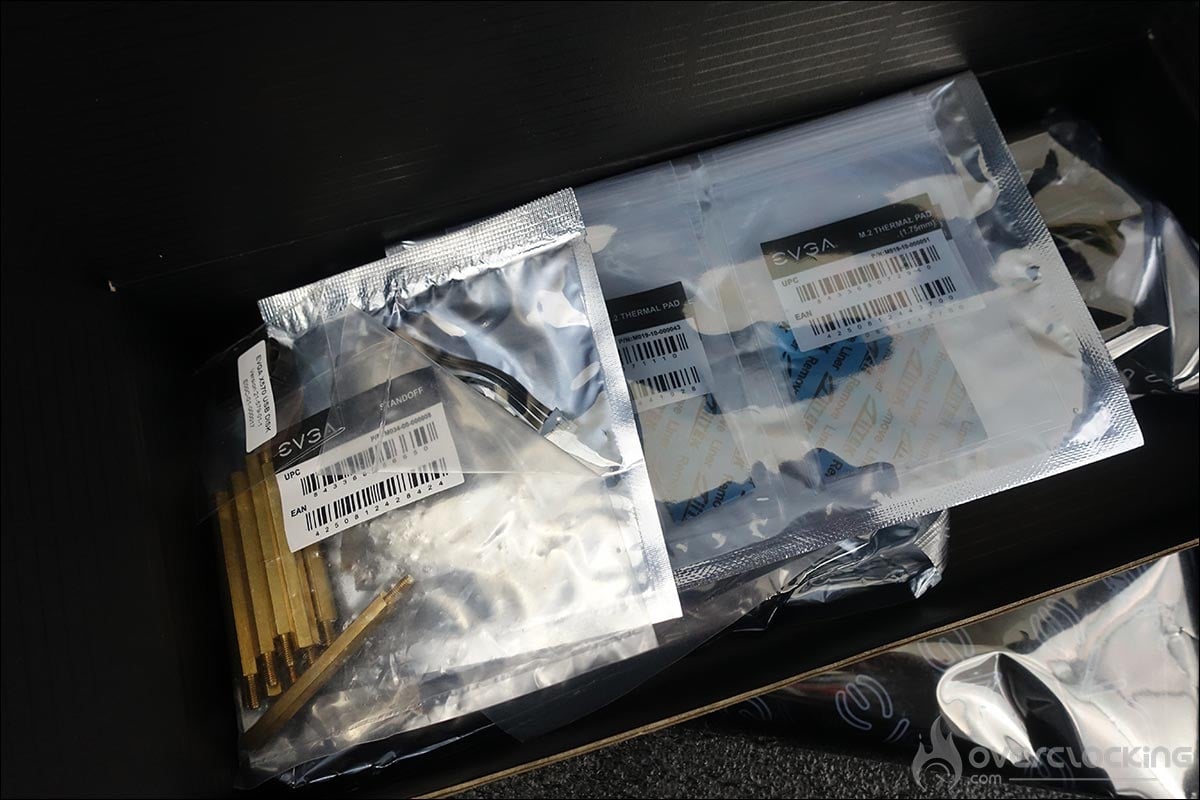
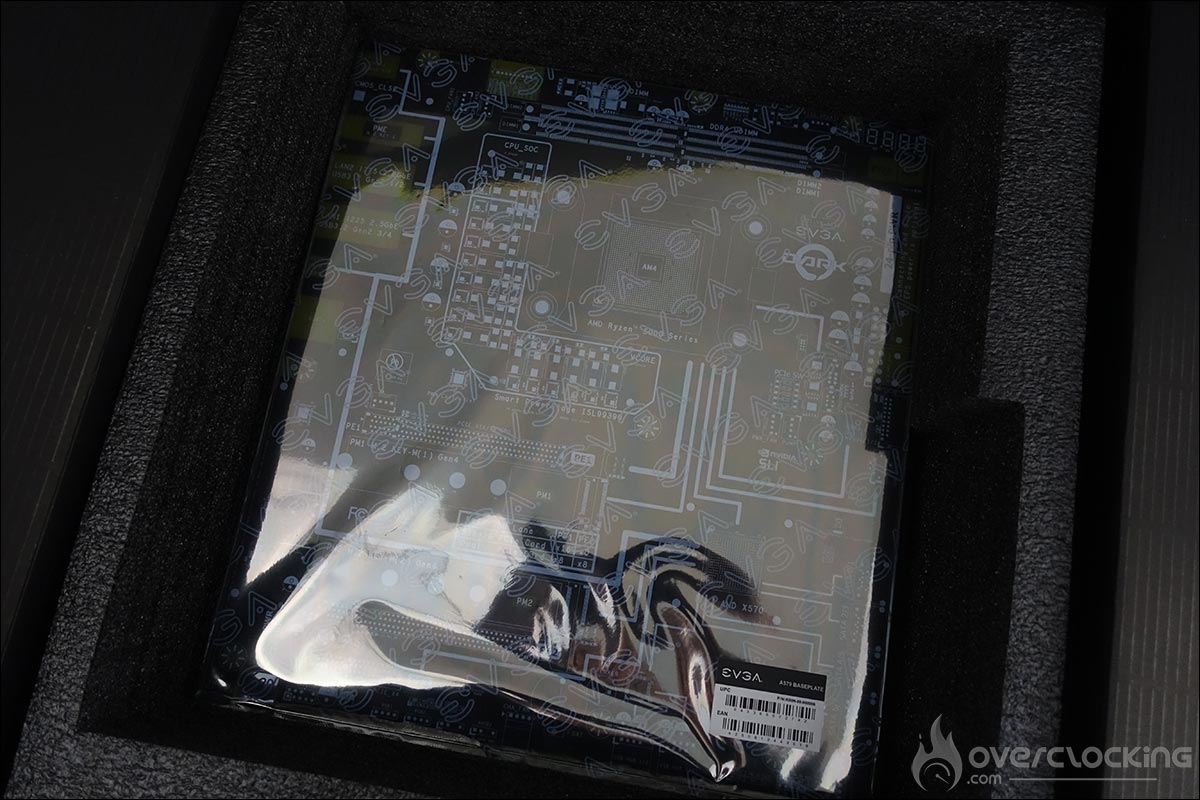
This PCB can also be used as a bench table as large spacers are provided in the bundle to maintain your motherboard. The complete bundle list and pictures can be found directly on EVGA’s website.
The different heatsinks :
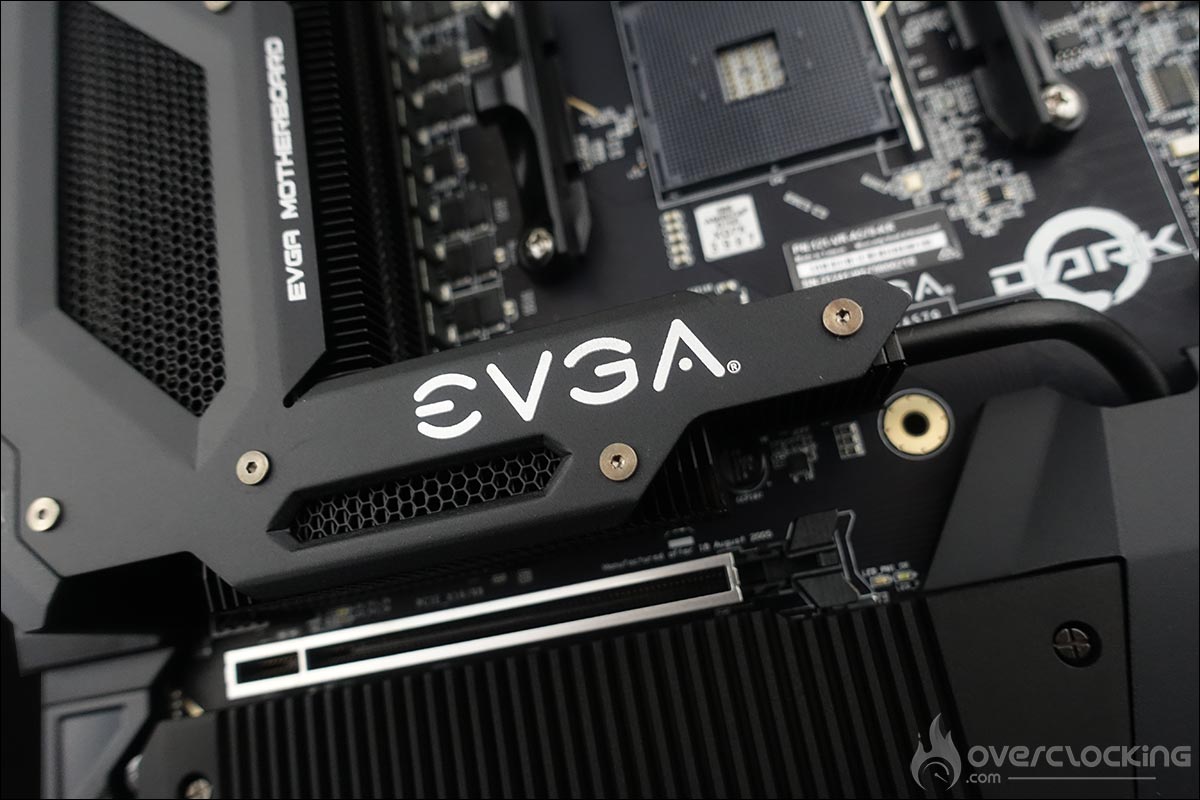
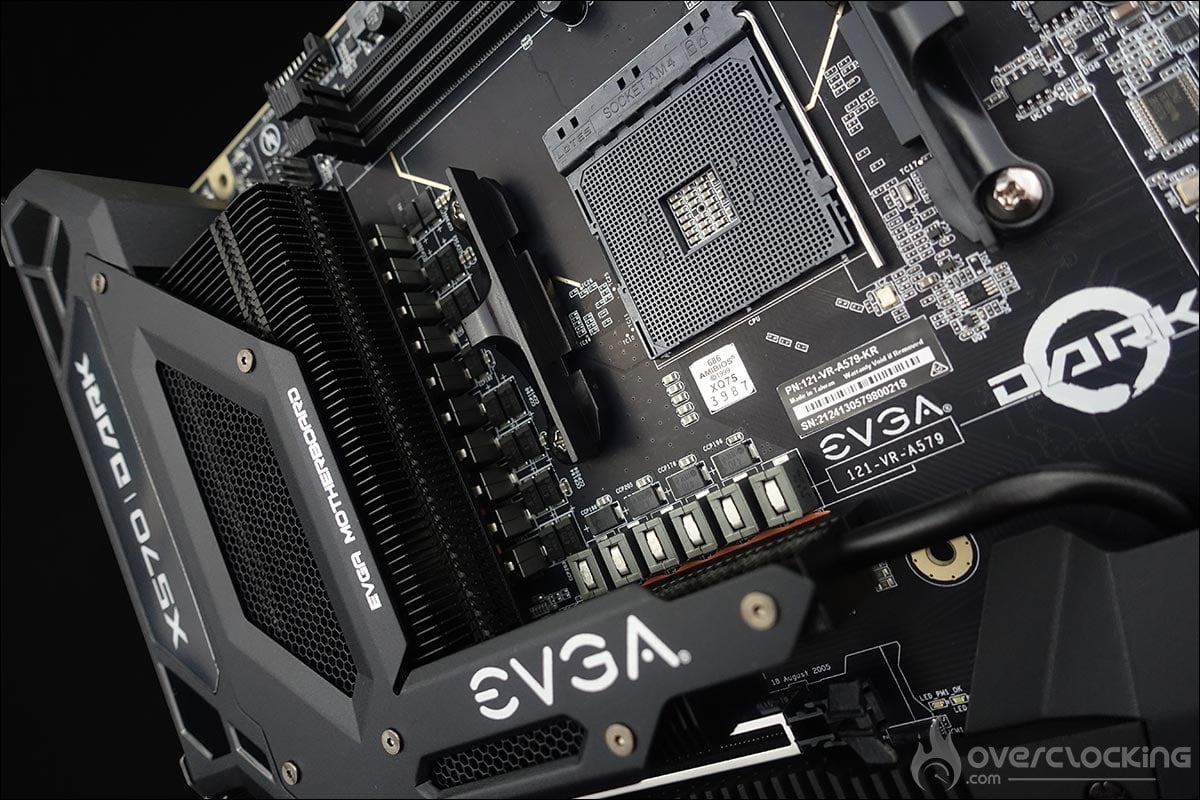
The first thing that strikes you about this X570 DARK is the layout of the PCB in its upper part. This has been completely redesigned by EVGA and has 10 layers. The socket and the two memory slots have been rotated 90° counter-clockwise. This choice allows the power connectors to be placed in a horizontal position in order to facilitate cable management. Personally, at first, I found it quite confusing visually, but really well thought out ! The 24-pin ATX power connector and the two 8-pin CPU connectors are located side by side.
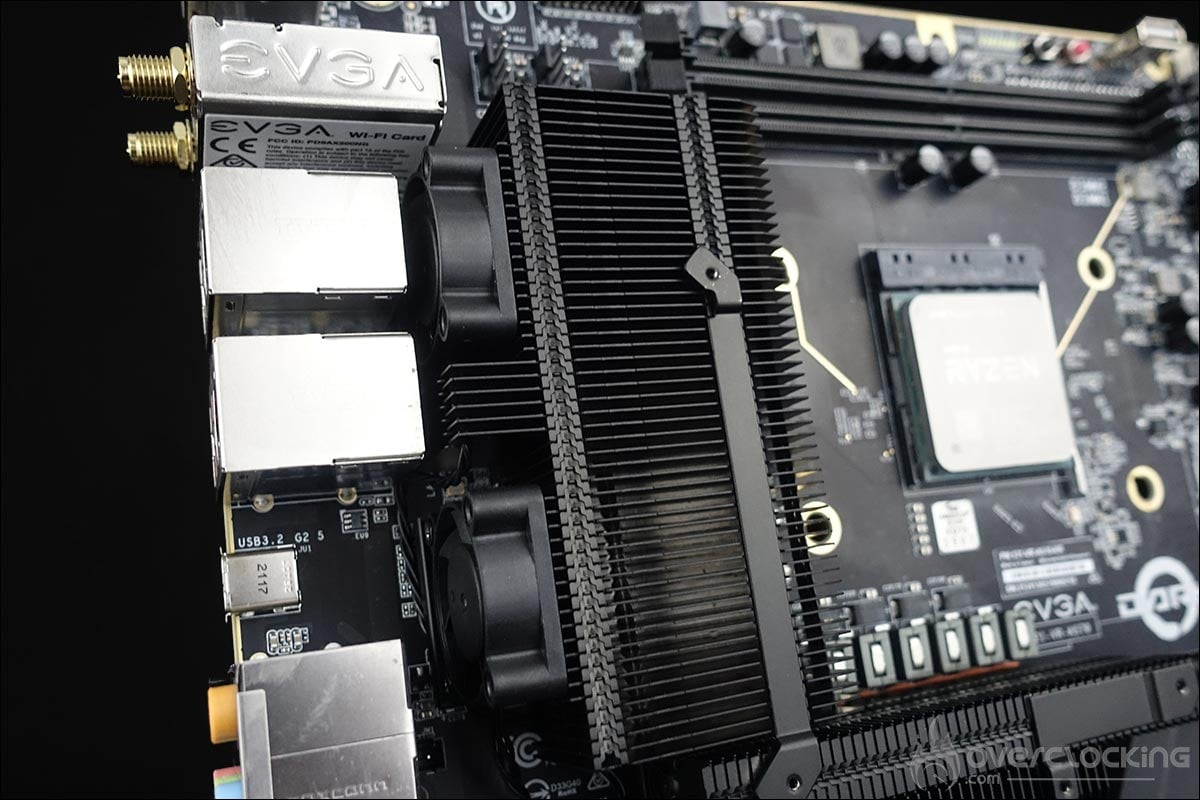
Let’s start the tour with the upper part. We can see there are two overlapping radiators. They will be in charge of keeping the power supply stages cool. Their position is unusual but also due to the rotation of the socket. The power supply stages have also been rotated by 90°.
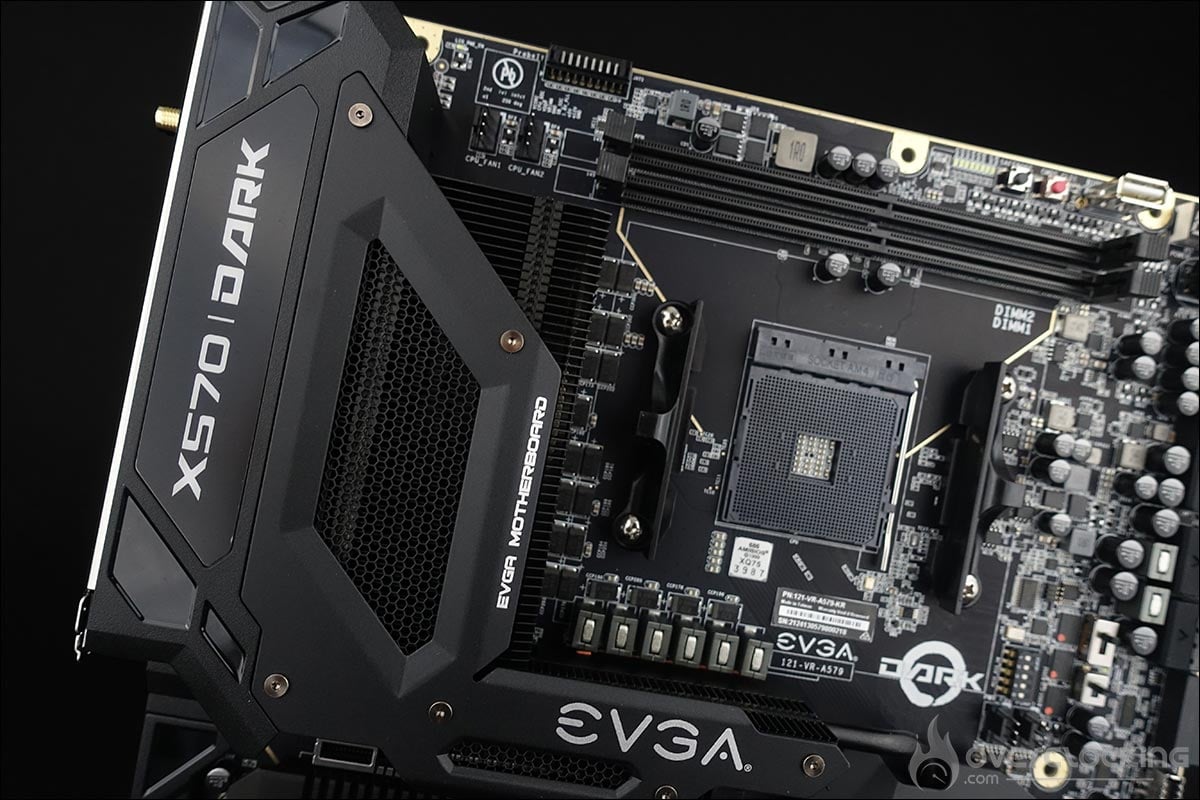
Although one might think that this is passive cooling, it is not. Two 30mm fans are concealed and will only activate when necessary. This is rarely the case.
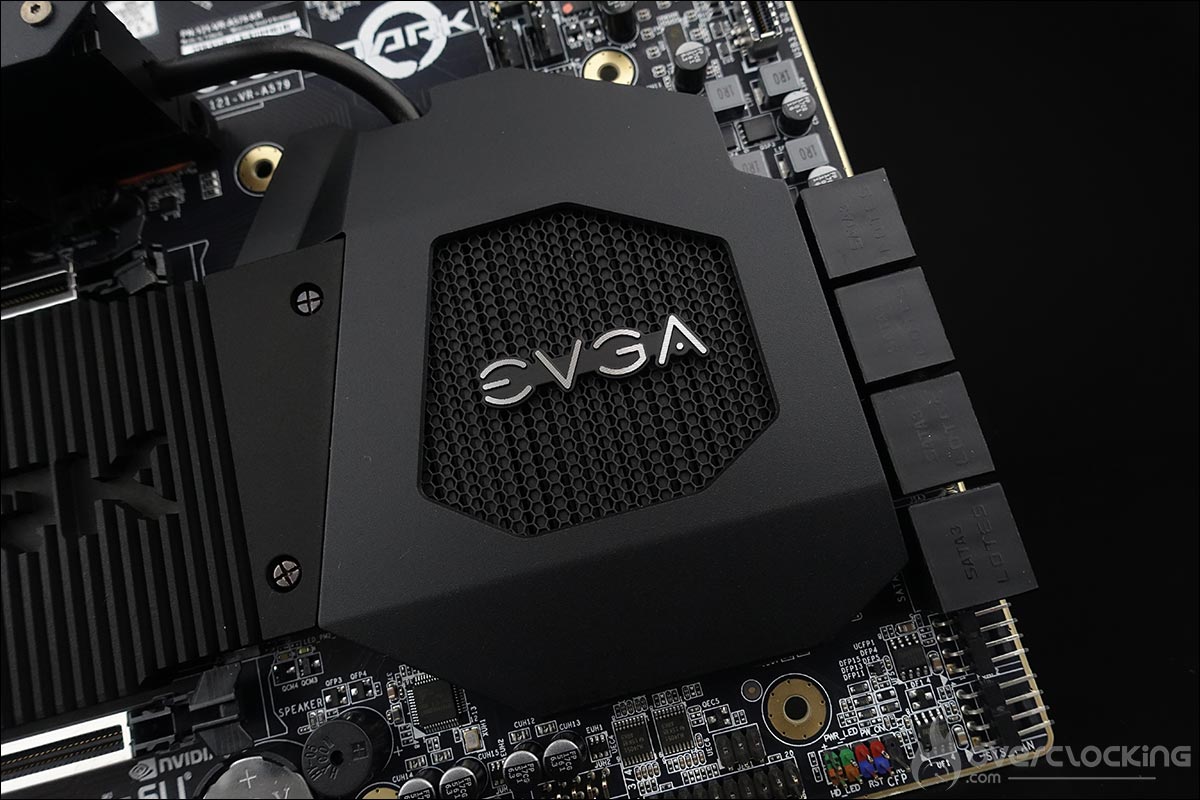
Finally, the third one is the one that covers the chipset and has a fairly large surface area, but a low height to allow easy placement of the graphics cards. It is an integral part of the cooling system as it is connected to the other two radiators by a heat pipe.
Two M.2 SSD slots :
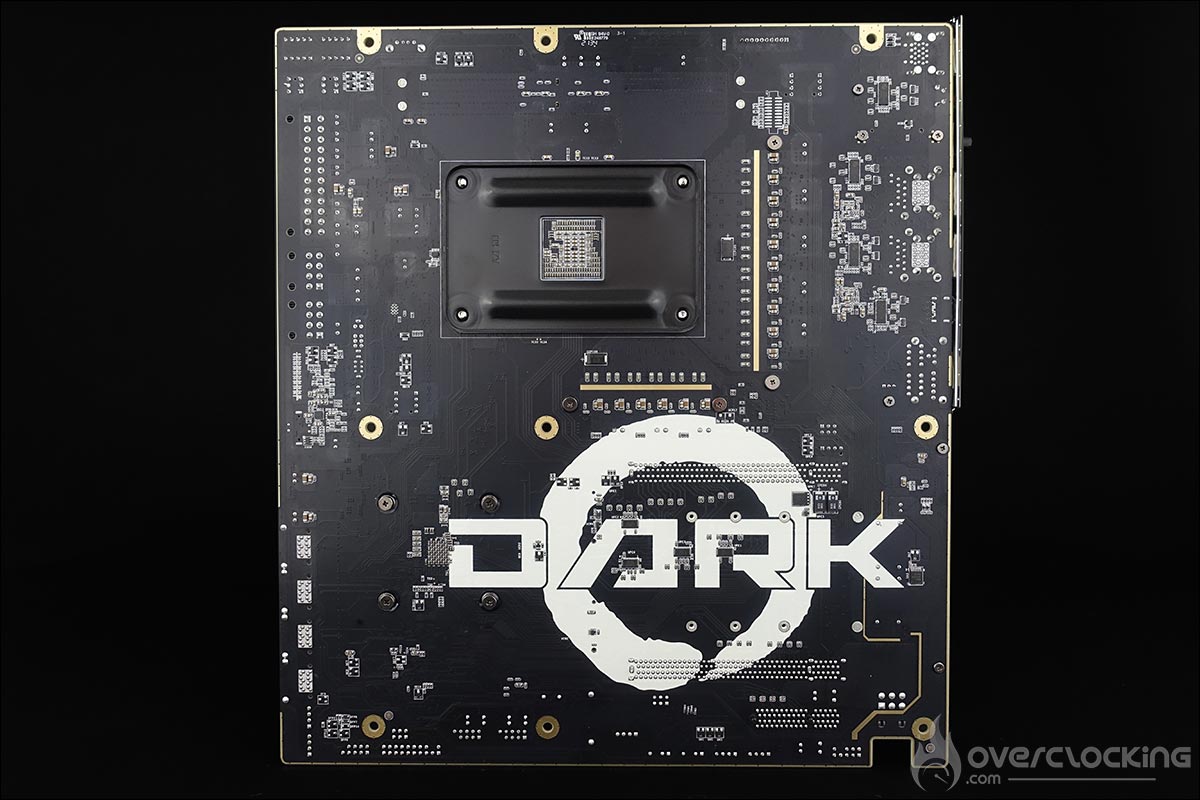
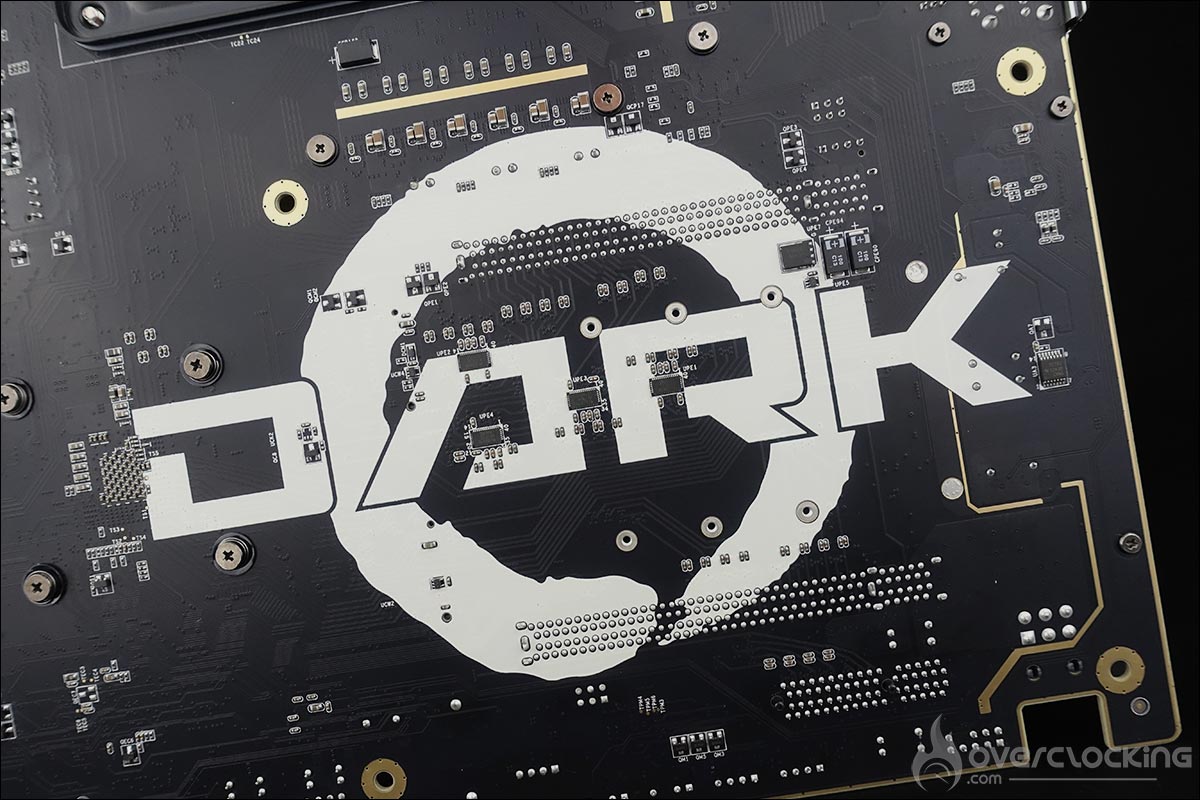
An aluminium plate with the name DARK, which acts as a heat sink, perfectly matches the one on the chipset. It covers the two M.2 SSD slots (one above and one below).
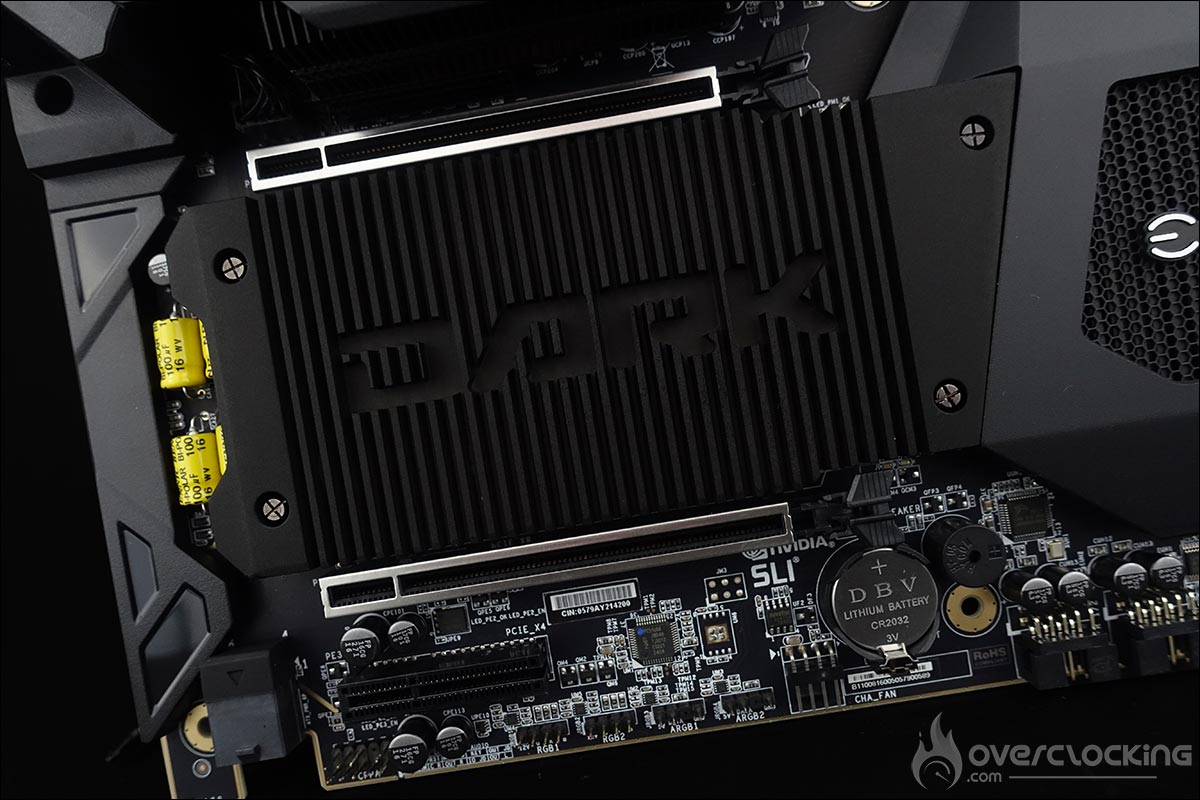
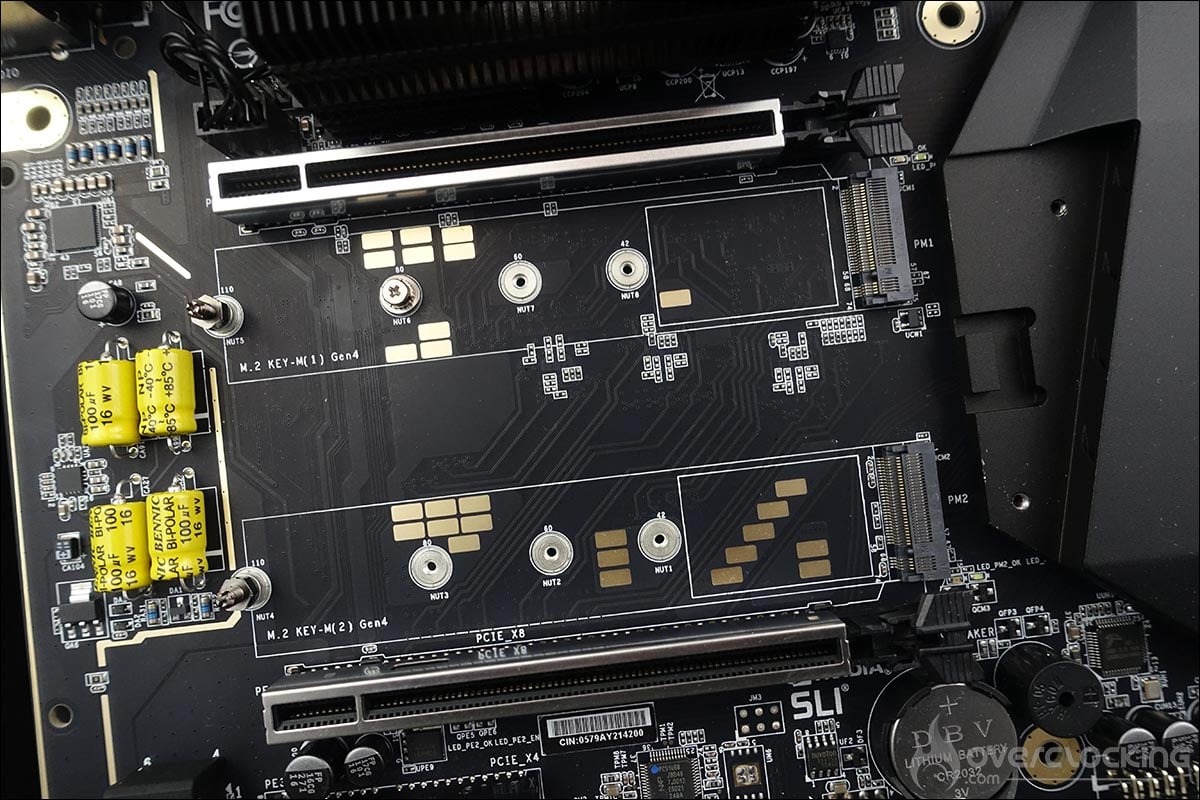
These two SSD slots are therefore positioned between the two PCI-e ports. They are compatible with the Gen4 standard. As for the PCIe slots, there are two PCIe 4.0 16x slots that will work in x8/x8 if you use SLI or CrossfireX technologies, and a third slot in PCIe 4.0 x4.
The socket and memory slots :
The space around the socket is very clear and will be easy enough to isolate with rubber for testing under LN2. Our EVGA X570 DARK has only two DDR4 memory slots for a maximum of two memory sticks.
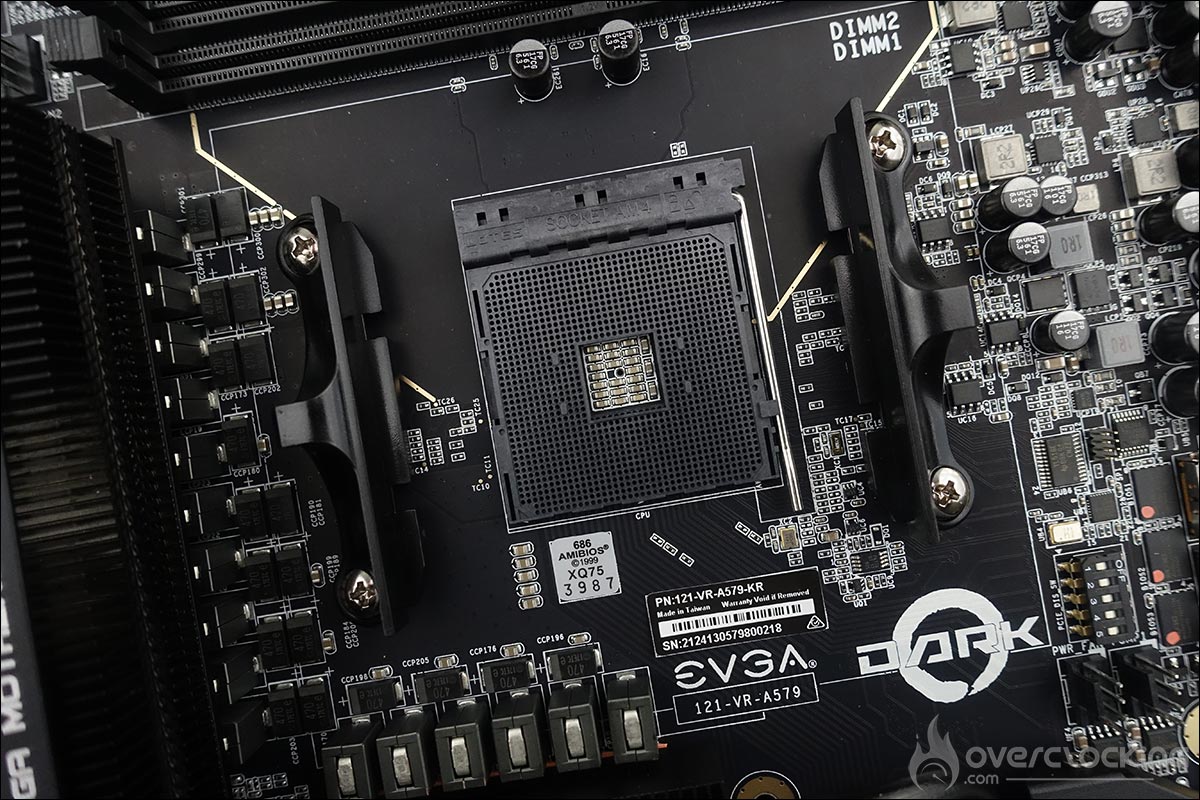
Why not four of them? This is clearly a motherboard for overclockers and RAM is one of the components you want to overclock as much as possible to boost your benchmark scores. Having only two slots means that the distance to the socket is smaller, which makes it easier to stabilise the RAM but also limits disturbances. It supports memory kits up to 4800 MHz+ for a maximum of 64 GB.
The fact that the two memory slots have been moved to the upper part of the case also allows for better air circulation between the front of the case and the fan on the CPU, as the memory kit is no longer in the way.
A tad bit of RGB :
A new feature on the DARK series motherboards is the introduction of an RGB backlight button. Personally, I think we could have done without it on this type of motherboard. In the case of our EVGA X570 DARK, it is the name of the model placed on the radiator above the external connectors that will light up when the motherboard is powered up.
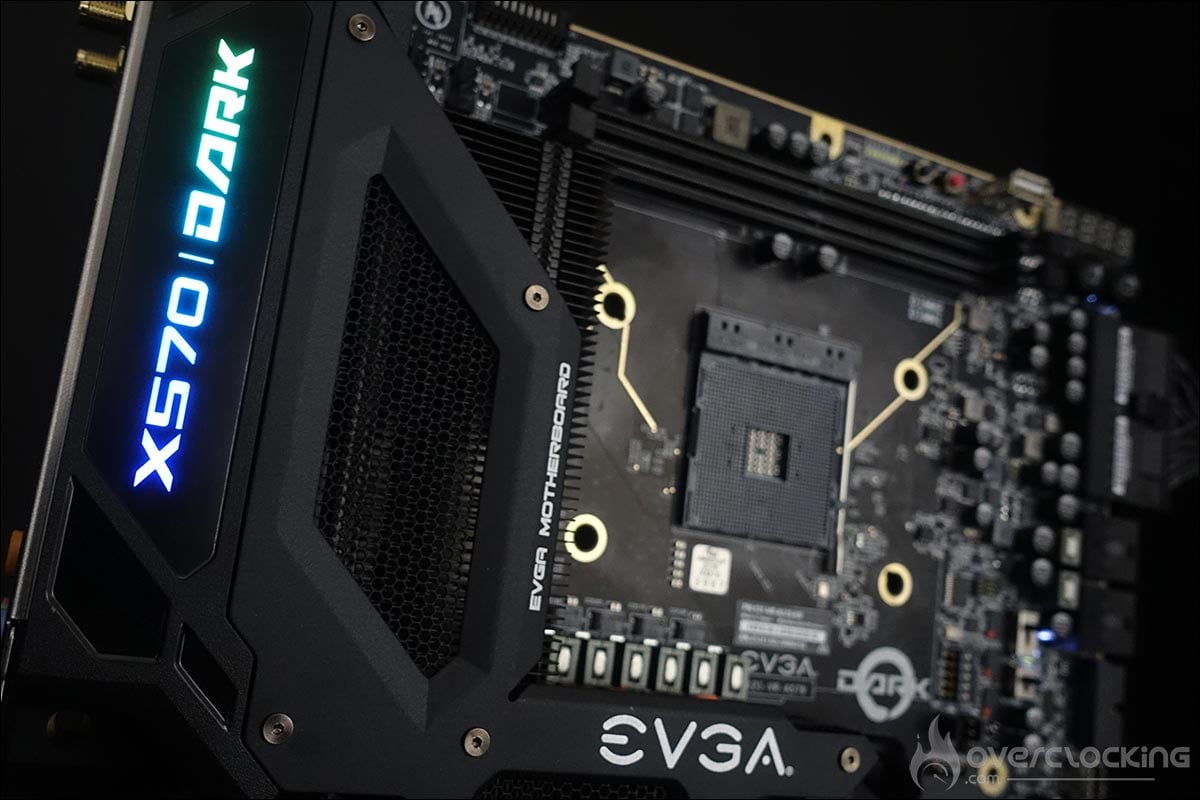
It’s quite simple and it will make the backlight enthusiasts pleased. Now let’s take a closer look at the overclocking tools on the PCB.
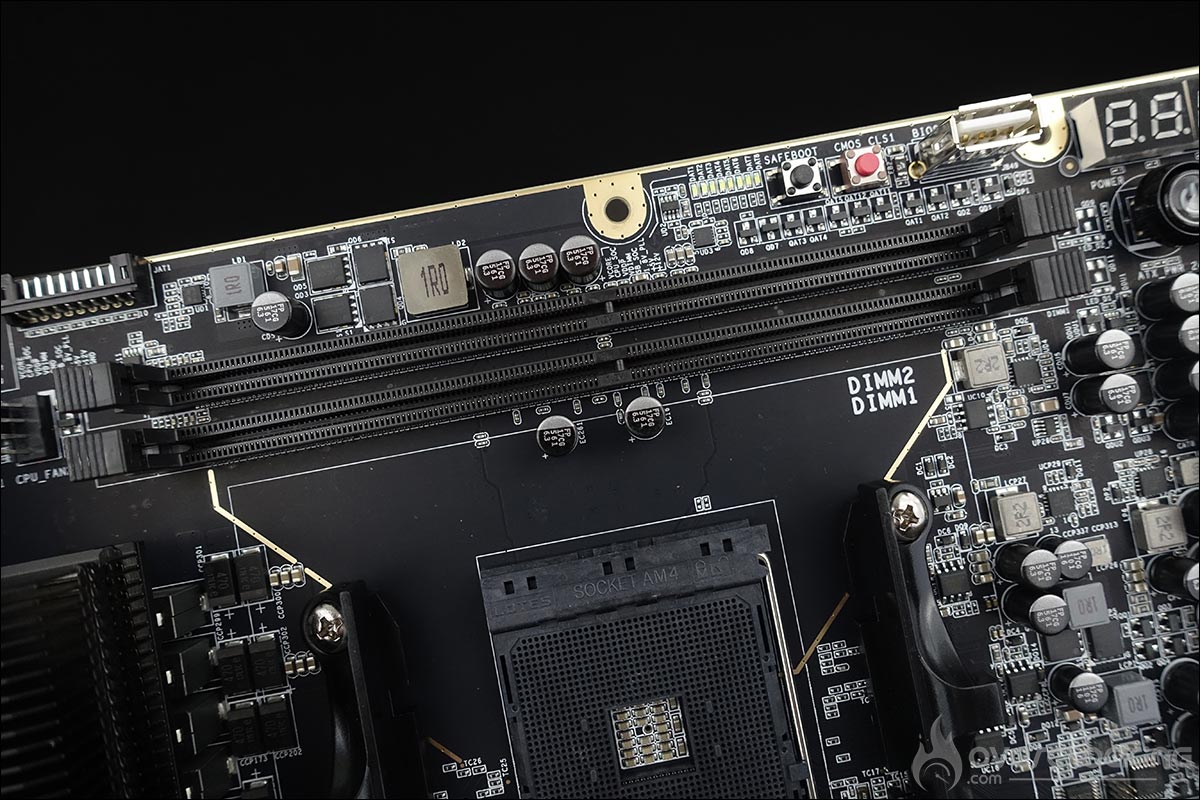
The clocker tools :
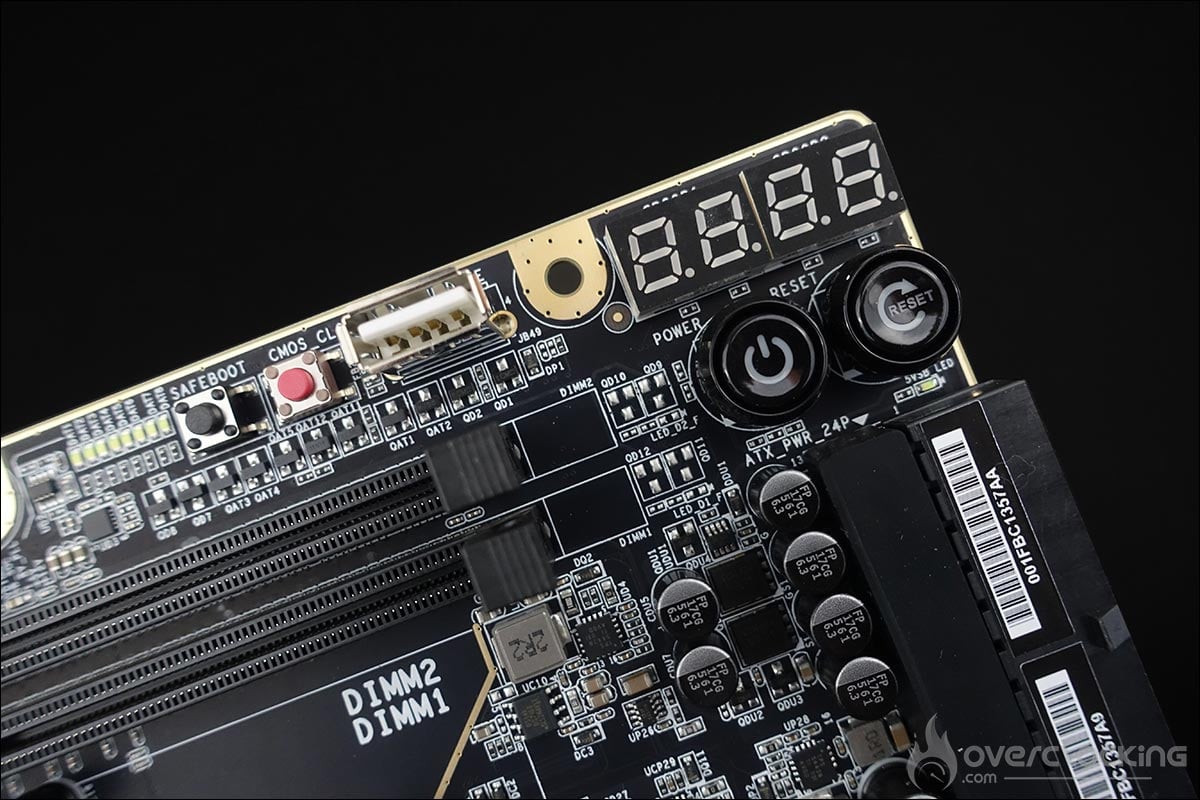
Why is the EVGA X570 DARK one of the best motherboards in terms of overclocking ? First of all, because it has many tools inserted directly on its PCB that will make your life much easier.
- The power button : allows to power up the motherboard.
- The reset button : allows to restart the motherboard in case of failure.
- CLR CMOS : allows to erase the BIOS settings in case of a boot failure.
- Two Debug LEDs : to identify the component responsible for the boot error, but also to display the CPU temperature and voltages.
- Status LED : which, depending on their color, allow you to identify a problem or to know at what level the component voltage is.
- ProbeIT : via the cables included in the bundle, you can easily read the different voltages with a multimeter.
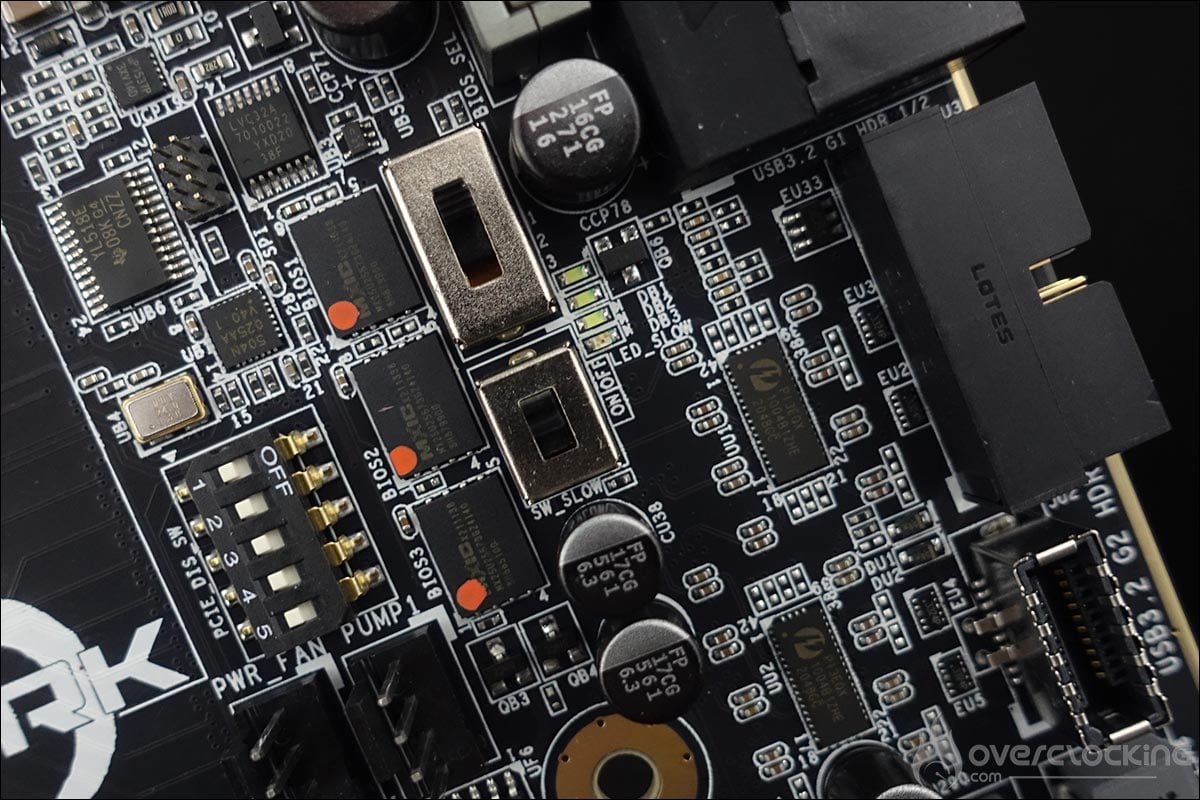
- BIOS switch : in order to switch from one bios to another, there are three of them !
- PCI-e 16x Switch : allows you to activate or deactivate the PCI Express 16x ports. This allows you to test several configurations without having to remove the graphics card each time.
- Slow mode : allows you to boot with a 16x coefficient and once in the OS to put back the one chosen in the bios. In cold mode, if you want to reach 6GHz in 60x100MHz, by activating the Slow Mode, you boot in 16×100 and in the OS, hop back to 60×100. It’s mostly for max screens.
- Safe Boot : allows the motherboard to be rebooted even if the parameters chosen in the bios do not allow booting. This prevents having to clear CMOS which would imply losing your settings.
- USB BIOS Update port : as the name suggests, this can be used to flash your BIOS.
If you have the opportunity to purchase a multimeter, it is an essential tool to accurately measure the voltage of your processor. Personally, I can’t do without it anymore and it also allows me to see the impact of the « LoadLine calibration » which I’ll tell you about during our overclocking tests. With this X570 DARK and the ProbeIt tool, it’s child’s play to make readings.
The PCB :
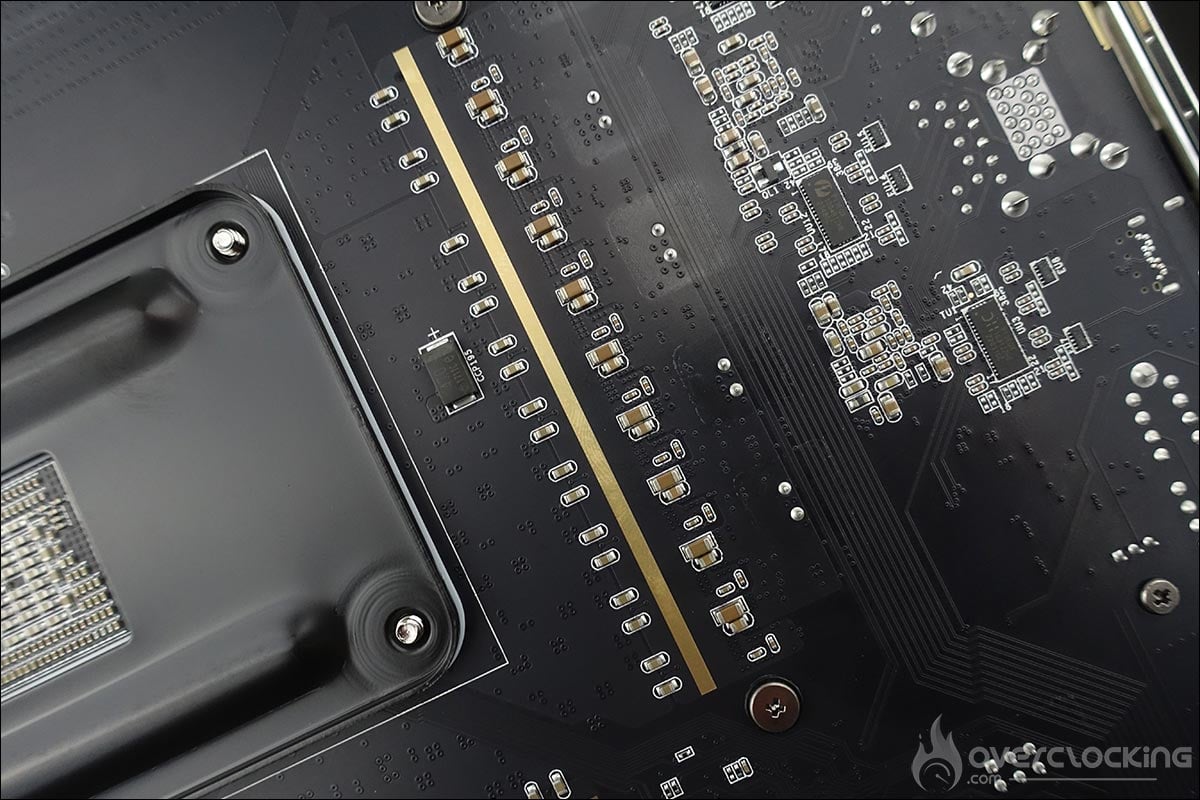
Regarding the power supply stage, it has been further strengthened and is based on a 14+2+1 power supply (CPU + SOC + MEM). The CPU part consists of 14 phases and on this model there is no doubler. But beware, the phases are placed in parallel : therefor there are really seven of them.
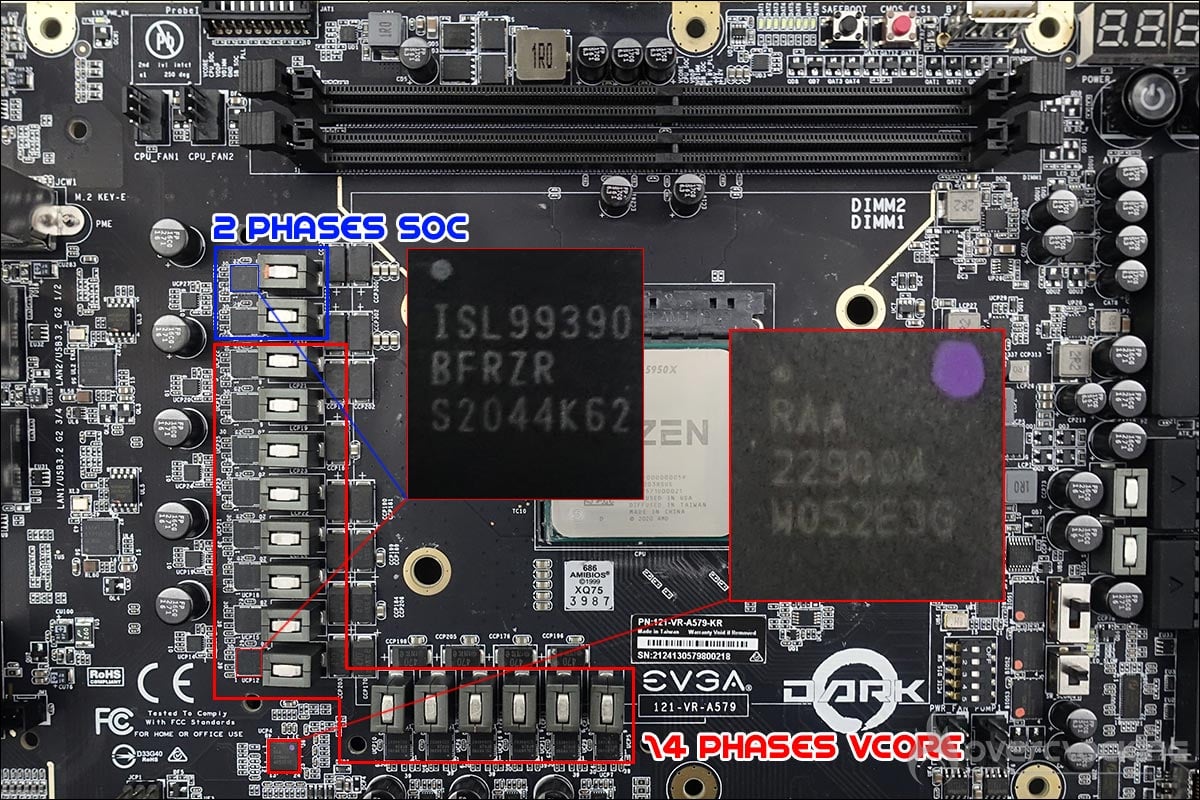
The digital controller is a Renesas RAA 229004. The mosfets are 90A Intersil ISL99390s, so there is plenty of room for overclocking the 5950X.
An really complete I/O panel :
The EVGA X570 DARK has a full range of connectors, which is more than enough for overclocking. One of the particularities of the card is that it has two PS/2 slots for plugging a keyboard and a mouse. You maybe asking why do we still use this type of connector in 2021 ? The answer is simply because some benchmarks perform better under Windows XP (Super Pi) and the use of non-USB peripherals greatly facilitates the installation of the OS.
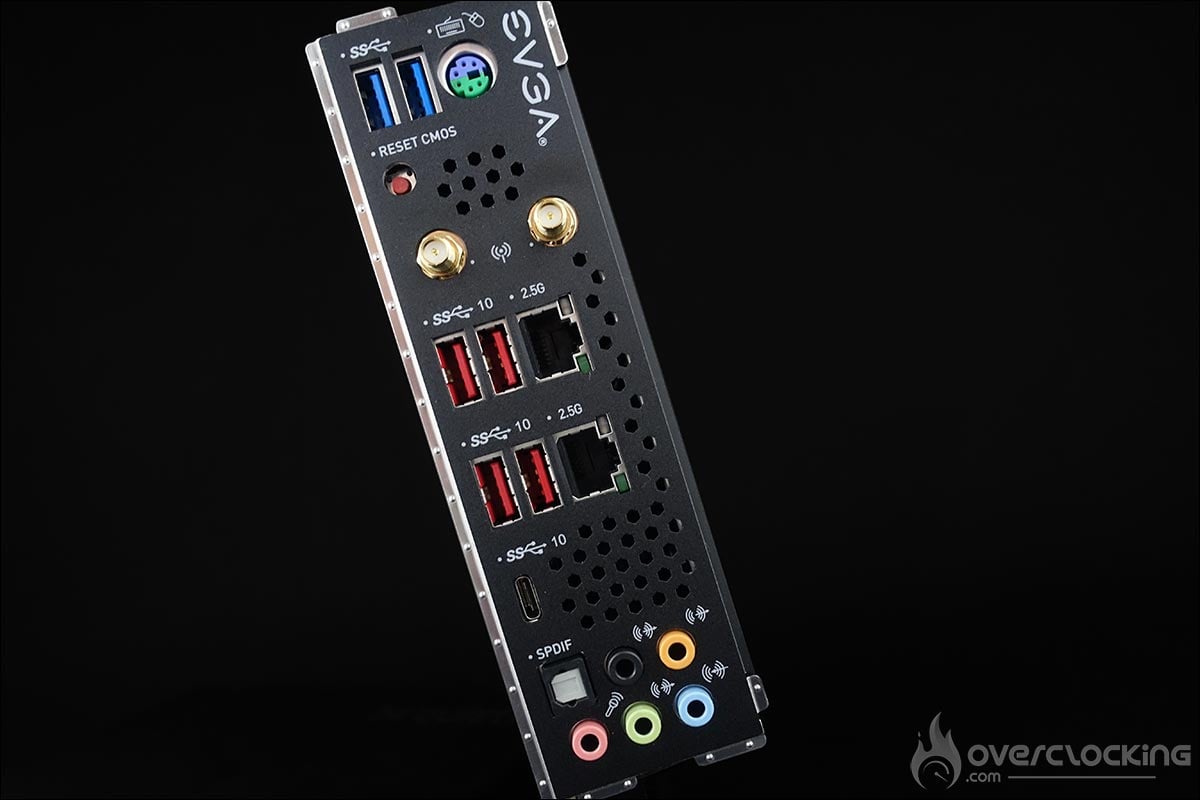
There are also two 2.5 Gigabit Ethernet controllers. As for USB, we have two USB 3.2, four USB 3.2 Gen2 and one Type-C. Finally, there are antenna mounts for dual band Wi-Fi and audio outputs. As far as the BIOS is concerned, if you are not a regular user of the brand, you might be a bit lost but that would be normal. We will try to briefly go through it, because there is so much to say, so that we can highlight the main different features. Personally, I really like the UI structure chosen by EVGA, especially the memory section.
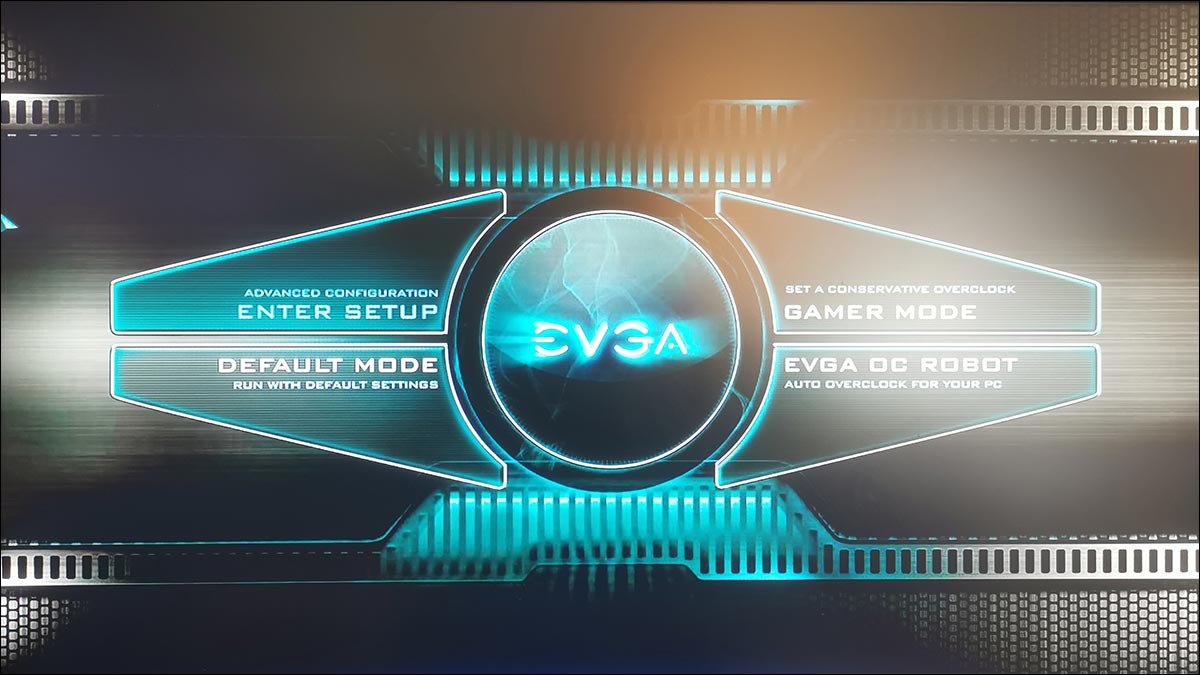
As a reminder, you can access the bios by pressing the « Del » key when booting your PC or during a Clear CMOS. I’m sorry, but I couldn’t take any screenshots with the F12 key. It never choose my USB stick to save them. As you can see, you end up with a screen that will offer you four choices:
- Enter Setup (advanced configuration) which allows you to access all the settings. It is of course in this part that you will spend the most time.
- Default Mode to restore your configuration with the default settings.
- Gamer Mode, which in our case, proposes us to overclock our processor to 4.5 GHz.
- EVGA OC ROBOT (auto overclock) which will try to push your processor to the maximum by tweaking the voltage and monitoring the temperature.
We will come back to these different modes in the overclocking section.
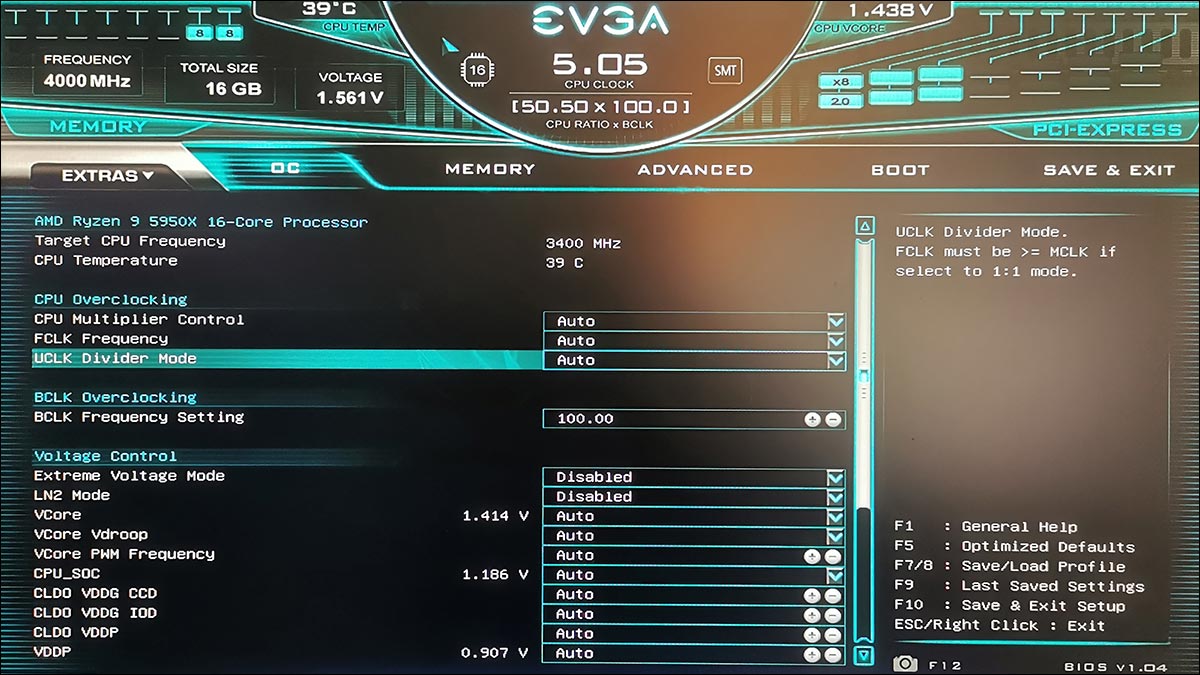
The different tabs :
In the upper left corner is the « EXTRAS » tab. Here you can check the stability of your overclocking and activate the « OC ROBOT ». You can also use the eight overclocking profiles for memory. Finally, you can update your BIOS by selecting the BIOS to flash on your USB stick. A vertical USB port is located directly on the PCB of your X570 DARK.


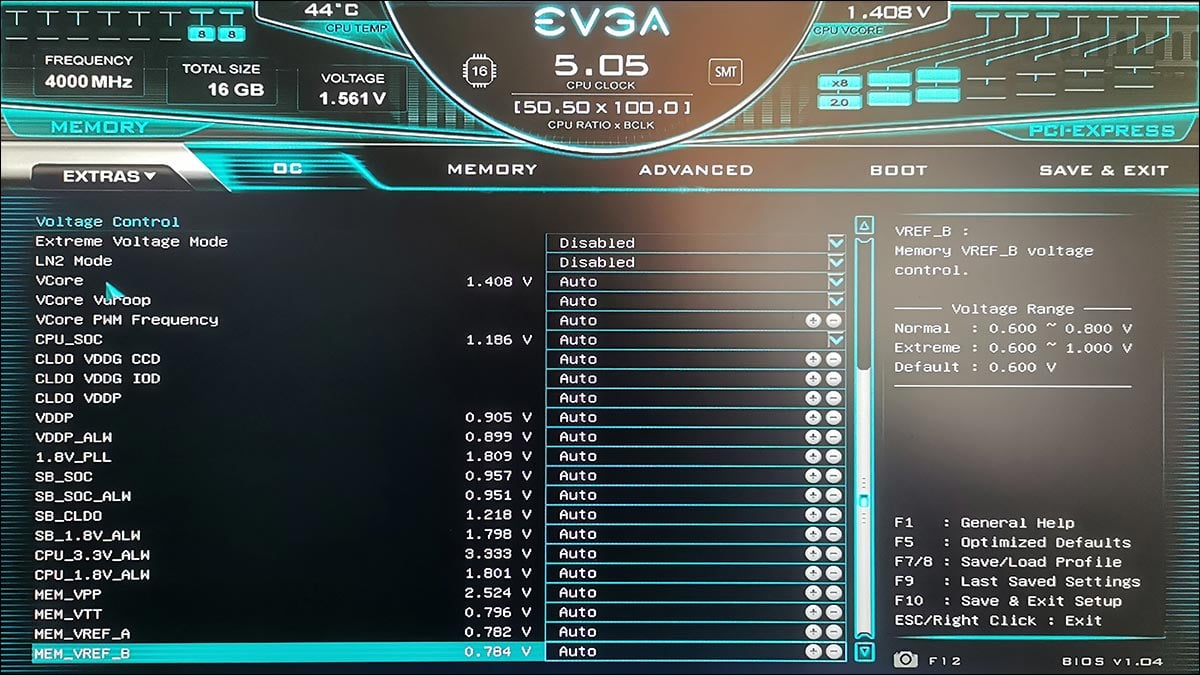
The « OC » tab will focus on the various options for CPU control and voltages. It is also in this section that you can set the « Load Line Calibration » which EVGA named « VCore Vdroop ». It is reported here as a percentage. On our side, we opted for the least Vdroop by choosing 25%.
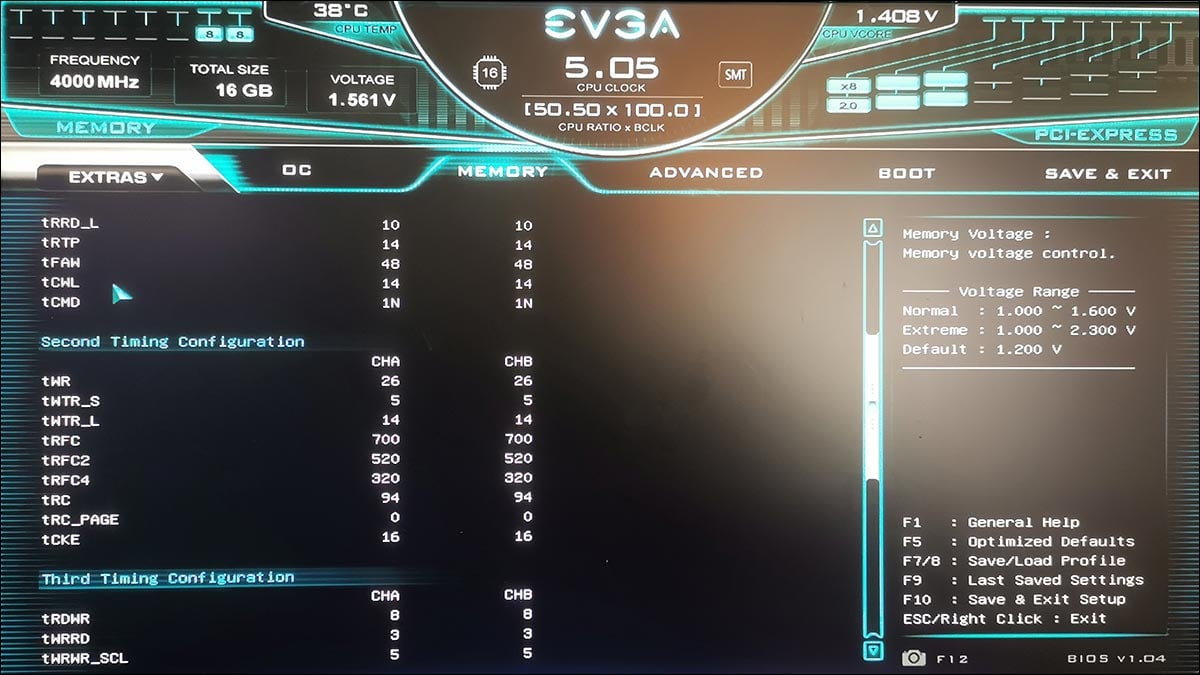
Next, let’s move on to « Memory ». Here you will be able to activate your XMP profile. As we keep reminding you, it is essential to activate the XMP (Intel) or DOCP (AMD) profile of your memory kit. Of course you have the opportunity to modify the timings and subtimings manually. Don’t hesitate to ask for advice on our forum and discord if you encounter any problems when setting up your BIOS.

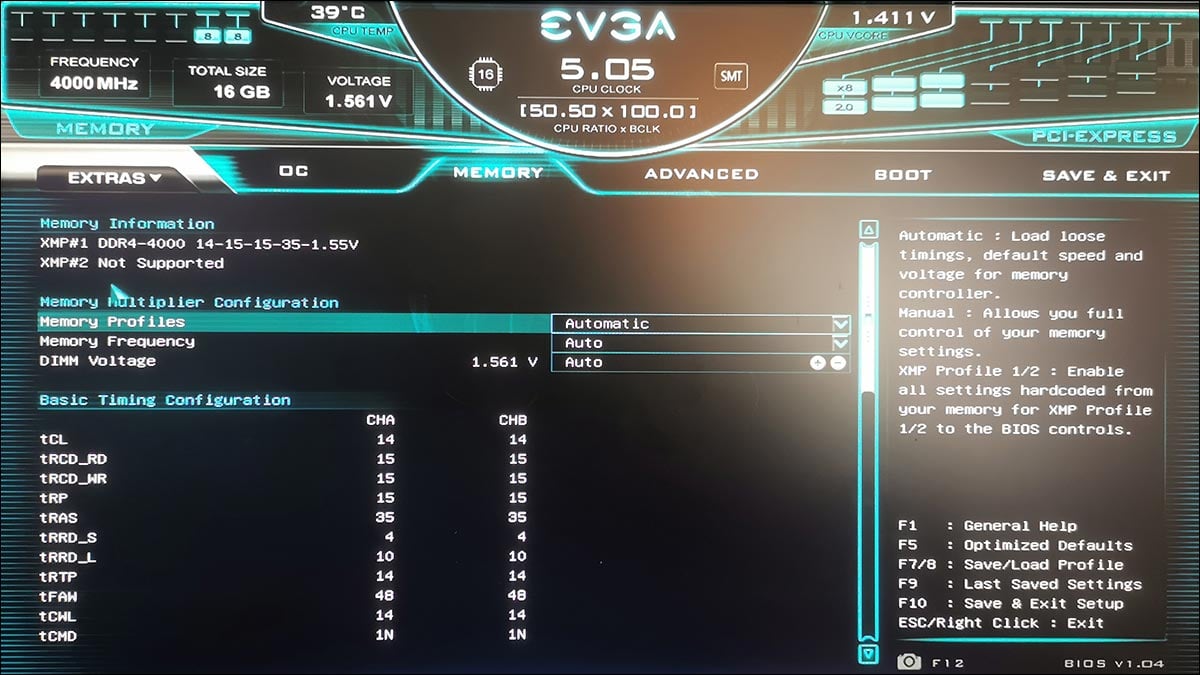
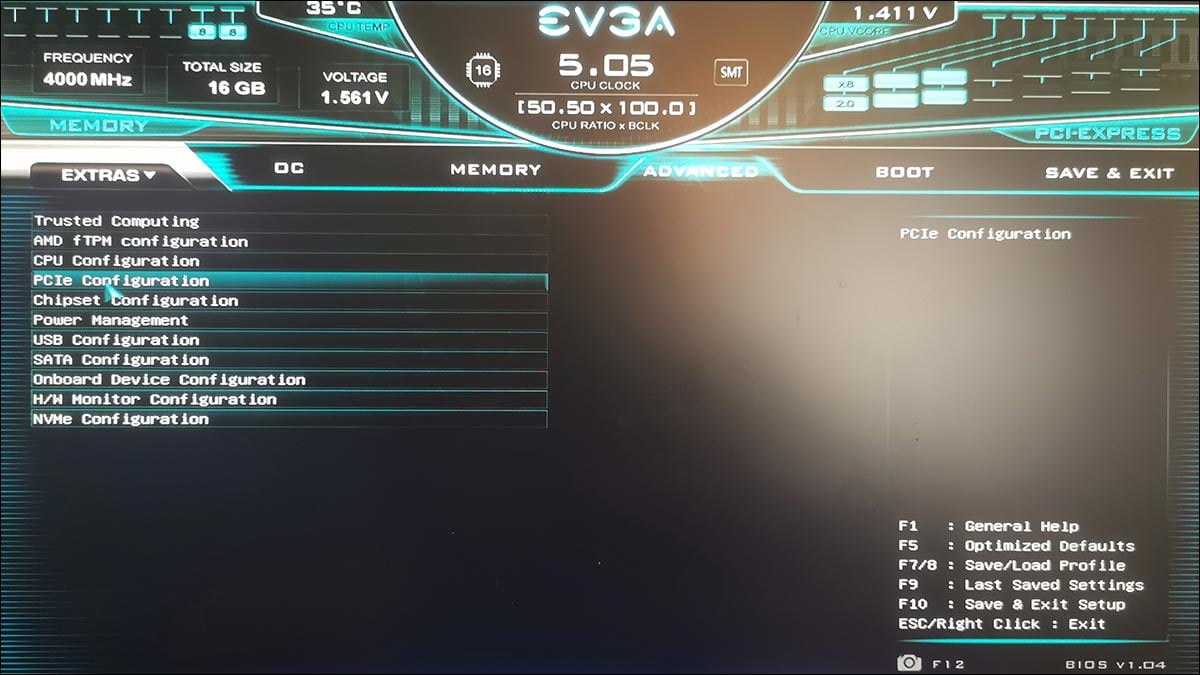
Another important element is to regularly update your BIOS to avoid incompatibility issues with your memory kit for example. The last three sections will allow you to optimise certain settings specific to AMD processors.
Finally, saving profiles is highly recommended when testing. It saves time. You can also save them on a USB stick and/or share them with another user with the same motherboard.

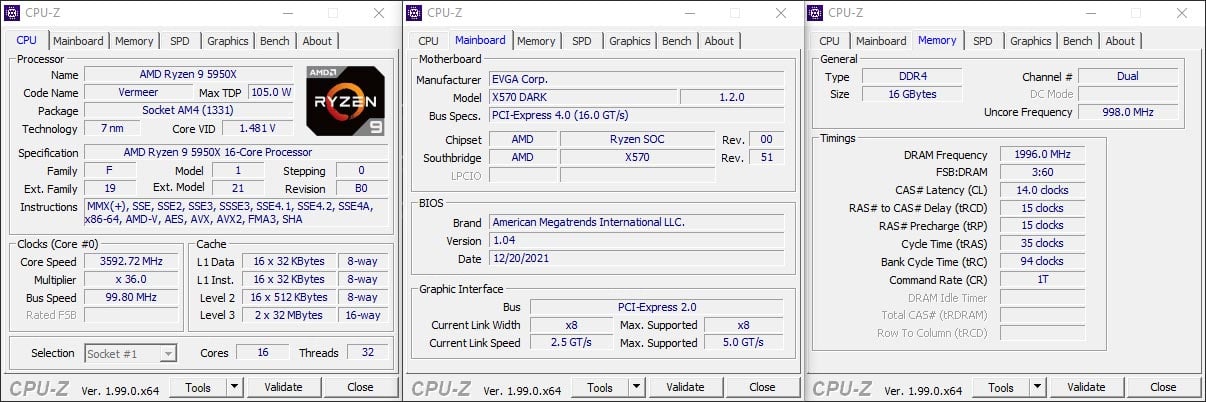
Now that we’ve had a look at the BIOS, it’s time to get our hands on it and overclock our Ryzen 9 5950X and various memory kits. Here is the configuration that will be used for the test of this ROG Crosshair VIII Extreme:
- Motherboard : EVGA X570 DARK (BIOS 1.04)
- Processor : AMD Ryzen 9 5950X
- Memory : 16 GB GSKILL Tridend Z Royal Elite 4000 MHz CL14-15-15-35 (FCLK 1800)
- Graphics Card : MSI GT 710
- Cooling system : Optimus waterblock + 480 mm EK radiator
- SSD : Seagate FireCuda 520 1 TB Gen4
- Power supply: Super Flower Platinum 1600 watts
- Operating system : Windows 10 64-bit
- Display : Asus PG27UQ
A quick tour through CPU-Z to make sure everything is in order before we start our tests.
Let’s start the overclock of our Ryzen 9 5950X, of our different memory kits on this EVGA X570 DARK. We will start the overclock by using the two profiles available in the BIOS. These are the gamer profile and the OC Robot profile. The idea is to compare the performance obtained against the stock processor and then against our manual overclock.
1. Stock performance :
As we have already said, before you overclock any component, the most important thing is to have reference scores. Therefore we took a series of readings (score, voltage, power consumption and temperature) during both Cinebench R15 and Cinebench R23 benchmarks. Here is what we got with the CPU at stock and with our XMP profile enabled.

During both benchmarks we found that the frequency on all 16 cores stabilized at around 4415 MHz. We will compare these results with the different BIOS profiles and our manual overclock.
2. Gamer Mode profile :
On the BIOS home screen, you can choose what is called « Gamer Mode ». You have to agree to a message saying that the CPU will go up to 4500 MHz and the computer will reboot automatically. The only downside, as with all automatic overclock, is that the memory kit is not configured correctly. So you will have to remember to do it manually after rebooting.

The score increases very slightly, which is quite logical since we go from 4415 MHz to 4500 MHz. On the other hand, the temperature has taken a hit and finally the stock profile is perhaps more interesting given the low gain.
3. EVGA OC Robot profile :
As far as the « OC ROBOT » is concerned, the test is quite fast as it « only » takes a minute. The software starts the test at 4000 MHz and finally settles at 4600 MHz at 1.25 volts. If you are happy with this, just confirm and the PC will automatically reboot.

In the end, the good news is that this automatic overclock is quite safe. The chosen voltage is not exaggerated and the temperatures remain good. The score increases even more and is more interesting here. Compared to the « Gamer Mode » profile, we have gained another 100 MHz.
4. Manual overclock :
Having already tested this Ryzen 9 5950X on other X570 motherboards, I know what to expect. I therefore opted for a frequency of 4800 MHz, a Vdroop of 25% and a BIOS voltage of 1.25 volts.
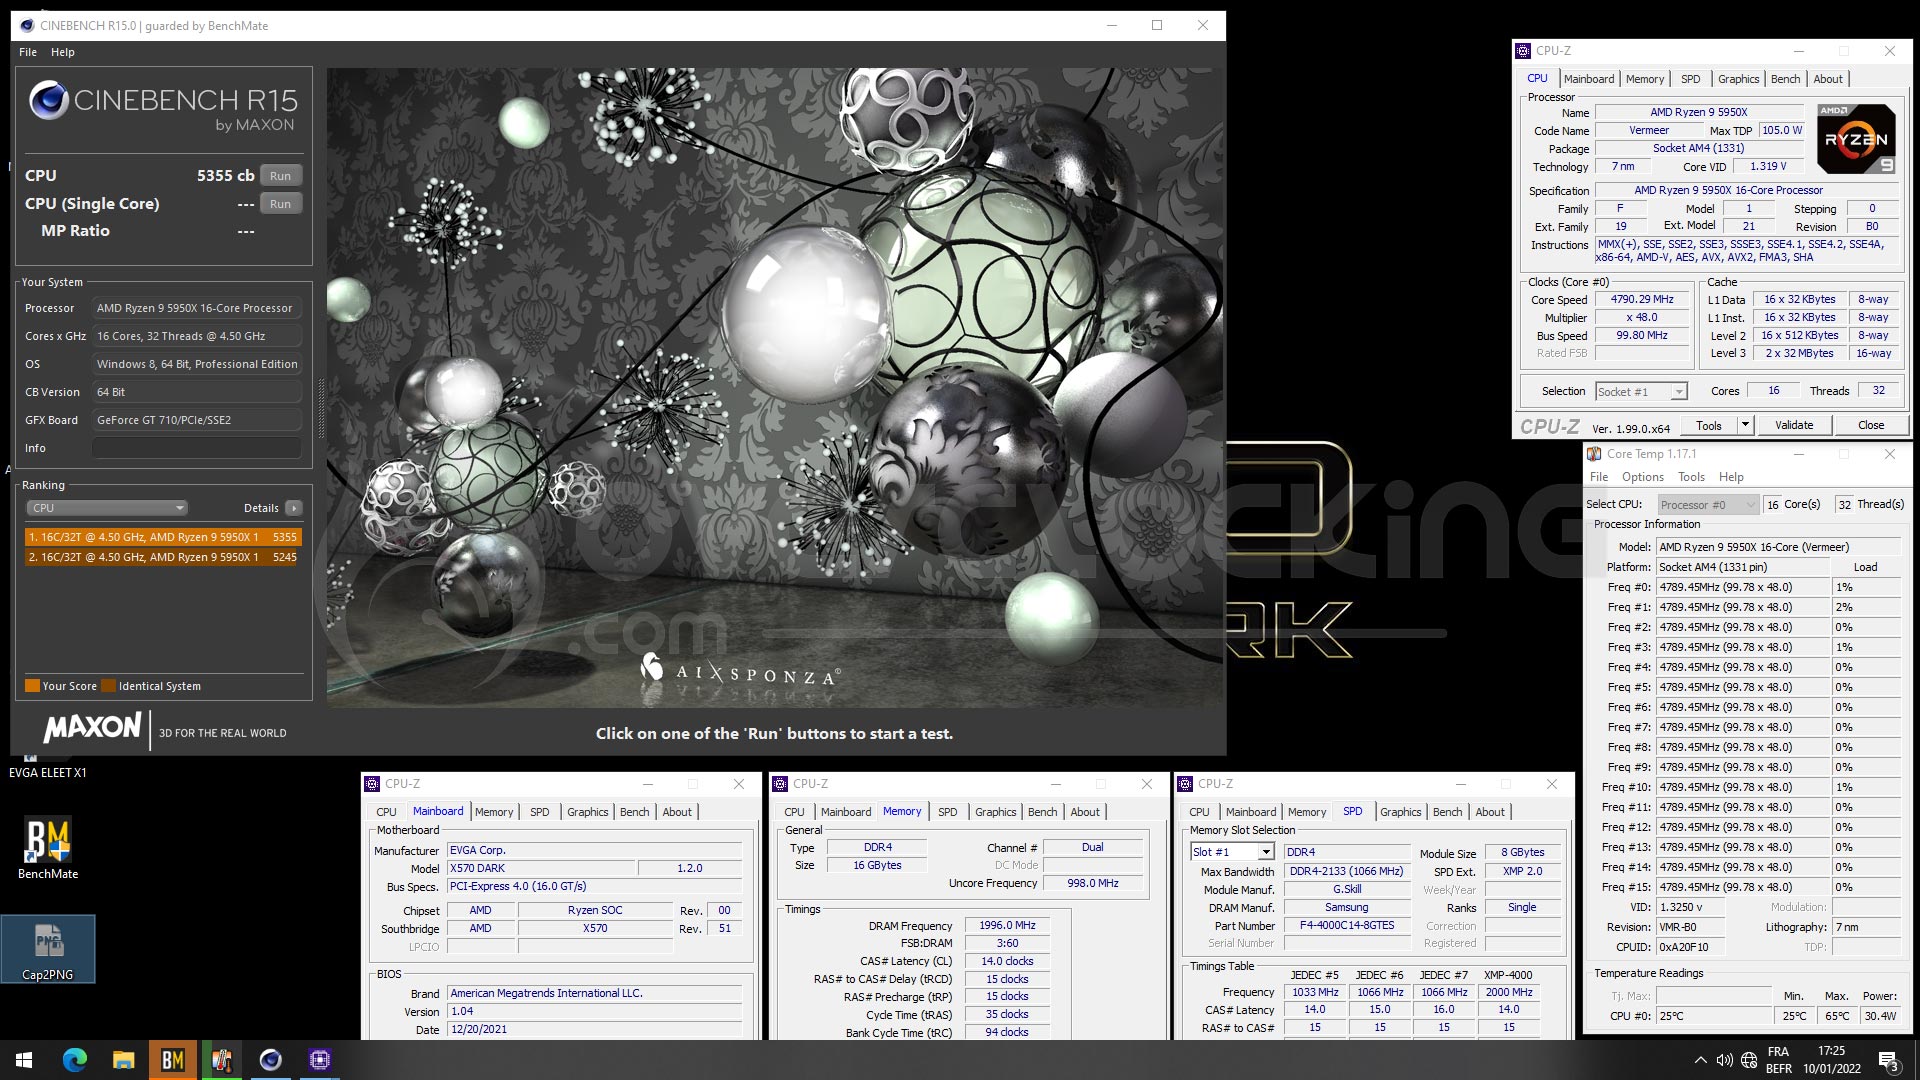
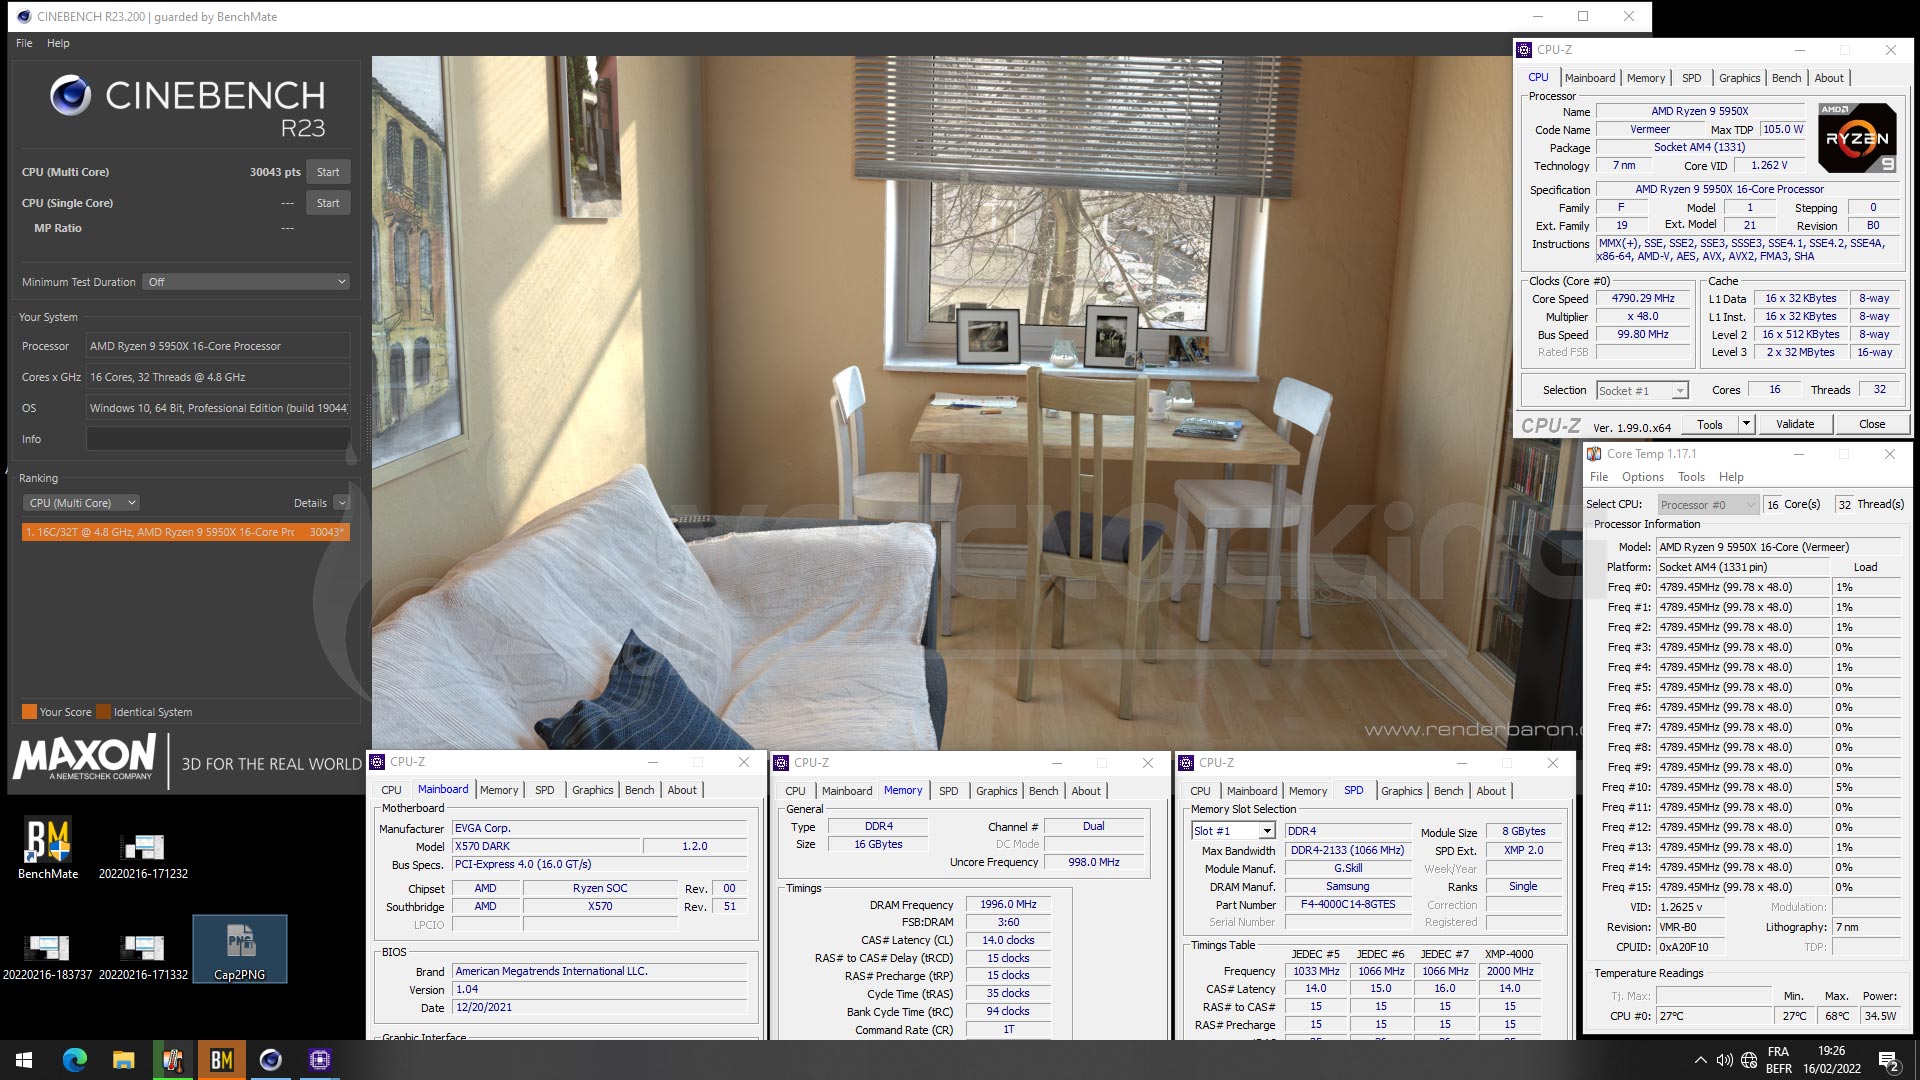
Our Ryzen 9 5950X manages to reach 4.7 GHz with a voltage of 1.19 volts without a flinch. We are quite lucky here, as this chip performs very well and is very docile in terms of overclocking. To get Cinebench R15 to 4.8 GHz, it needs 1.21 volts and 1.22 volts for Cinebench R23.

We will test this configuration in two weeks under LN2. Let’s now move on to the overclock of our memory kits. If you know of our website and overclocking in general, you know that modifying the settings of a memory kit is not the easiest part. In order to carry out our overclocking tests, we chose our G.SKill Trident Z Royal Elite 4000 MHz C14 kit. This is a kit with B-Die chips and should be the most suitable for overclocking.
Profiles within the BIOS :
There are several profiles in the BIOS of our EVGA X570 DARK that can be used to scrape a few more points in the benchmarks. Beware, some profiles require voltages close to 2.0 volts and should therefore be used with caution and full knowledge. If you are a beginner, we advise you to stay on the « Daily » profiles. 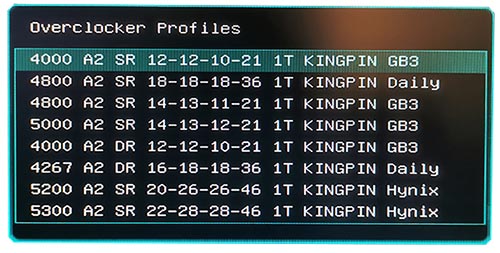 As a reminder, the meaning of « SR » is single-rank and « DR » is dual-rank. This means that either the memory chips are all on the same side of the PCB or they are spread over both sides. Most 2 x 8 kits are SR and some 2 x 16 kits are DR.
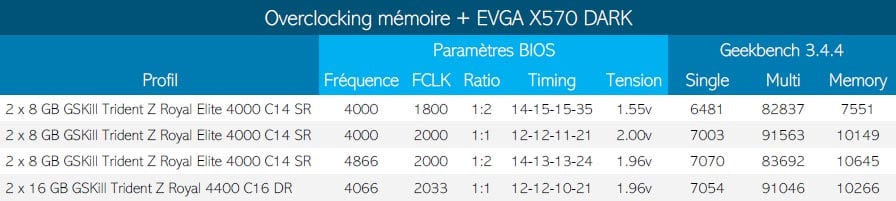
Before sharing our performance results with you, please note that it took us a long time to find stable profiles in the benchmarks. But on the other hand, it is with thanks to EVGA’s DARK motherboard that we obtained overall best performance. The profiles available in the BIOS were a good base, but we had to modify them to be fully stable.
1. Stock performance :
Just like with the CPU overclock, it is important to have a reference score to be able to compare and evaluate the performance gains. We will run a Geekbench 3 at 4.5 GHz with the XMP profile loaded. Note that our memory kit is already performing well with its 4000 MHz C14 profile !

2. The 4000 MHz C12 (SR) custom profile:
The first profile we tested is based on the one proposed in the BIOS. In order to do achieve this, we raised the frequency of the FCLK to 2000 MHz with a 1:1 ratio. This is something that greatly influences the score.
On this profile we had to slightly modify the timings to be stable. So it’s a base but we had to work on it. The performances take off as you can see on the summary table right below.

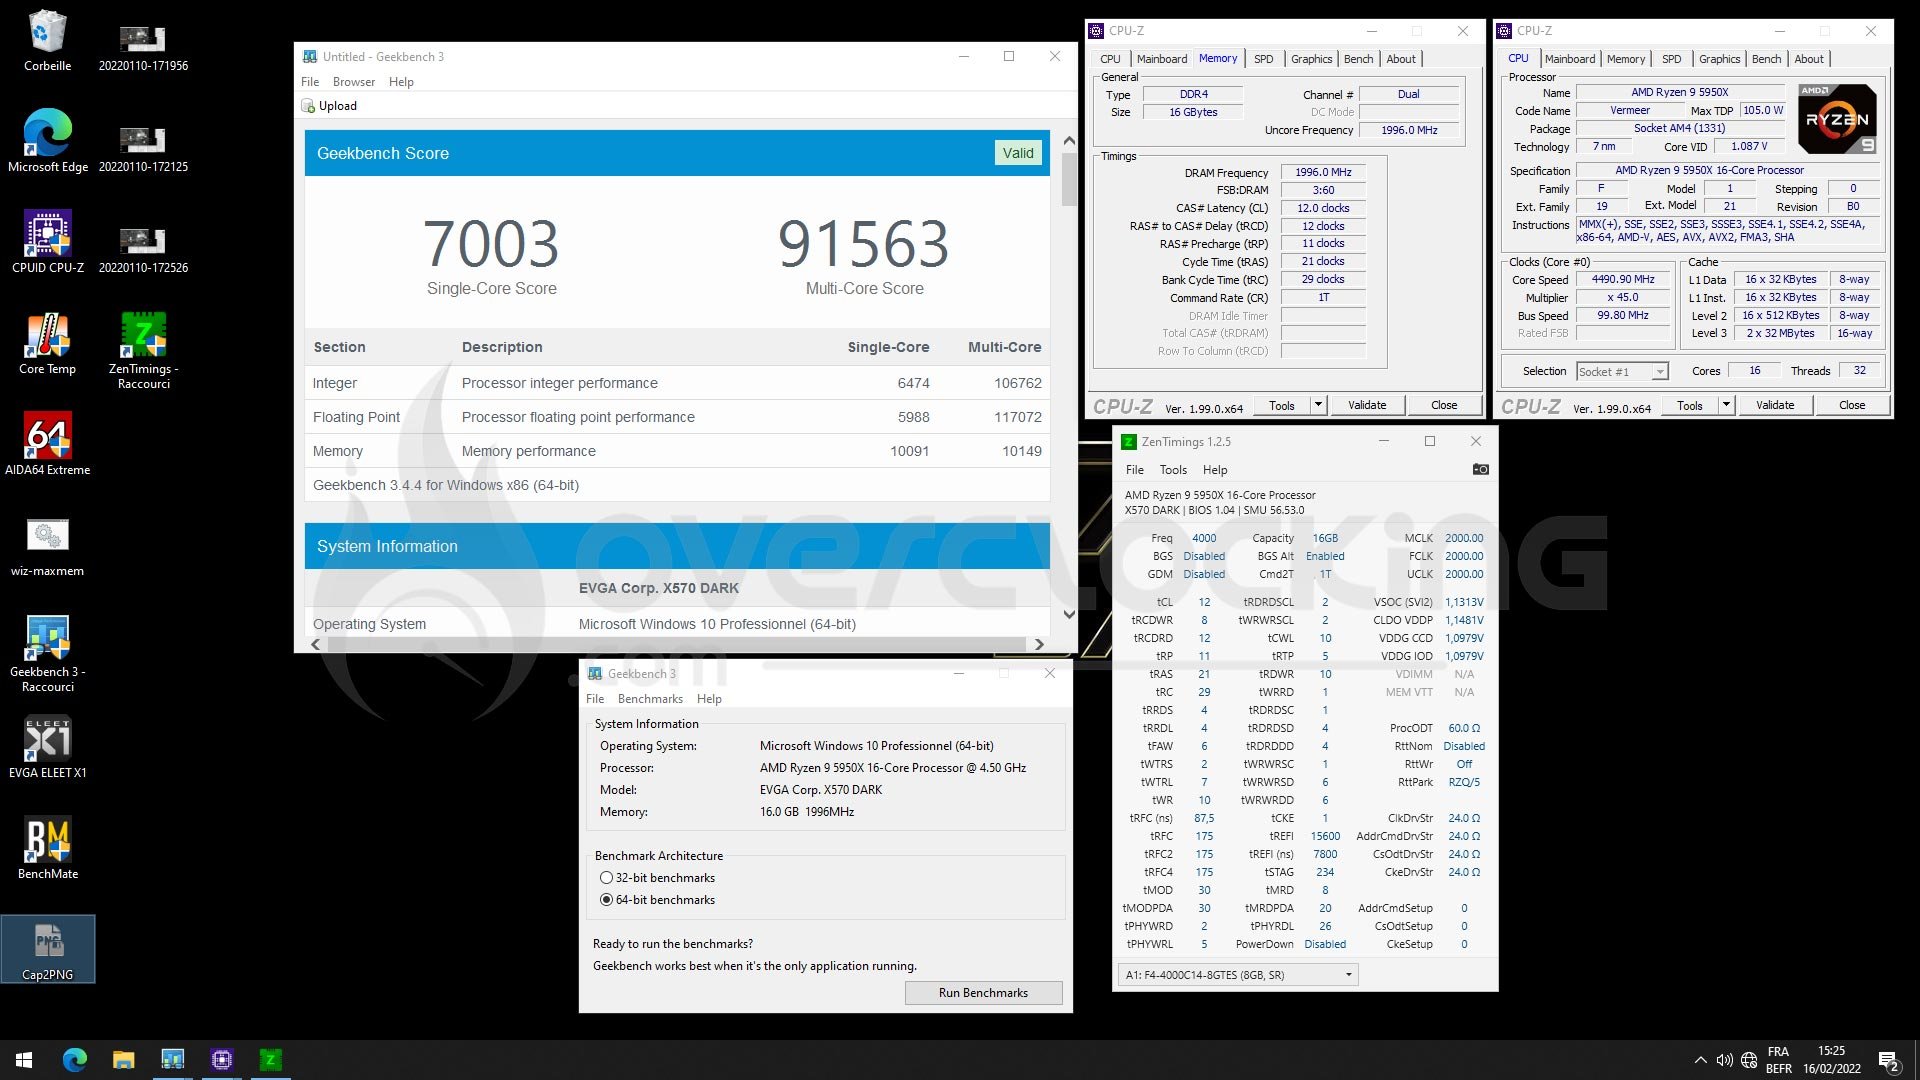
3. The 4866 MHz C14 (SR) custom profile:
This is the profile that took us the longest to set. To give you an idea, I must have spent something like 8 hours, just to get something satisfying. This is the profile that gave us the highest memory score with 10645 points.
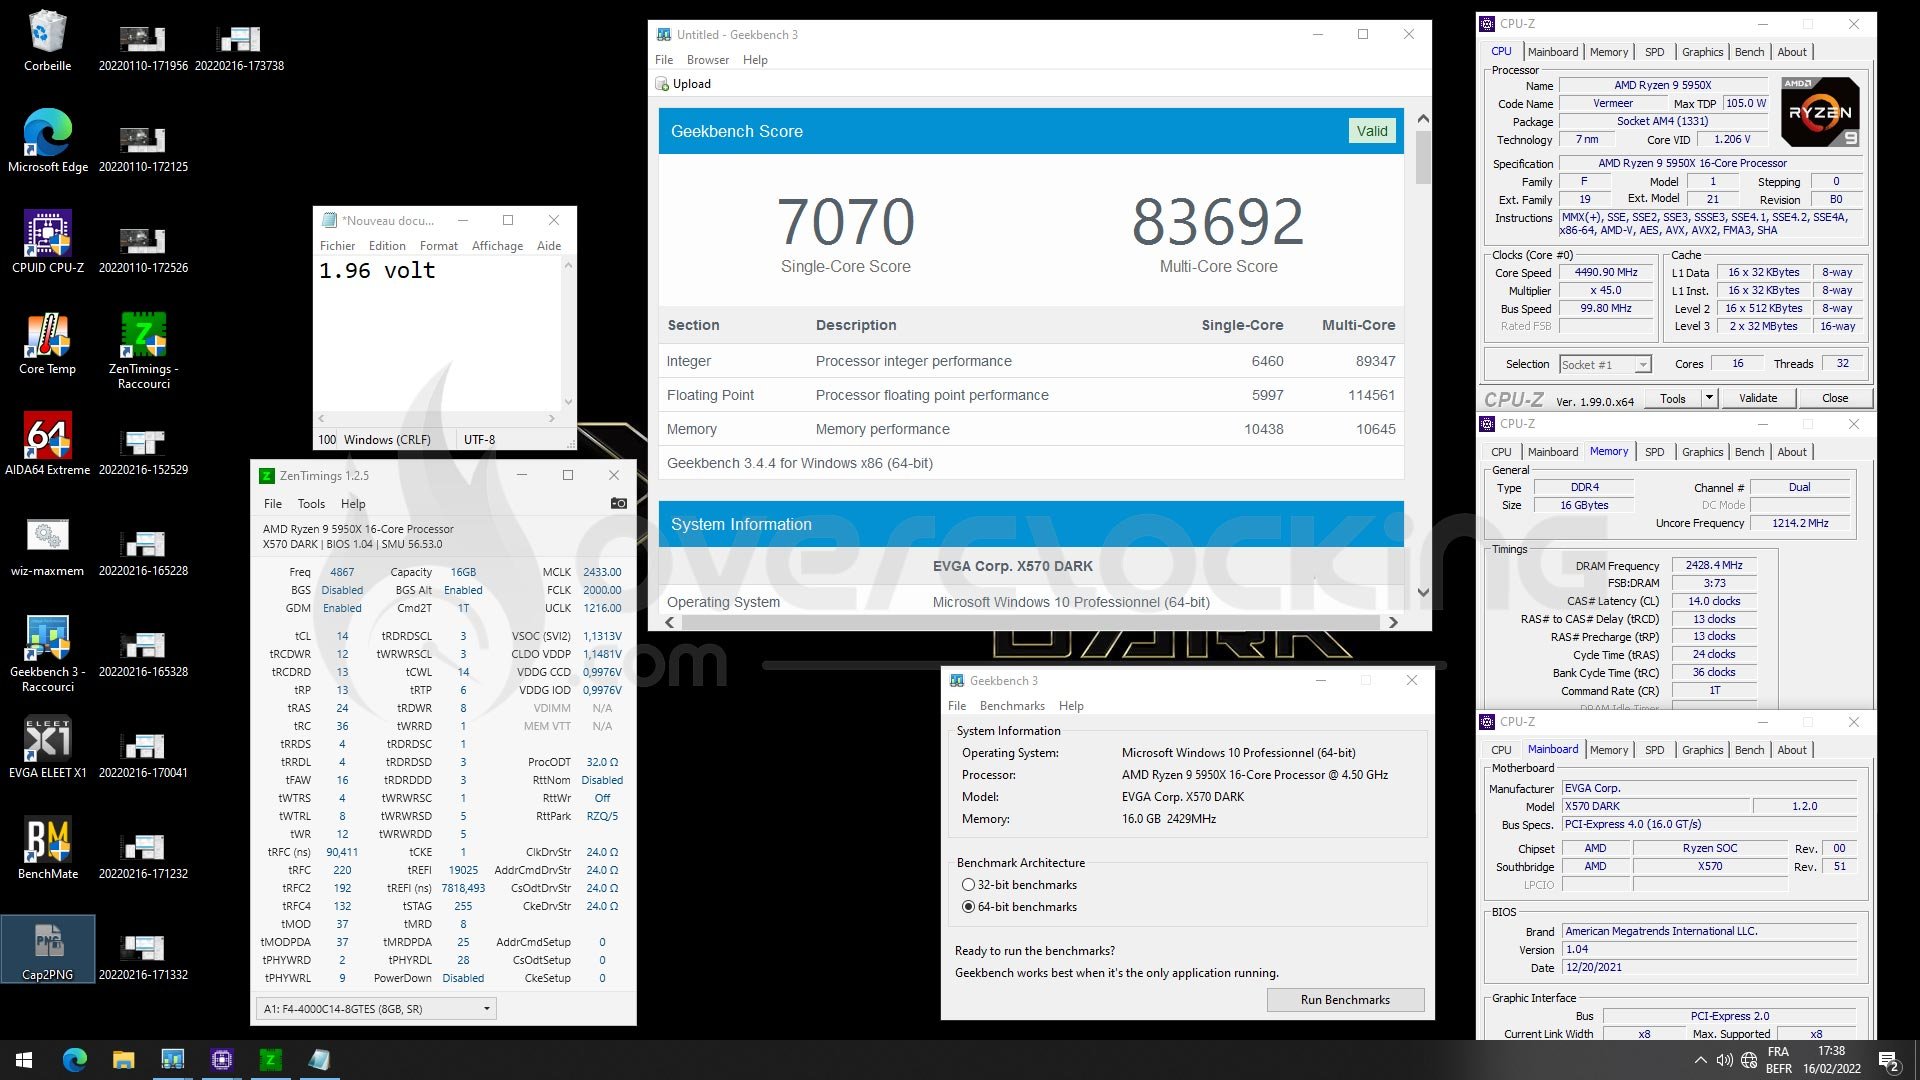
The Geekbench 3 single score in particular benefits from this profile. Nice surprise also regarding the voltage, since only 1.96 volts were needed.

4. The 4000 MHz C12 profile in Dual Rank :
Now let’s change our memory kit, but we will keep using some G.Skill memory. We wanted to test the performance of our G.Skill Trident Z Royal 4000 MHz CL16 in dual rank. And here, no problem, once the profile is loaded, everything boots without any problem. We were also able to push the frequency to 4066 MHz with 2033 MHz on the FCLK.
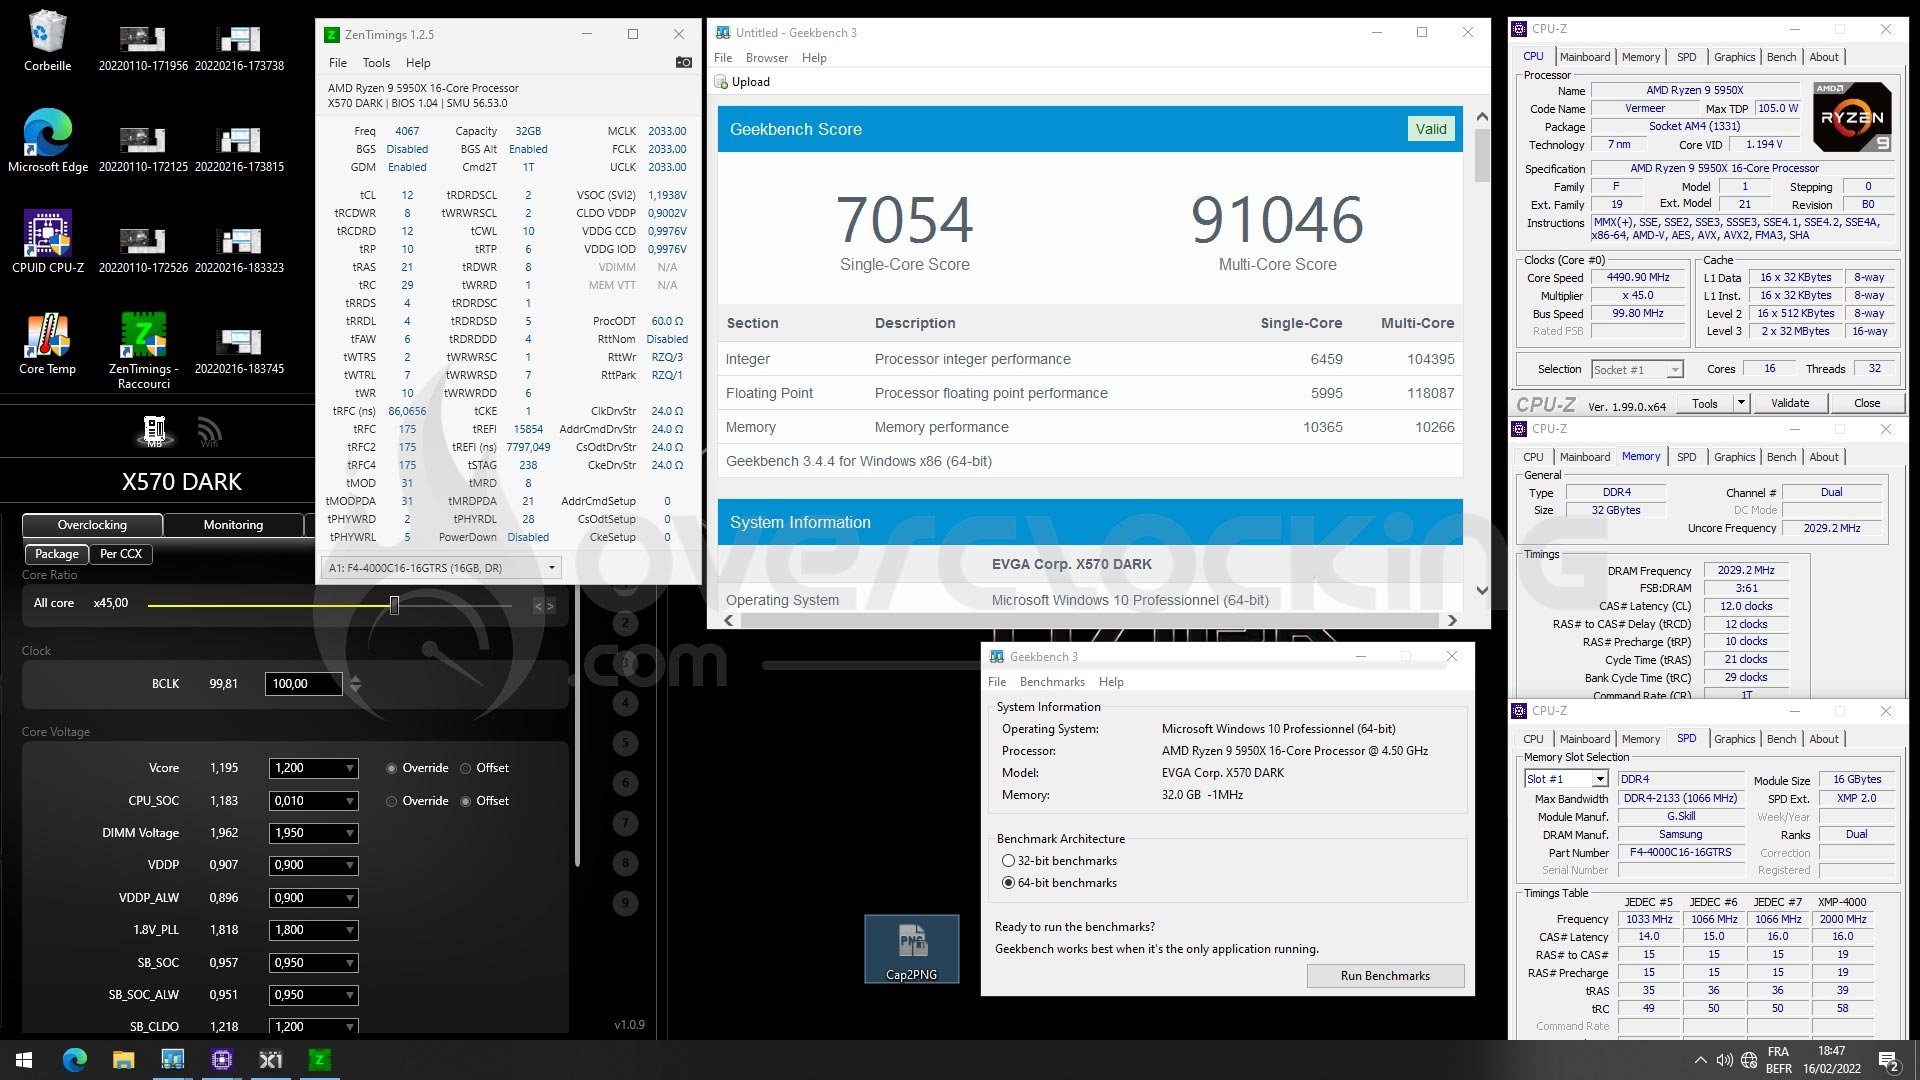
The performance is again excellent as our table shows.
Whew, well that took a lot of work ! In the end, it’s the first time I get such good results on the X570 chipset with this Ryzen 9 5950X. The profiles offered by EVGA are very performant but you’ll have to work on them a little. You’ll be lucky if you manage to boot on the first try. One final word to add that I couldn’t use my 5066 MHz G.Skill kit with Hynix chips.
Now that we’ve had a look at this motherboard, it’s time to conclude. Here we are at the end of this article dedicated to the EVGA X570 DARK motherboard. Let’s start with our personal feeling. For us, this motherboard is not meant for everyone. Even though it has certain memory profiles, other XOC cards are easier to use than the EVGA X570 DARK. Personally, I think it already requires a certain level of knowledge to be able to take advantage of its potential. I have never spent so much time on memory overclocking for example.
But on the other hand, it is the one that gave me the best performance in this field. EVGA and of course KingPiN have done an excellent job with this motherboard. Remember that it has been a long time since we have had a board with a different chipset other than Intel.
So this is a goal that has been fully met for this first test. We really welcome this AM4 version in EVGA’s product lineup and we have finger crossed when it’s time for AM5. This new of the « DARK » series motherboard has really gained in maturity.
It’s a motherboard that removes the unnecessary features which an overclocker has no use for, such as RGB, OLED screen, a multitude of M2 slots, etc. In short, this EVGA X570 DARK goes to straight to what’s essential and that’s what we like about it !
EVGA X570 DARK :
We liked :
- An extensive connectivity
- A rich and unique bundle (bench table , PCB reproduction, etc.)
- A solid power stage
- Its overclocking potential thanks to various BIOS settings
- The possibility to use high capacity and high frequency memory
- LN2 mode for liquid nitrogen tests
- Tools on the PCB to make overclocking more convinient
- Automatic overclock features with OC Robot
- Easy voltage reading thanks to ProbeIt
- A sober design where the RGB backlight does not spoil the motherboard
We would have liked :
- As always, better visibility and availability in Europe
- The release of « beta » BIOS for all overclockering enthusiasts
- The double penalty for European buyers, price + customs fees
With this X570 DARK version, EVGA is finally putting its know-how at the service of the AMD chipset and the AM4 socket. Even if the latter is slowly coming to the end of its life, it’s a real pleasure to see EVGA answering the call of its community which has been asking for a similar model for several years. And if that wasn’t enough, aesthetically the board is a pure delight.
Getting the hand-on is not all obvious. Good knowledge in overclocking is, according to me, necessary in order to take advantage of its full potential. The card has proven to be very efficient and this is the first time we can fully take that much advantage of our B-Die memory kits. So please EVGA gentlemen, don’t leave us out any longer and come back to Europe. Next goal, is to get our hands on a sample of the EVGA Z690 DARK !
The post Review: EVGA X570 DARK appeared first on Overclocking.com.