

Samsung has shifted the Galaxy S20 series up a gear. We’ve had an expansion at the top end with the S20 Ultra – a super-spec phone, sitting alongside the Galaxy S20 and the Galaxy S20+ – with the S20 FE at the more affordable end.
But there’s a lot to get to grips with: Samsung offers more features than anyone else out of the box, so it’s easy to overlook or never discover some of the hidden gems. We’ve torn through the phones to pull together a detailed guide of everything that your S20 device will do and how to master it. With One UI 3.0 and Android 11 update there are changes – and all the S20 devices should now have the new software.
Samsung Galaxy S20 top tip: If you’re struggling to find things, swipe down the quick settings and you’ll find a search option at the top. Just start typing your search query and this universally searches your phone returning settings, apps, contacts, calendar appointments. It’s really powerful. You can also launch it by bringing up the apps tray, and tapping the finder bar at the top.
How to power off or restart the Samsung Galaxy S20: Samsung has reconfigured the side key on the S20, so a long press will launch Bixby by default, rather than power off the device like (almost) every other phone on the planet. To power off the phone, slide down the quick settings pane and tap the power icon there. Then you can turn off the phone. On that screen is also a shortcut to the side key settings so you can change the function if you need to.
Samsung Galaxy S20 FE, S20+, S20 Ultra home screen tips
The home screen part of the launcher. It’s where you unlock your phone to, the place for app shortcuts and widgets and it’s where you return when you’re finished doing something in an app. Now supporting Android 11, you can also choose your navigation style.
Turn on Android 11 gesture navigation: By default the S20 will offer Samsung’s three icons for navigation. If you want to switch to Android 11’s gestures open settings > display > navigation bar. Here you have the option for buttons or swipe gestures. You can tap on “more options” to customise, but with swipe gestures your phone will then let you swipe in from the side to go back, up from the bottom to go home, just like other Android devices.
Customise the navigation bar: If you’re sticking with on-screen navigation controls, you can customise the order. Head into settings > display > navigation bar and you can change the the order of buttons.
Edit your home screen: A long press on the wallpaper on any home screen lets you edit the wallpaper, themes, widgets, pages or further settings. This area will also let you add or delete complete screens, so if you want a widgets page, this is where you go to add it.
Get more on your home screen: You can change the size of the screen grid on which your shortcuts and widgets sit, depending on how dense you want the home screen to be. Long press on the wallpaper and select “home screen settings”. Select 4×5 to keep things fairly clear, 4×6, 5×5 or 5×6 to cram more in. We tend to use 5×6, otherwise things look too big, but this comes down to personal preference.
Resize widgets: Many widgets are resizable. A long press selects them. When you lift your finger, you can drag the blue box that appears and resize your widget. You can even resize or reposition the Google search box.
Customise the status bar: This is the information that sits at the top of the screen. Head into settings > notifications > status bar and you have some options. You can limit to three notification icons, or you can have all. You can also turn on or off the battery percentage.
Allow your home page to work in landscape: This option will allow the home screen and apps tray, settings, etc, to display in landscape. It’s off by default, but you can turn it on in settings > home screen settings > rotate to landscape mode. Switch this on to get rotation to landscape, so if you’re switching from gaming to movie watching you don’t have to keep returning to portrait.
Create a folder: Simply drag one app on top of another on the home screen and a folder is created. To remove an app from a folder, open the folder and long press an app and you’ll get a pop-up menu which lets you remove that app. To add apps, either drag them into a folder, or hit the “+” button within the folder to add apps.
Change a folder colour or name: Open a folder and enter the name you want at the top. If you don’t want a name, leave it blank. To change the folder background colour, tap the dot in the right-hand corner and select a new colour – including completely custom colours.
Delete a folder: If you no longer want a folder, press and hold and then hit remove from home. The folder and the app shortcuts will vanish.
Access Samsung Daily from the home screen: To the left of the home screen, Samsung now has something called Samsung Daily, which replaces Bixby Home. You can swipe to it and it will feed you news, sport, weather and stuff from the Galaxy Store, along with additions from some services you might use like Spotify. You can change what it shows you by opening the menu top right and selecting the cards you want to see.
Turn off Samsung Daily: If you don’t want Samsung Daily (and we don’t blame you), long press on the wallpaper and you’ll enter the home screen controls. Swipe to the right and the Samsung Daily panel will appear. There’s a toggle switch in the top right-hand corner. If you don’t want the Samsung Daily panel on your home screen, just turn this off. Sadly, you can’t change it to something else without changing the launcher.
Change launcher (home screen): You can easily change the experience of your phone with a different launcher, such as Nova, if you want more customisation. Just download the launcher from Play Store and install it. When you press the home button you’ll be given a choice to select a new default launcher. Or, head into settings > apps and hit the menu button top right. Select “default apps” and then “home app”. You’ll see your choice of launchers there, pick the one you want. Note: if you’re using Android 10/11’s gesture navigation, this isn’t supported by all third-party launchers, so you might have to revert to using three button controls.
Show app suggestions in recent apps: When you tap the recent apps button, or slowly swipe up if you’re using Android 11 gestures, you’ll get thumbnails of your recent app pages, but also a line of suggested apps across the bottom. These are based on what the Galaxy S20 thinks you might want based on recently used apps. If you don’t want want this, then open the menu top right in the search bar and turn off “suggested apps”.
Pop-out conversations in a separate window: Remember Facebook Chat Heads? Samsung can do that with messaging services across the Galaxy S20, popping out the conversation into a floating button so you can respond without switching apps – as long as the app supports multi window use. It’s called “smart pop-up view” and you can find it in settings > advanced features > smart pop-up view. You can toggle those apps you want to pop-up (we used to for messaging services) and then you can reply to them in a separate window. It’s off by default.
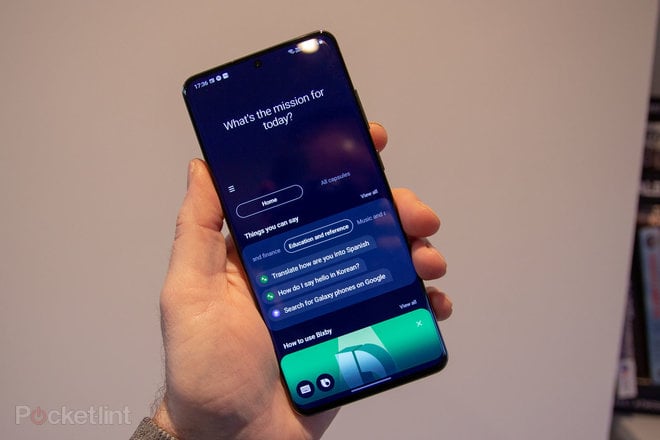
Managing your digital assistants on the Galaxy S10
Samsung pushes Bixby as its digital assistant, while as an Android phone you get Google Assistant too. Install Alexa and that becomes an option – although Samsung will also let you access Finder and Samsung Internet too via the same route. Here are all the management options for those virtual assistants.
Access Google Assistant: A long press on virtual the on-screen home button will launch Google Assistant. You can then talk to Google and get the full experience as Mountain View intended. This is synced with your Google account from sign-in, so works with anything you’ve already set-up Google Assistant to do. If you’re using Android 11 gestures, swipe diagonally in from the bottom corner to launch Assistant.
Turn on “Ok Google” hotword: The hotword to get Google to respond with just your voice is part of the Google app, but you’ll have to turn it on to get it to respond. Head into the Google app, tap “more” in the bottom right-hand corner, settings > voice > voice match > hey Google. Toggle on the option and as long as there’s a voice match linked to your account, it will recognise you speaking and give you voice control of your phone.
Disable Google Assistant/all assistants: If you don’t want Google Assistant on that home button shortcut, you can remove the ability to launch it there. Head into settings > apps and open the top right-hand menu and select default apps. Then head into “assist app”, and top on “device assistance app”. You’ll now see the option to select “none”. Tap that option and nothing will then happen with a long press on the home button or when you swipe from the corners.
Change your digital assistant to Alexa or Bixby Voice: If you’d rather launch Alexa on the home button, install the Alexa app and then, as above, switch the default device assistance app to Alexa – or Bixby Voice if you’d rather. That will then mean you have Alexa or Bixby accessed through the home screen instead of Google. The Alexa hotword will not work.
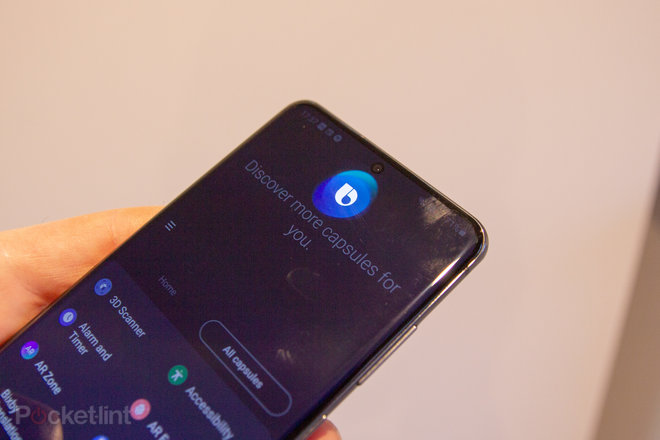
Launch Bixby Voice: If you want to use Bixby, press and hold the side button and Bixby will launch. You’ll have to be logged-in to a Samsung account use Bixby. You can also enable the “Hi Bixby” hot word. The easiest way to do this is to launch Bixby, swipe up from the bottom and then open the menu top right. This will bring up the Bixby Voice settings – tap “voice wake-up” and you’ll be able to get control with your voice. It’s off by default, so if you’re not going to use it, leave it turned off.
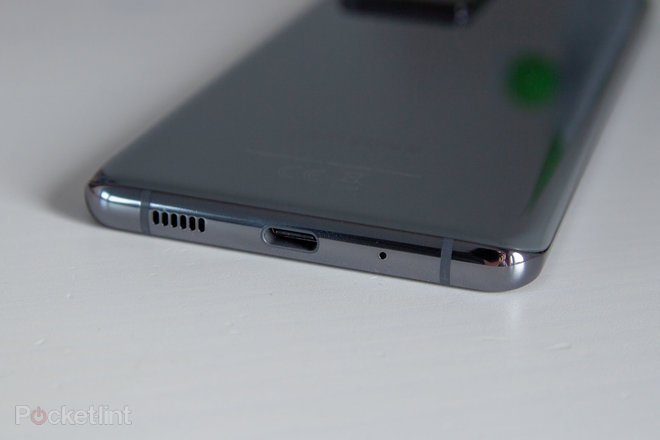
Re-assign the side button: There’s no longer a Bixby button like the last few Galaxy S models had, instead there’s just one button. Head into settings > advanced features > side key. Here you get all the options for that side key, so you can remove Bixby, you can set it to power off the phone with a long press, launch the camera with a double press or open an app of your choosing. Basically, you get to choose.
Samsung Galaxy S20 quick settings tips and tricks
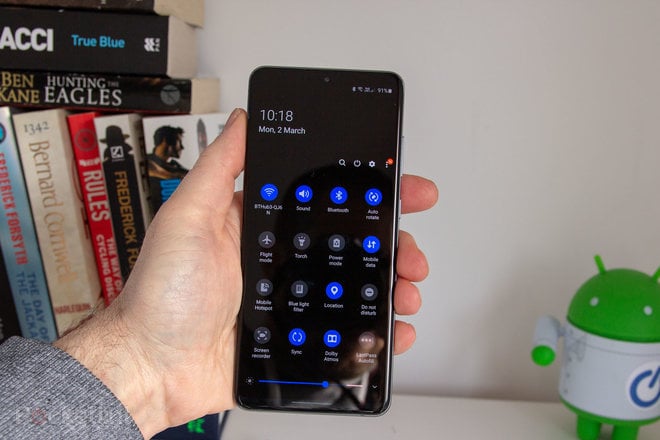
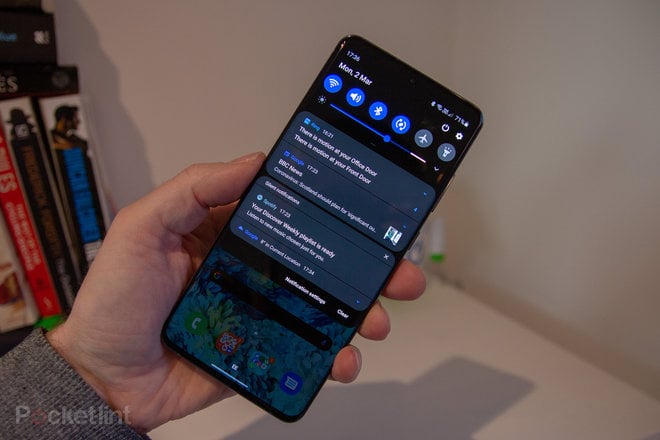
The quick settings area is part of Android where you can access the most frequent settings for your device, like power saving modes, Wi-Fi and Bluetooth. It’s a selection of shortcuts, accessed when you swipe down from the top of the screen on Samsung phone. Samsung also adds a couple of extra elements here.
Instantly access the quick settings and notifications pane from your home screen: Swipe down anywhere on the home screen and the notifications pane will slide down meaning you don’t have to stretch up to the top of the page, swipe down again and you’ll get quick settings – really useful on the bigger Galaxy S20+ and S20 Ultra phones. This is off by default, to turn it on long press on the wallpaper and select “home screen settings”, then “swipe down for notification panel”.
Edit quick settings: To change the shortcuts you see when you swipe down the notifications, swipe down twice so you see the full grid, open the menu by tapping the three dots and select “button order”. You’ll be shown the full list of options across pages. You can drag to reorder, or remove shortcuts you don’t need. Top tip: only the first six apps are shown in the compact view across the top, so make these your first settings shortcuts.
Instantly access device settings from quick settings: This is a standard Android tip, but great for accessing settings instantly. Press and hold the shortcut (for example Bluetooth) and you’ll instantly jump to the full settings menu. It’s really useful for Wi-Fi, Bluetooth, and power saving options.
Access connected devices in quick settings pane: By default you’ll find that connected devices and media is shown in the quick settings pane too. This means you can swipe down and tap through to access music you’re playing or speakers that you’re connected to. The devices option covers direct connections as well as SmartThings, so if you’re a smart home user then this is a way to get directly to those devices. You might find you don’t or need that option, so you can turn it off by opening up the quick settings and tapping the menu top right. Then tap on “quick panel layout” and toggle off “show media and devices” to remove it.
Quickly adjust the screen brightness: Samsung lets you access the brightness through the quick settings panel, just swipe it down and you’ll see the slider. If you want to adjust autobrightness, hit the down arrow at the right-hand end of the slider and it will take you straight through to those settings, where you can turn it on or off.
Samsung Galaxy S20 and S20+ app tips
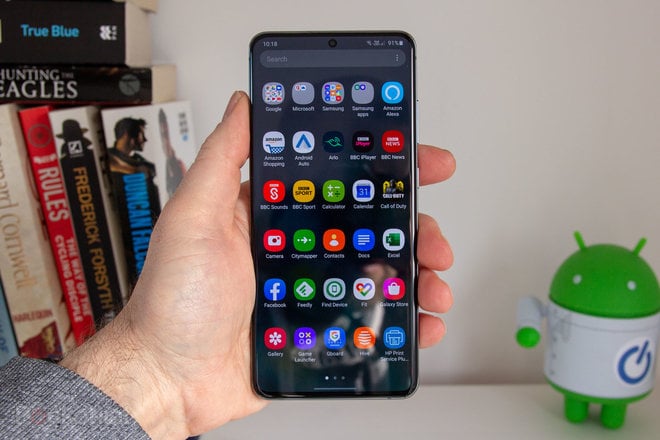
The apps tray is part of the launcher on your phone and it’s the area that your app shortcuts live.
Show all the apps on the home screen: This is a popular option for some. If you want to remove the apps tray, long press on the home screen and tap “home screen settings”. Then select “home screen layout” and you’ll see two options, “home screen only” or “home screen and apps screen”. The former removes the apps tray completely, like the iPhone.
Add or remove an apps tray button: By default there is no apps tray button and you open the apps tray with a swipe. If you want the button back head into the home screen settings as above and select “apps button”. Here you can turn it on or off.
Swipe to show or hide the apps tray: As above, the Galaxy S20 lets you view the apps tray with a swipe up. The apps pages themselves then scroll left and right. If you want to return to the home page, you don’t need to press the home button, you can just swipe up again and the apps tray vanishes.
Change the apps screen grid size: Like the home screen you can change the density of apps in the apps tray/page. As above, go into the home screen settings, and you’ll see the option for “apps screen grid”, with up to 5×6. The latter will pack more apps in.
Alphabetise your apps: In the apps tray, hit menu in the top right-hand corner, then “sort”. This will give you the option to have alphabetical order. Just tap that option and everything will drop into place.
Reorder apps: Hit the menu button in the top right-hand corner, then tap “sort”. This time, select “custom order”. You can now you can drag the apps to the position you want them in.
Create an apps tray folder: You can have a folder for apps whether you’re in custom or alphabetical order. Just press and hold an app icon and drag it over another and a folder will be created. You can then edit the name and colour as you wish.
Search your entire phone with Finder: At the top of the apps screen is a search bar for Finder. This will return search results for apps you have installed, but can also search content in apps, like Netflix, Play Store, messages, reminder, calendar and a whole lot more. Tap the Finder bar in the apps tray, then hit the menu button on the right then “manage apps” and you can choose where it searches.
Manage the apps that Finder searches: If Finder returns information you don’t want, you might want to turn off some of the apps it accesses. Open the apps tray and tap the menu top right. Then select Finder settings > choose apps to search in. This will let you turn off the apps you don’t want results from.
Let Finder give you app suggestions: When you tap on the Finder at the top of the apps tray, you’ll immediately get suggestions based on recent apps you’ve used. If you don’t want this, head into the Finder settings as above, and you can turn it off under “show suggested apps”.
Uninstall apps: You can uninstall directly from an app icon. Just long press on the app and a pop-up menu will give you the option to uninstall an app. If it’s a core app (which you can’t uninstall) the same option will let you disable an app.
Add apps to your home screen: Press and hold on the app shortcut in the apps tray. This will let you place a shortcut on your home screen by dragging it to the top of the page, or you can select “add to home” from the pop-up menu that appears.
Stop adding new app icons to home screen: Head into the home screen settings (long press on the wallpaper) and you’ll find the option to “add apps to home screen”. Turn this off, otherwise every app you install will be added to your home screen. Or turn it on, if that’s what you want.
Change the default app: Android lets you decide which is the default app if you have more than one that will do the same thing. Under settings > apps hit the menu button in the top right-hand corner and then “default apps”. Here you can see what has been selected as the default browser, calling app, messaging app and home screen. Other defaults are selected by the first app you open for a particular task.
Control app permissions: Android lets you manage all the permissions for each app on an individual basis. Go to settings > apps and select the app you want, then hit Permissions. This will let you toggle permissions on and off, so you can disable location or contacts access, for example.
Samsung Galaxy S20 lock screen and always-on display
The lock screen is what you see when your phone is locked. It’s really divided into two parts, one when the screen is off – where “always-on display” can give you some information – or the proper lock screen where the screen is fully on, but you can’t access the the device.
Turn on always on display: To have the screen show you “always on” information, head into lock screen > always on display and switch it on – it’s off by default. This shows when the phone display is in standby, i.e. when the display is otherwise off. You can opt to have it appear on a schedule – perhaps only show when you’re at your desk – or show at all times or when you tap your phone. Remember, it consumes battery.
Change the always-on clock style: There are a range of different clock types for the S10 always-on display. Head into settings > lock screen > clock style. Here you can change the clock both for always-on display and the lock screen. You can also change the colours, so if you don’t want mono, you can select something else.
Add a music controller or FaceWidgets to your lock screen or always-on display: FaceWidgets are the name Samsung uses for other information on your lock screen or always-on display. You’ll probably have a music controller there by default, but if you don’t, head into settings > lock screen > FaceWidgets. Here you find all the options to turn on and off, including Bixby Routines, weather, alarms and schedules.
Change the brightness of the always-on display: This is linked to auto brightness on your phone, however you can manually over-ride this to set the brightness yourself. Head into settings > lock screen > always-on display. Within this menu you’ll see “auto brightness”. Turn this off and you can set the brightness yourself. You can also change the brightness manually by tapping on the always-on display once it is showing.
Change lock screen shortcuts: You can have two shortcuts on the lock screen for quick access (only the lock screen, not the always-on display). These are phone and camera by default, but can be anything you like. Head into settings > lock screen > shortcuts. Here you can select the left and right shortcuts, or turn them off completely.
Disable/enable lock screen notifications: If you don’t want notifications on your lock screen, head to settings > lock screen > notifications. This lets you hide content, only show app icons or disable notifications completely. Conversely, if you want notifications with content, don’t select hide.
Change the look of lock screen notifications: Not only can you change the information you are shown on the lock screen, but you can change how it appears. Head into settings > lock screen > notifications and you can change the transparency of the lock screen notifications. You can also have the text invert so it stands out more against the background.
Show a roaming clock on the lock screen: One of the nicest features on phones is that it automatically switches to the local time, but a roaming clock can show you your home timezone. Head into settings > lock screen > roaming clock. You can also choose where your home timezone is.
Samsung Galaxy S20 series security and unlocking
Security remains as important as ever, with Samsung offering a range of unlocking options.
Top security tip: Biometrics aren’t foolproof, because when they fail your device reverts to PIN or password to unlock. Therefore, your device is only as secure as the password or PIN you use, as anyone trying to break into your phone can always opt to head straight to these unlock methods. Biometrics are there for convenience, not security.
Enable fingerprint or face security: To use your fingerprint or face to unlock, head into settings > biometrics and security. Here you can register your face or fingerprints. You’ll have to set a back-up PIN or password at the same time to provide additional security. Top tip: if using fingerprints, then register fingers on each hand so you can unlock however you are holding your phone.
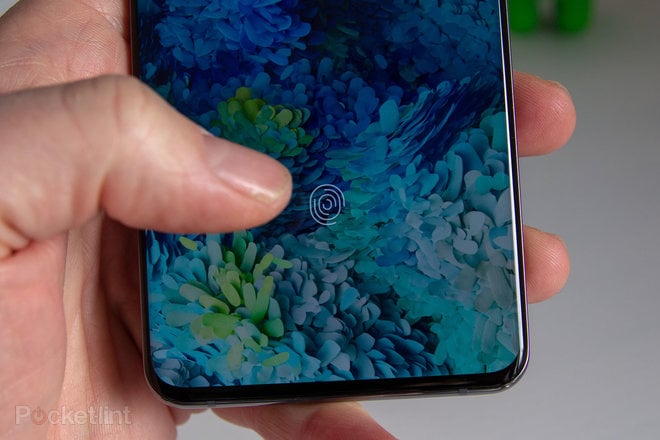
Tap the screen to show the fingerprint scanner location: You can have the fingerprint icon illuminate by tapping the phone, so you know where to unlock it. Head into settings > biometrics and security > fingerprints. Tap in your PIN or password, then head to “show icon when screen is off”. You can then opt to tap the screen and the fingerprint icon will appear showing you were to press.
Instant lock: When you press the standby button, you want your phone to lock instantly. Head into settings > lock screen > secure lock settings. There’s the option to lock the device as soon as the screen goes to sleep or when you press the standby button. If you do want a delay, there’s plenty of time options.
Smart Lock/Bluetooth unlock: Again in settings > lock screen > there’s the Smart Lock section. This is a standard Android feature and you have the option to nominate trusted devices, so your Android will unlock when connected to something else. You can nominate Bluetooth devices (like your smartwatch or car), location, trusted voice and so on. Bonus tip: This is basically one of the only places in Samsung’s One UI where you revert to stock Android visuals!
Automatically wipe your device: If you’re worried about your phone falling into the wrong hands and being cracked, you can have it automatically wipe. Head into settings > lock screen > secure lock settings. Here you’ll find the option to auto factory reset if 15 failed unlock attempts are made.
Lock network and security functions: This option will mean that your network settings cannot be changed while your phone is locked. This makes it easier to locate your phone if it’s stolen. However, it also means you have to unlock your phone to engage flight mode. Head into settings > lock screen and security > secure lock settings to find the option to turn it on or off.
Encrypt your SD card: If you don’t want people snooping through your SD card if they pull it out of the phone, then you can encrypt it. Then it can only be read on your unlocked phone. Head into settings > biometrics and security > encrypt SD card and you can get all the details.
Keep your private files and apps in the Secure Folder: If you’re worried about people accessing your phone and finding things they shouldn’t, you can use the Secure Folder. This sets up another layer of security, you can then add files, pictures and apps that you want to keep hidden – that might be anything from personal photos to business documents. You can also add second versions of apps you want secure and private. It’s in settings > biometrics and security > secure folder.
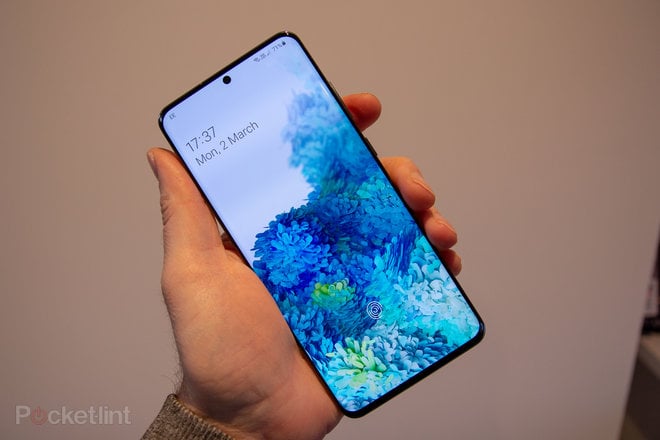
Samsung Galaxy S20 display tips
Samsung is now on its second generation of Infinity-O displays and on the Galaxy S20 series there’s now the option of 120Hz.
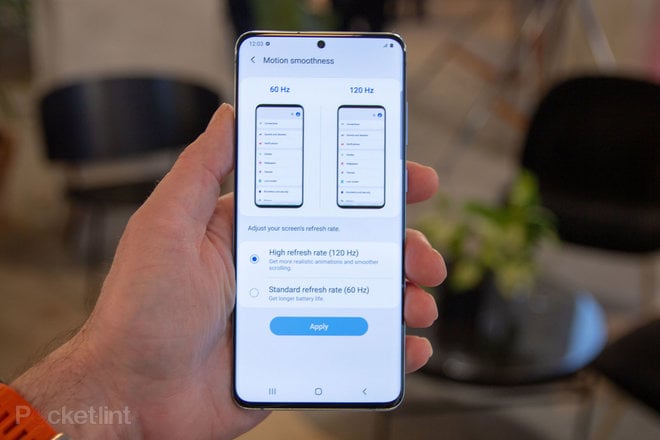
Engage 120Hz mode: There’s the option for 120Hz or 60Hz on the S20. Head into settings > display > motion smoothness. This will let you pick from “high” or “standard”, with 120Hz aiming to make things smoother. It’s only available at Full HD+ resolution (also the default), but it will also use up more battery life than sticking to 60Hz.
Change the display resolution: “Quad HD+” they say, but the default is “Full HD+”. You can select the resolution you want for the display in settings > display > screen resolution. Lower resolution might save you battery power. There’s no option to change the resolution on the S20 FE.
Engage dark mode: This has been on Samsung phones for a while, but it’s much more widespread and is now a native Android feature. Just open the settings menu and head into display. It’s the first thing you’ll see at the top of the page, but you can tap on “dark mode settings” and you can schedule dark mode to come on at sunset.
Change the display colours: Head into settings > screen mode and you’ll get the option to change the way the display looks. The default is vivid with the option to make it natural. Within vivid you can change the colour temperature and the RGB settings, if you want.
Turn on the video enhancer: There’s a video enhancer hiding on the S20 that aims to boost videos. It works with a range of apps, including Netflix, Play Movies, Prime Video and YouTube. Head into settings > advanced features > video enhancer to toggle it on or off depending on your preferences.
Turn on the blue light filter: This changes the colour of the display to reduce blue light, avoid eye strain and help you sleep better, notionally. Head into settings > display > blue light filter to change the times and the strength of the effect.
Hide the front camera: If you don’t like the camera on the front, you can hide it in a dark banner. It means your phone will then have a larger top bezel. Head into settings > display > full screen apps. Open the menu to reveal the advanced settings. Here you’ll find a toggle option to hide front camera, if it bothers you.
One-handed mode: Head into settings > advanced features > one-handed mode and you’ll find the option for a button or gesture to enable one-handed mode. This has to be toggled on, but it will shrink the display to give you easier access to things nearer the top – great for small hands on large phones. Once in one-handed mode, you can switch from left to right by tapping the arrows. To exit one-handed mode, just tap on the black area.
Samsung Galaxy S20 series notifications tips and tricks
Samsung likes to notify you all the time, so taming those notifications and getting them doing what you want is a big part of living with a modern phone. Samsung will often replace all notifications with its own sound and vibration, so there’s a lot of unpicking to be done. We’ve covered some notifications in the lock screen section above, but this is how to get a grip on all those beeps and buzzes.
To turn off notifications for an app: Go to settings > notifications and you’ll see a “recently sent” section. Tap “see all” and you’ll get easy toggle options for all the apps on your phone. Here you can either shut them off completely, or tap through to control specific notifications.
Show app icon badges: Icon badges are a feature of Android, letting each app show you how many notifications you have. Samsung applies this across the entire device. Head into settings > notifications > app icon badges. You can toggle the options on or off, or tap to change the style (numbers or no numbers). If you tap on an app instead, you can turn off dots for a specific app.
View your app notifications with a long press on an app shortcut: This is quite an advanced extension of the icon badges. You can press and hold on an app icon that’s showing a badge and the notifications will be revealed in a pop-up menu. Head into settings > notifications > app icon badges and you’ll find this option at the bottom of the page under “notifications on app icons”.
Disable a notification you’ve received: This is a standard Android feature, but it’s really useful. If you get a notification from any app and you never, ever, want to see it again, slowly swipe the notification to the right and you’ll see a settings cog. Tap on that and you’ll see the option to turn off notifications for that app.
Samsung Galaxy S20 volume controls, sound and do not disturb
Learning to master do not disturb is a key skill of Android. You can get it to give you the notifications you want when you want them, you can silence your phone when you want without needing a mechanical slider, but still let those vital notifications through. On the Galaxy S20 you have five volume sliders. That’s right, five: ringtone, media, notifications, system, Bixby voice.
Turn on live caption for everything: Live caption is a system-wide offering that will give you captions for video apps. It’s hiding in the volume controls. Just tap the volume up or down and when the slider appears, tap the drop down arrow. This will show all your volume controls, but at the bottom of the list you’ll see the option to turn on live caption.
Ignore the media volume toggle: Within the volume settings (swipe down the volume or in settings > sounds and vibrations) you’ll find the option to use the volume keys for media. This is off by default, but if you turn it on, then when you press the volume buttons, only the media volume moves. Leave it off and it controls ringer volume, but switches to media volume when you have media playing, for example in Netflix or Spotify.
Change the vibration levels for everything: Head into settings > sounds and vibration > vibration intensity and you can change the vibration levels for calls, notifications and touch.
Quickly switch to vibrate alerts: If you want silence, but are after vibration alerts still, push the volume button and tap the speaker icon on the pop-up. This will switch to vibrate. Or you can hold down the volume button so it slides all the way down to vibrate.
Set your phone to silent: The normal volume controls only go to vibrate. To make your phone silent, swipe down to the quick settings and tap the sound shortcut. This will cycle through sound/vibrate/mute. Remember to turn the sound back on, or you’ll miss all your calls and messages, or use do not disturb instead.
Turn off the charging noise, unlocking noise, keyboard sounds: Samsung would have your Galaxy beep and vibrate on every action and touch. Head into settings > sound and vibration > system sounds/vibration control and you’ll find all the options to turn these things off. Do it, please.
Enable and control Dolby Atmos: This can be toggled on in quick settings, or head into settings > sounds and vibration > sound quality and effects. Within the Dolby Atmos section you have the option for auto, movie, music or voice as individual options for audio enhancement. There’s also the option to just have Atmos automatically turn on when you start a game.
Adapt the sound quality to you: You can customise the sound output from the S20 devices. Head into settings > sounds and vibration > sound quality and effects and you’ll see “adapt sound” down that the bottom. You can take an age-based profile or you can create a custom setting based on a short listening test.
Engage do not disturb: Do not disturb is an Android feature that lets you silence your phone, but set up a range of exceptions. Swipe down quick settings and tap the do not disturb button to turn it on. You can also set it to a schedule, for example at night, or when you’re in the office. Just press and hold the quick setting to access the full menu options.
Allow alarms and exceptions in do not disturb: If you want silence then do not disturb is great. But if you want some notifications, then you have to designate the exceptions that are allowed. Head into settings > sound and vibration > do not disturb > allow exceptions. Here you can allow alarms (essential if you want to wake up in the morning), but also allow repeat callers or nominated contacts – such as favourites for messages and calls – as well as reminders. It’s worth checking what can get through and what can’t.
Allow notifications in do not disturb: While sounds and vibrations are silenced in do not disturb, you can still have silent notifications. In settings > sound and vibration > do not disturb > hide notifications you’ll find options to allow or stop notifications. Hide all will mean there’s nothing appearing, but you get to choose – you can turn off icon badges, the notifications list, pop-ups and status bar icons.
Samsung Galaxy S20 camera and photo tricks
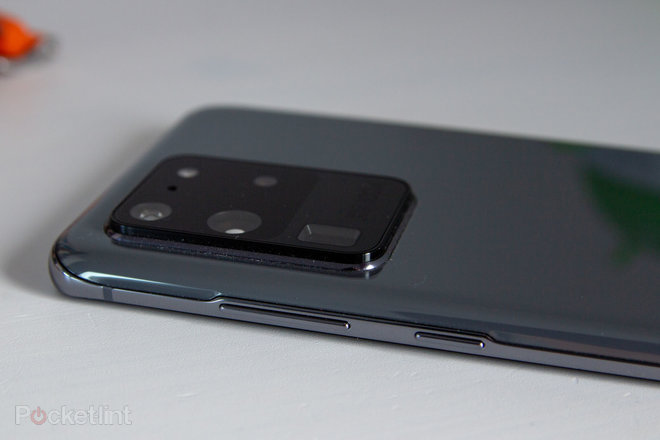
The cameras on the S20 and S20+ are quite different to the S20 Ultra – but there’s a lot that they have in common and a lot to get to grips with. Here’s how to take control of the camera.
Engage the 108MP mode (S20 Ultra only): The S20 Ultra has a 108-megapixel camera, but by default it’s set to 12-megapixels. If you want the full resolution, tap the aspect ratio button in the viewfinder and you’ll see the “4:3 108MP” option.
Turn on 8K video capture (S20, S20+ and Ultra only): If you want to capture video in the highest resolution, head into the video mode and tap the aspect ratio icon – you’ll see the option for 16:9 8K. You do lose some features at this resolution – there’s no advanced features, just the 8K capture.
Use night mode for better low light shots: Samsung has improved the low light shooting both in the normal camera and with a night mode. When it’s dark the camera will suggest you use night mode – tap on the notification. Or, head into the shooting modes and tap night mode. When shooting in low light, keep the camera as steady as possible, until the little moon in the shutter button is filled yellow.
Get a better macro photo: The wide aperture of the S20 cameras means that things up close might look blurred around the edges. This is partly caused by the f/1.8 aperture. Take a step back and use the telephoto instead – the narrower f/3.5 (on the S20 Ultra) or f/2.0 (on the S20) might get more of a close-range subject in focus.
Use Single Take for moving subjects: If you’re looking at something interesting that’s moving around, like a street performer or perhaps your dog, Single Take can grab a range of images and video for you. Note: Single Take doesn’t capture sound putting its own soundtrack over video.
How to get out of a camera mode: If you find you’re stuck in camera mode and don’t know how to get back, look for the back arrow in the left corner of the phone. This will go back to the normal viewfinder.
Turn off ultra-wide angle distortion correction: When you take a photo with the ultra-wide camera, software corrects some of the distortion that comes with it. The might be a straight line that is curved when it shouldn’t be, for example. If you’d rather the phone doesn’t do that, head into camera settings > save option and you’ll see the option to turn it off.
Turn on the shot suggestion mode: A feature introduced on the S10, it will analyse the scene and suggest the best composition. The camera will suggest the best shot you can take and help you line it up using a guide on the screen. Open the camera and tap the settings cog at the top and you’ll find the option to turn on.
Use scene optimiser to improve your photos: The new scene optimiser uses AI to improve your photos, as well as allowing longer handheld night photos. In the viewfinder in the camera app you’ll see swirly icon in one corner. If it’s blue then scene optimiser is turned on and will identify the scene and pick the best settings for you. If there’s no swirly icon, head into camera settings and toggle on scene optimiser. You also get option to tweak how it works in the same section.
Quick launch the camera: By default, a double press on the side button will launch the camera. If you want to change this – like we mentioned for the side key controls above – head into settings > advanced features > side key and you’ll find the controls.
Switch camera modes: The camera does loads and you can swipe through modes from photo, swiping through the modes that you’ll see to the right or to the bottom. Basically you can swipe along that list, moving through single take, photo, video, more. You can swipe across the camera display to move through the modes. In more you’ll find the other functions, like pro (manual control), night, live focus, hyperlapse and so on.
Edit the available camera modes: You don’t have to stick to the default options above – you can add or remove modes that you find more useful. Head into “more” and you’ll see a pencil appear at the bottom. Tap that and it will allow you to drag those modes you want onto the list, so you can easily select them without opening up the “more” menu every time.
Quickly switch from rear to front camera: There’s a button to switch between front and rear cameras, but you can also do it with a swipe. Just swipe up or down the display to switch to the other camera. (Basically, swipe in the opposite direction to the one that changes the shooting mode as above.) Or, you can double press the power button again and the cameras will switch.
Enable raw capture: If you want the dng files saved as well as regular jpeg, head into the settings > save options. Here is the option to save both raw and jpeg files. To use it you’ll need to be in Pro mode, however, so if you want raw files, turn it on and shoot in Pro – you also can’t switch to 108MP in this mode, so you can’t get that huge raw file.
Enable video stabilisation: To stabilise your video on the rear camera, just tap the icon on the left with a hand and wiggly lines. This turns on super steady mode. It’s yellow when turned on. You can’t have super steady on 8K video.
Shoot in HDR10+ video: HDR10+ is a beta (or “labs”) feature. Head into the video mode and then open the camera settings > advanced recording functions. You can toggle on HDR10+, but be warned that you can only view those on a compatible HDR10+ display, otherwise they just look like low quality video. You can also only capture HDR10+ at 1080/30p, not the full range of resolutions the camera offers.
Take a selfie portrait: Rather than offer a portrait mode, Samsung offers “live focus”, which will blur the background. Just switch to the front camera and select live focus from the menu. There are four different bokeh effects to try. Note that skin smoothing is turned on my default, so tap the wand icon if you want to make changes.
Use AR Emoji: This is now a mode over in the menu. It will let you capture an emoji that’s you or use various AR characters. Just tap AR emoji and have some fun.
To take a long exposure photo: Open the Pro mode. On the right-hand side/bottom you’ll see the option to change the length of the exposure with a symbol that looks like a camera shutter. Use the slider to select the length of time you want. The exposure compensation icon will indicate whether you’re going to over or under expose, by switching from + to -.
Change gallery view: If you’re looking at your photos and you want more or less on display, you can pinch zoom, to change the thumbnail view.
Samsung Galaxy S20 edge screen tips
Ever since Samsung introduced the edges on the Infinity display, it has been trying to find things to do with it. If you don’t want any of the functions, you can turn it all off.
Add or remove edge panels: Head into settings > display > edge screen and tap on edge panels. Here you’ll see the selection of panels available and you can add and remove those you don’t want. Stick to the useful, otherwise you’ll spend more time navigating and less time doing. Smart select is worth investigating.
Move the edge panel handle to anywhere you want: You can move the edge handle (where you have to swipe to open the edge panels) to anywhere on the left or right of the screen. Just press and hold and you can drag it where you want it. If you don’t want to be able to move it, you can turn off that option in the settings, as below.
Change the size and transparency of the edge panel handle: Head into settings > display > edge screen > edge panels. Then tap on the menu in the top right-hand corner and select “handle settings”. Within these settings you can change the handle – including making it invisible, changing the colour, size and if you want it to vibrate when it’s touched.
Enable edge lighting for notifications: You can have the edges of the display light up to give you notifications. Head into settings > display > edge screen > edge lighting. You can change the style of the edge lighting as well as nominate which apps it will notify you about. You can have it on for everything, or just those apps you really care about.
Turn off edge screen: Head into settings > display > edge screen and toggle off edge panels. They will be banished to the bucket of functions you never use.
Bixby tips and tricks
Bixby is Samsung’s assistant. It made its debut on the Samsung Galaxy S8 in 2017 and has subsequently appeared in phones that have followed. The AI assistant can do a range of things, but it’s basically broken down into Bixby Voice (with its own screen) and Bixby Vision. We’ve covered some Bixby Voice tips in the digital assistants section above. If you want to know more about Bixby, we have a full Bixby feature for you to enjoy.
Setup a Bixby Routine: Head into settings > advanced features > Bixby Routines and you’ll find this option. This will let you setup various If and Then recipes. For example, when you travel abroad, turn off mobile data. You can make custom routines based around opening an app, which is great for gaming, for example.
Use Bixby to access settings on your phone: One of the charming things about Bixby is that it can be used to access settings on your phone. Press and hold the Bixby key and Voice will start listening, then say what you want to change on your phone.
Use quick commands to change the state of your phone: There’s a range of quick commands that will adapt your phone for particular settings, like driving, for example. They will let you use Bixby Voice to enable them in a flash. Open Bixby via the button, swipe up to open the main Bixby page, open the menu top right and you’ll find “quick commands”. Here you set up what you want to happen when you say a particular thing. It’s like Bixby Routines but for voice.
Have Bixby only respond when connected to a Bluetooth device: This is a fun. Head into Bixby settings > voice response and you’ll find the option to ensure that Bixby only responds with voice when connected to a Bluetooth device. It makes it ideal for hands-off control, in the car for example.
Use Bixby Vision to translate: Open the camera and you’ll find the Bixby Vision in the camera modes. Tap it and it will open Vision. By default it’s set to read barcodes and shopping – but open the menu and you’ll find the option to turn on translate, which is much more useful. Then it will find text and live translate that text for you.
Samsung Galaxy S20 and S20+ screenshot
Take a screen shot: Press the volume down and standby buttons at the same time. A screenshot will be captured.
Palm swipe for a screenshot: If you don’t want to press the buttons to take a screenshot, head into settings > advanced features > motions and gestures and turn on palm swipe to capture. This saves you having to press two buttons at once. It should be on by default.
Use smart capture: Samsung gives you more options for screenshots. Head into settings > advanced features > motions and gestures > smart capture. This will let you scroll to get more of a page, with instant edit and share options too. It’s great for capturing full web pages. There’s also a tag generator that will scan the image and suggest tags to add to it.
Capture a gif from the screen: You can create a gif instantly from anything that’s playing on your phone, like a video in Twitter, Instagram or YouTube. Enable the smart select edge panel. Then, once your video is on the display, swipe to smart select from the edge and select animation. A preview window will appear which will let you record video to create a gif.
Samsung Galaxy S20 battery tips
The Galaxy S20, S20+ and S20 Ultra have massive batteries – 4000mAh, 4500mAh and 5000mAh respectively – while the S20 FE also has a 4500mAh battery. But they also burn through them pretty quickly. Here’s how to get the most from them.
Turn off the 120Hz display: The fast refresh rate eats more battery, so if you’re stuggling, then turn it off. Instructions are in the display section above.
Switch to full HD+: It’s the default setting for Samsung’s phones for a reason – because higher resolutions eat more battery life. Again, the instructions are above, but head to settings > display and you’ll find the option.
Turn on dark mode across your device: There’s some evidence that using dark mode lowers the power the phone needs to illuminate all those white background. Again, it’s in the display settings.
Turn off features you aren’t using: Samsung phones come fully loaded with features and you’re not going to use them all. In many cases you can turn them off. That might include everything to do with Bixby, NFC, the second SIM card slot, edge panels, edge illumination, all the vibration notifications.
View what’s eating battery: Head into settings > device care and tap battery. This will show you the predicted battery usage based on your 7-day averages, and tapping the “battery usage” will show you what’s using up that battery.
Look at your battery usage history: On the battery usage page detailed above, you can tap through the graph to see what your usage was on the last 7 days. Scrolling down the page will reveal the apps that used the most battery.
Manage app power saving: In settings > device care > battery you’ll find app power management. Here you can choose to put some apps to sleep if you think they’re using too much power in the background. For example, if Amazon Alexa appears to be using battery in the background, you can choose to restrict that background access. Take care though – some apps might not work as you expect if they’re asleep.
Engage power saving mode: Either hit the shortcut in quick settings, or head into settings > device care > battery. Here you can change the power mode and engage medium or maximum battery saving, with the option to change the settings for each mode. You can also opt for adaptive power saving.
Use Wireless PowerShare: The Samsung Galaxy S20 can reverse charge wirelessly. There’s a quick settings toggle for the function that will let you charge another device when you place them back to back. Just tap the button and then place the other device on the back of the Galaxy S20 be that Samsung Buds+ or an iPhone or any other Qi device.
Enable fast charging: Head into settings > device care > battery > charging. Here you’ll find toggles for different charging rates.
Time till fully charged: Charge time is displayed when connected to a charger. Look at the bottom of the lockscreen and in the battery status screen. If you’re fast charging, it will say so, and the estimated time left.