
Samsung has new flagship phones for 2023, comprised of the Galaxy S23, the larger Galaxy S23+ and the top-tier device, the Galaxy S23 Ultra. All launch on Android 13 with One UI 5.1. If you’re familiar with Samsung’s software, you’ll find your way around, but if you’re coming from an older device, you might find that there are a load of new functions, and that things have moved. The same applies if you’re an Android user: it’s familiar, but it’s not all the same.
We’ve drilled through the details to breakdown Samsung’s software and give you a guide to everything that it offers, which S23 settings to change, and how to get the best from your device. You can use the table of contents above to jump to the section you want, or you can just cruise through and soak up the Samsung goodness. There’s a lot packed to the Galaxy S23 and this is the ultimate guide to figuring it out.
Samsung Galaxy S23 top tip: If you’re stuck, swipe upward from the bottom of the screen to launch the apps tray. There’s a search bar up top which searches settings, apps, contacts, calendar and more, to help you find things.
Find the settings: A lot of what we cover below involves accessing the settings, to do so, swipe down from the home screen and you’ll see a cog in the top right corner. Tap this, it goes to the settings menu.
How to power off or restart the Samsung Galaxy S23: The button on the right-hand side of the S23 defaults to launching Samsung’s Bixby voice assistant. A quick press of the button just takes you to the lock screen. To power down you’ll need to press-and-hold this power button and the volume down key simultaneously (not a short press, as that’ll just take a screenshot), which will raise a software screen complete with ‘Power off’, ‘Restart’, and ‘Emergency mode’. From this screen you can also select ‘Side key settings’ to reconfigure a long press to bypass Bixby and bring up the power menu instead.
Home screen tips
Turn on gesture navigation: Samsung still has the option for button controls – and you might find them on by default. If you want to switch to Android’s gestures then head to settings> display> navigation bar. From here you have the option to change the button order or select ‘Swipe gestures’ instead.
Edit your home screen: A long press on the wallpaper on any home screen lets you edit the wallpaper and style, themes, widgets, and access additional settings. This area will also let you add screens (swipe to a fresh page and hit the giant + in a circle), or delete complete screens (hit the trash can icon up top).
Customise your UI colours: You can access Android’s Material You feature through the home screen options. Then tap on wallpaper and style. In this section – aside from changing the wallpapers from default ones, including animated ‘video’ options – you’ll see the option for colour palette. This will let you customise the user interface colours based on your wallpaper. There’s also the option to apply that to icons, but it only applies to native Samsung apps or folder backgrounds.
Get more on your home screen: You can change the size of the screen grid on which your shortcuts and widgets sit, depending on how dense you want the home screen to be. Long press on the home screen, then select ‘Settings’ to the bottom right. There are options for 4×5, 4×6, 5×5 or 5×6 which can be applied to the home screen and/or the apps tray separately.
How to access Google Discover: Simply swipe left to right on the home screen. If you prefer Samsung’s alternative option then long-press on the home screen and swipe right to access the left-hand page. Here you’ll see the option between Google Discover or Samsung Free, or hit the toggle up top to turn this page off entirely.
Resize widgets: To access widgets long-press the home screen and select ‘Widgets’. You’ll need to place a widget on the home page or subsequent pages before you can make adjustments to them. Once any widget is placed, simply press-and-hold the widget itself, and a border will appear complete with four circular ‘pull points’.
Stack widgets: You don’t need to have all your widgets separately, you can place them in a ‘stack’ which you can swipe through to see information from a range of sources. Press and hold any widget and you’ll get the option to ‘create stack’ and add more widgets to that stack.
Display battery as a percentage: Going to settings> notifications> advanced settings and hit the ‘Show battery percentage’ toggle there to turn on or off.
Allow your home page to work in landscape: This option will allow the home screen and apps tray, settings, etc, to display in landscape orientation. It’s off by default, but you can turn it on in settings> home screen settings> select ‘Rotate to landscape mode’.
Create a folder: Simply drag one app on top of another on any home screen page, or in the apps trays, and a folder is created. To remove an app from a folder, open the folder and long press an app and you’ll get a pop-up menu which lets you remove or uninstall it. To add more apps, either drag them into the folder, or hit the ‘+’ button within the folder to add apps where you can select multiples from your list.
Change a folder’s colour or name: Open a folder and enter the name you want at the top. If you don’t want a name, leave it blank and nothing will show. To change the folder background colour – and you can do this individually per folder – tap the dot in the right-hand corner and select a new colour, including completely custom options.
Delete a folder: If you no longer want a folder, press and hold and then hit the trash can icon. The folder and the app shortcuts will vanish, but it doesn’t uninstall said apps, it just tidies things up on your request.
Hide apps: Don’t want an app to show on your home screen or in search? You can hide it. Long press the home screen, open settings, select ‘Hide apps’ and select those you don’t wish to appear, before hitting ‘Done’. Caveat: search will still reveal the app’s settings access in some cases.
Connection options
There’s a new menu area called connected devices and it will provide plenty of options.
How to setup eSIM: If eSIM is enabled on your device, you’ll be invited to set this up when you first set up the device. If you want to do it after initial setup, head into settings> connections> SIM manager> add eSIM.
How to use Samsung DeX: The desktop experience (DeX) is a standard feature on the Galaxy S23, allowing you use your phone as a desktop computer either via a PC or with a TV or monitor. You can find DeX in settings> connected devices. You’ll have to either install the Samsung DeX app on your PC (to run it in a window on your PC) or you’ll have to connect the monitor to your phone via the USB-C connection on the bottom. It will also work through USB-C hubs.
Call and text on other devices: Using the Samsung account, you can allow calls and messages to come through on other Samsung devices, like a tablet, meaning you don’t have to change devices all the time when working. Head into settings> connected devices> call &text on other devices and turn it on. That will mean texts and calls to the number on your phone will be synced with your other Samsung devices.
Link to Windows: If you want to sync to a Windows PC to manage mobile notifications, view recent photos, make and receive calls via PC, access messaging/conversations, and sync mobile apps, you can do that. Head into settings> connected devices> Link to Windows and toggle it on. You’ll then be taken through the setup process.
Manage Android Auto on your Samsung device: Samsung phones will let you customise the Android Auto experience. Head into settings> connected devices> Android Auto. Here you can customise the apps you are shown in Android Auto as well as change some other settings.
Use Smart View to project to another device: If you want to display your phone on a TV, you can use Smart View. Head into settings> connected devices> Smart View. This will let you mirror on a compatible device. You can do the same in reverse, with some devices able to be mirrored on your Samsung phone.
-

Samsung
Samsung Galaxy S23
The Galaxy S23 is the smallest and cheapest of Samsung’s newest flagship phone lineup. It features a 6.1-inch 1080p display at 120Hz, 8GB of RAM, up to 256GB of storage, and a 50MP camera.
-

Samsung
Samsung Galaxy S23+
The Samsung Galaxy S23+ is the middle-ground flagship phone for early 2023. It looks very similar to the smaller S23, but shares the larger storage and battery sizes of its larger S23 Ultra counterpart.
-

Samsung / Pocket-lint
Samsung Galaxy S23 Ultra
The Samsung Galaxy S23 Ultra is the biggest, baddest, and most expensive of the S-series flagships in 2023. It has a huge 6.8-inch, 120Hz-capable display, a 5,000mAh battery, a brand new 200MP camera, and an included S Pen.


 Managing your digital assistants
Samsung pushes Bixby as its default digital assistant. As the S23 is Android you get Google Assistant too. Install Amazon Alexa and that becomes an option too. Here are all the management options for those virtual assistants.
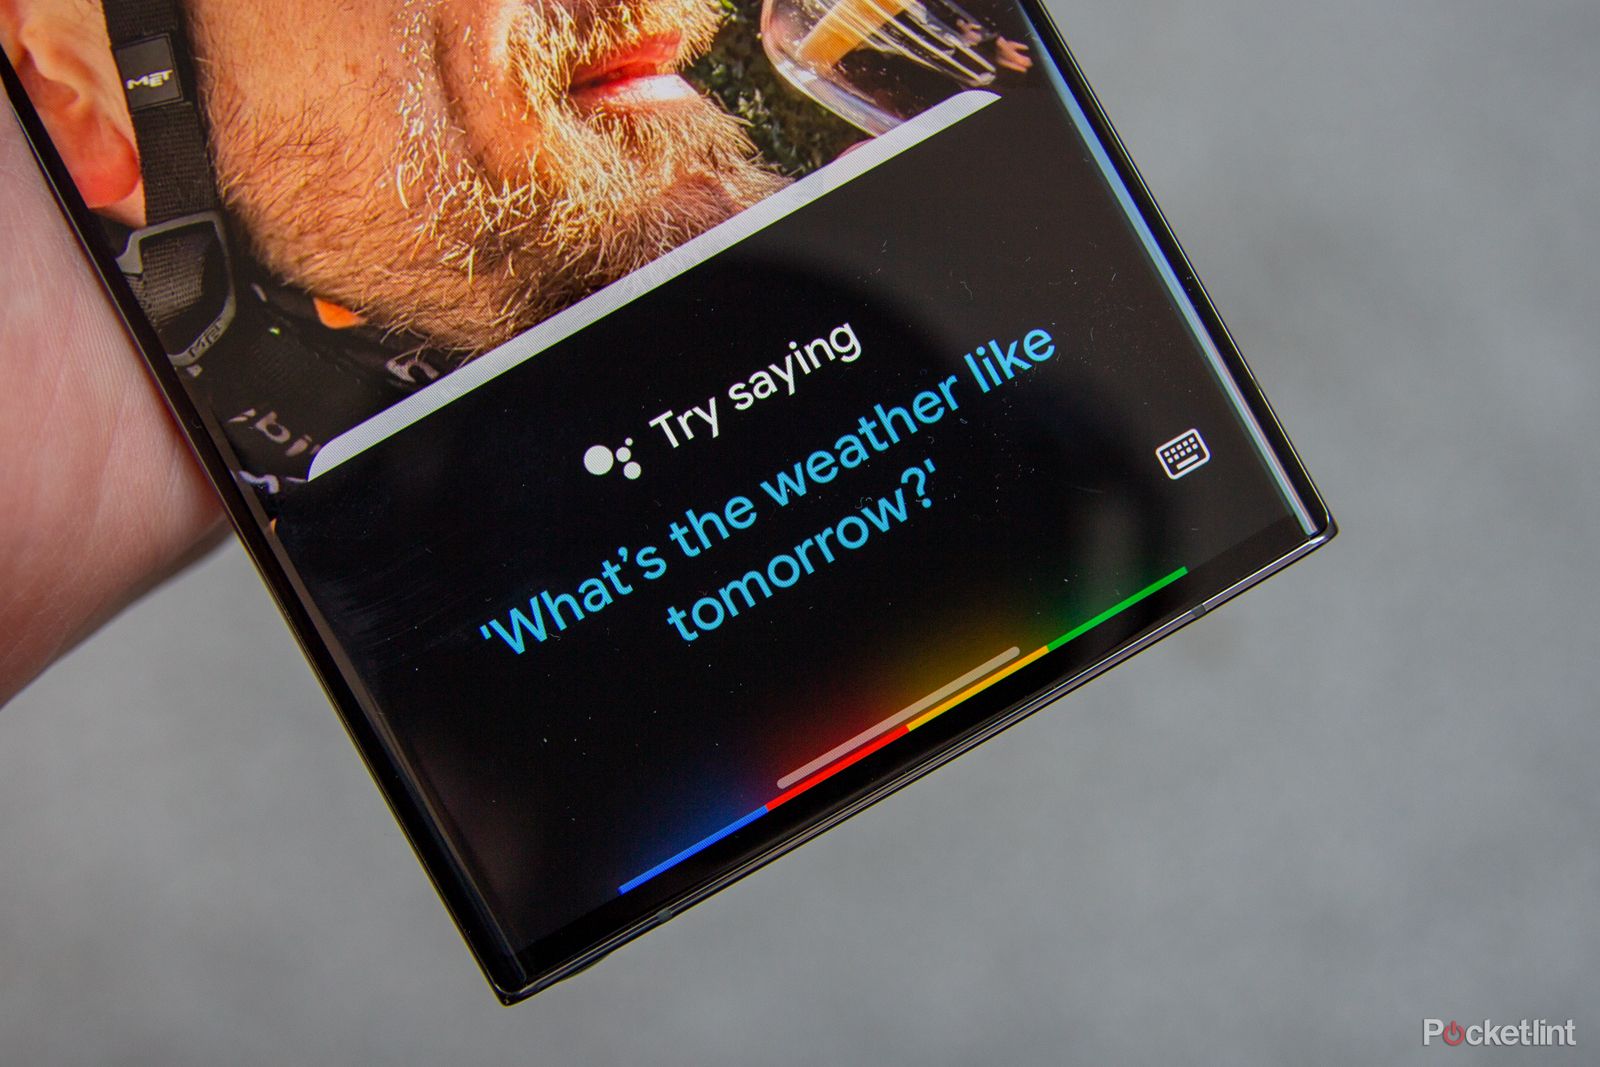
Access Google Assistant: A long press on virtual on-screen softkey will launch Google Assistant. If you’re using gestures then a 45-degree corner swipe will activate the same. This is synced with your Google account from sign-in, so works with anything you’ve already setup Google Assistant to do.
Turn on “Hey/Ok Google” hotword: The hotword to get Google to respond with just your voice is part of the Google app. If you didn’t enable this on initial setup, the easiest way to get to the settings is to open Google Assistant (as above) and say “show me Google Assistant settings”. You’ll then go through the settings menu and the top option is for Hey Google and Voice Match, where you can turn it on.
Disable Google Assistant/all assistants: If you don’t want Google Assistant or any other, you can remove the ability to launch it. Head into settings> apps> choose default apps, select ‘Digital assistant app’ and tap ‘Device assistance app’. You can select ‘None’ to disable, or another option to change the default system.
Change your digital assistant: If you’d rather launch Alexa on the home button, install the Alexa app and then, as per above tip, switch the default device assistance app to Alexa or Bixby Voice if you’d rather. However, the Alexa hotword will not work.
Quick settings tips and tricks
Instantly access the quick settings and notifications pane from your home screen: Swipe down anywhere on the home screen and the notifications shade will slide down – meaning you don’t have to stretch up to the top of the page. Swipe down again and you’ll get quick settings buttons.
Quick access to Google Home controls: If you have Google Home installed and setup, drop the quick settings menu and then tap ‘Device control’. Now tap the drop-down menu option that says ‘SmartThings’, and you should see ‘Home’ as an option. Select that and now you’ll see big onscreen widget controls for your Google Home connected devices.
Edit quick settings: To change the shortcuts you see when you swipe down the notifications, swipe down twice so you see the full grid of buttons, open the menu by tapping the three dots top right and select “edit buttons”. You can drag to reorder, or remove shortcuts you don’t need. Top tip: only the first six apps are shown in the compact view across the top so make these your first shortcuts.
Instantly access device settings from quick settings: This is a standard Android tip, but great for accessing settings instantly. Press and hold the shortcut (for example Bluetooth) and you’ll instantly jump to the full settings menu.
Access connected devices in quick settings pane: By default you’ll find that device control and media output is shown in the quick settings pane. This means you can swipe down and tap through to access music you’re playing or speakers that you’re connected to, as well as control smart home devices as described above. If you don’t want this, you can turn it off by opening up the quick settings and tapping the menu top right. Then tap on ‘Quick panel layout’, ‘Device control and Media output buttons’ and choose your preferred option.
Quickly adjust the screen brightness: Samsung lets you access the brightness through the quick settings panel, just swipe it down and you’ll see the slider. If you want to adjust adaptive brightness, open the menu at the right-hand end of the slider and it will take you straight through to those settings, where you can turn it on or off.
App tips
Show all the apps on the home screen: This is a popular option for some. If you want to remove the apps tray, long press on the home screen and tap settings. Then select ‘Home screen layout’ and pick ‘Home screen only’.
Add or remove an apps tray button: By default there is no apps tray button – you open the apps tray with a swipe. If you want the button back head into the home screen settings as above and select the ‘Show apps screen button on home screen’ toggle.
Alphabetise or custom order your apps: In the apps tray, hit the triple dot menu in the Finder (search bar) to the top right, then select ‘Sort’ from the drop list. This will give you the option to have alphabetical order. Or select ‘Custom order’ and you can then drag your apps into the positions you want.
Create an apps tray folder: You can have a folder for containing multiple apps whether you’re set to custom or alphabetical order in the apps tray. Just press-and-hold an app icon and drag it over another and a folder will be created within the apps tray. You can then edit the name and colour as you wish – just as you can on the home screens.
Let Finder give you app suggestions: When you tap on the Finder (search bar) at the top of the apps tray, you’ll immediately get suggestions based on recent apps you’ve used. If you don’t want this, select the triple dot menu where you can turn off various settings: suggested apps, search suggestions, suggested settings, Downloads & Screenshots, search history, and hidden apps.
Uninstall apps: You can uninstall directly from an app icon. Just long press on the app and a pop-up menu will give you the option to uninstall. If it’s a core app (which you can’t uninstall) the same option will let you disable an app.
Add apps to your home screen: Press and hold on the app shortcut in the apps tray. You can select ‘add to home’ from the pop-up menu that appears.
Stop adding new app icons to home screen: Head into the home screen settings (long press on the wallpaper, hit the settings cog) and you’ll find the ‘Add new apps to home screen’ toggle. It’s off by default, but if you want every new install to appear on your home screens then this will enable that.
Change the default app: Android lets you decide which is the default app if you have more than one that will do the same thing. Go to settings> apps> choose default apps. There are options for browser, caller ID/spam, assistant, Home, Phone, SMS.
Control app permissions: Android lets you manage all the permissions for each app on an individual basis. Go to settings> apps and select the app you want, then hit Permissions. This will let you toggle permissions on and off, so you can disable location or contacts access, for example. Doing so may cause an app to have limited functionality or continually prompt you for permission, though, so keep this in mind.
Boost your video calls: You can apply effects to video calls – including changing the background colour or image. This works on common apps like Meet, Zoom and WhatsApp. Find the option in settings> advanced features> video call effects. Once setup, a camera effects icon will appear during your call, so you toggle it on or off during video calls.
 Lock screen and always-on display
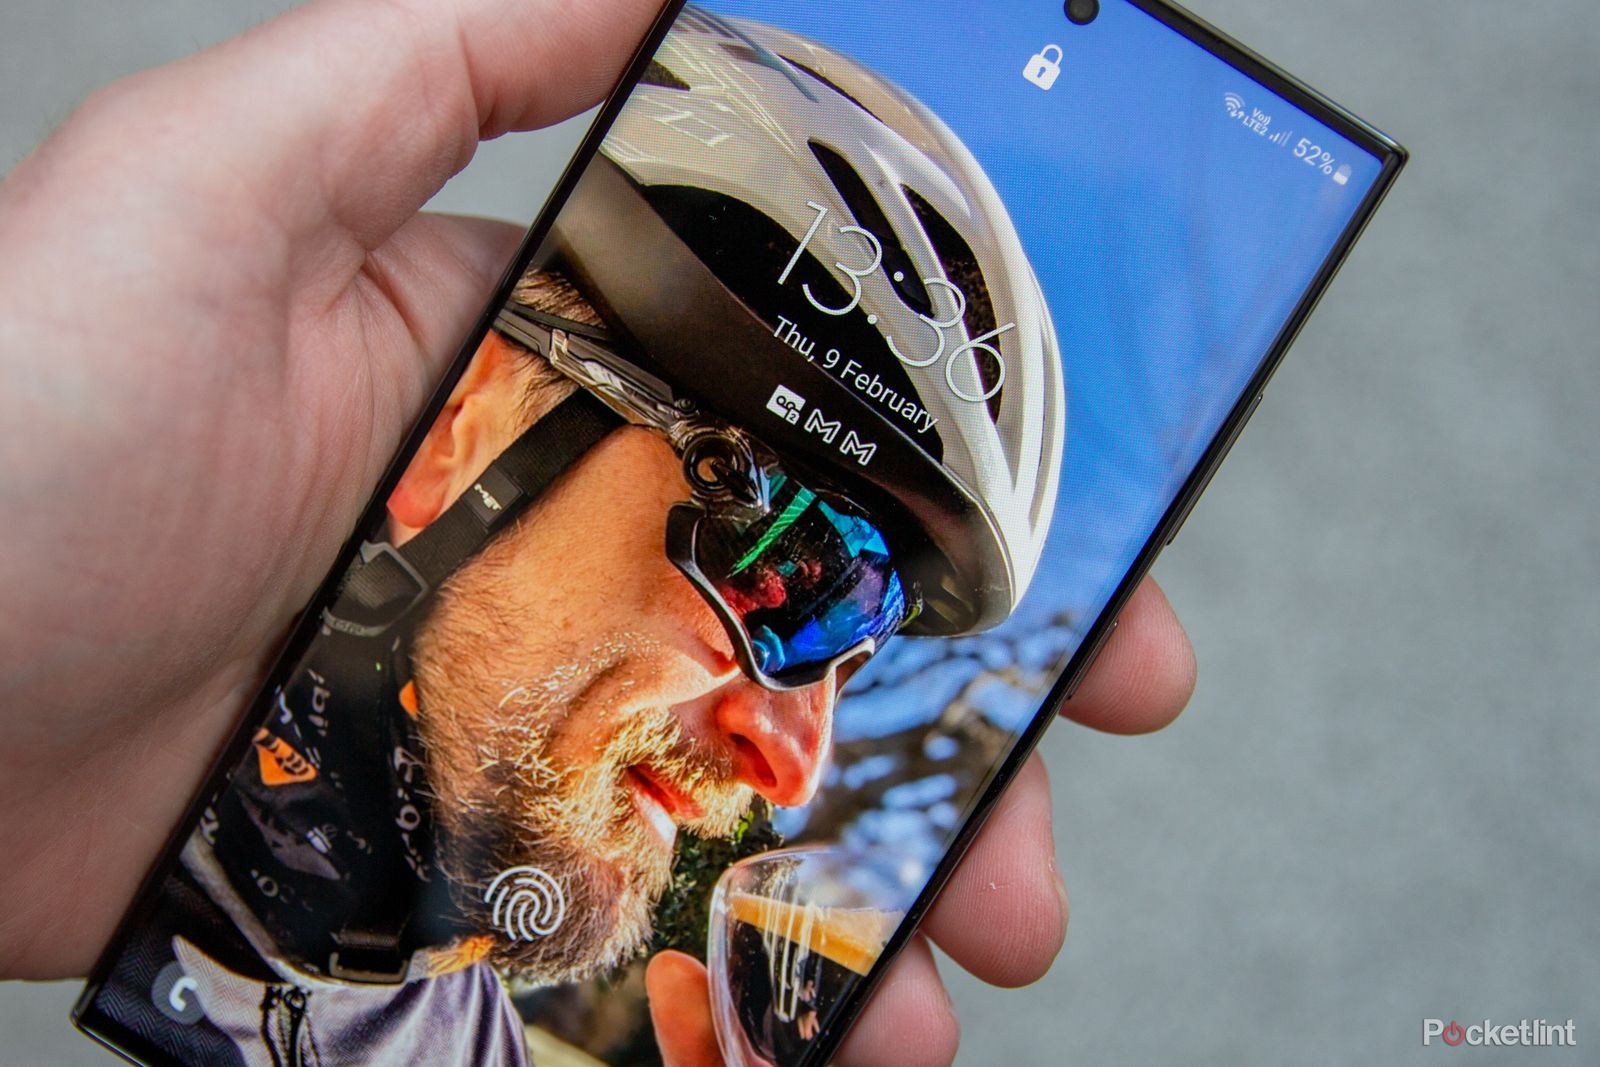
The lock screen is what you’ll see when your phone is locked. It’s really divided into two parts: one when the screen is off – where “always-on display” can give you some information – or the proper lock screen where the screen is fully on, but you can’t access the device.
Turn on always-on display: To have the screen show you always-on information, head into settings> lock screen, and ensure ‘Always On Display’ is toggled on. Hitting this setting allows you to set a schedule, show for new notifications, or show always. Just remember that it consumes battery, so going overboard to have your device light-up for every instance will diminish longevity.
Change the always-on clock style: There are a range of different clock types for the S23’s always-on display. Head into settings> lock screen> always on display> clock style. You can select the clock type, add an ‘Image clock’, and also change the colours.
Add widgets to your lock screen or always-on display: Samsung will allow widgets on your lock screen or always-on display. You’ll probably have a music controller there by default, but if you don’t, head into settings> lock screen> widgets. Here you find all the options to turn on and off, including routines, voice recorder, weather, alarms and more.
Change the brightness of the always-on display: This is linked to auto brightness on your phone, however you can manually over-ride this. Head into settings> lock screen> always-on display. Within this menu you’ll see ‘Auto brightness’. Turn this off and you can set the brightness yourself, specifically for the always-on display. You can also change the brightness manually by double tapping on the always-on display once it is showing.
Change lock screen shortcuts: You can have two shortcuts on the lock screen for quick access (only the lock screen, not the always-on display). These are phone and camera by default, but can be any app you like. Head into settings> lock screen and then tap the lock screen diagram to edit. Here you can select the left and right shortcuts, or turn them off completely.
Disable/enable lock screen notifications: If you don’t want notifications on your lock screen, head to settings> notifications> lock screen notification. This allows you to show icon only notifications, full details, to hide content, and select if notifications also show on the always-on display too. It’s even possible to adjust the transparency of the notification background/text using a slider.
Show a roaming clock on the lock screen: If you’re travelling and the local time is showing, but you want to see your at-home time too, head into settings> lock screen> roaming clock. You can also choose where your home timezone is set and adjust this as you choose.
Security and unlocking
Top security tip: Biometrics aren’t foolproof, because when they fail your device reverts to PIN or password to unlock. Therefore, your device is only as secure as the password or PIN you use, as anyone trying to break into your phone can always opt to head straight to these unlock methods.
Enable fingerprint or face security: To use your fingerprint or face to unlock, head into settings> security and privacy> biometrics. Here you can register your face or fingerprint (or multiple prints). You’ll have to set a back-up PIN or password at the same time to provide additional security. Top tip: if using fingerprint, then register fingers on each hand so you can unlock however you are holding your phone.
Instant lock: When you press the standby button, you want your phone to lock instantly. Head into settings> lock screen> secure lock settings. There’s the option to lock the device as soon as the screen goes to sleep or when you press the standby button. If you do want a delay, there are plenty of time options.
Automatically wipe your device (after numerous failed logins): Not a setting we would suggest many use, but you can get the phone to factory reset, including deleting all of your apps and data, after 20 failed attempts to unlock the device. This is located in the same Secure lock settings as per above tip.
Lock network and security functions: This option will mean that your network settings cannot be changed while your phone is locked. This makes it easier to locate your phone if it’s stolen. However, it also means you have to unlock your phone to engage flight mode. Head into settings> lock screen> secure lock settings to find the option to turn it on or off.
Keep your private files and apps in the Secure Folder: If you’re worried about people accessing your phone and finding things they shouldn’t, you can use the Secure Folder. This sets up another layer of security, you can then add files, pictures and apps that you want to keep hidden – that might be anything from personal photos to business documents. You can also add second versions of apps you want secure and private. It’s in settings> security and privacy> secure folder.
Display tips
The display is one of the highlights of the Galaxy S23 models – and you’ll want to make sure you keep them protected with a screen protector. Here are the best tips for managing the rest of your display settings.
Access 120Hz mode: There are two display modes – Adaptive or Standard. The standard mode sticks to 60Hz, the adaptive smoothness will select the appropriate refresh rate from 1-120Hz (on the Ultra, or 48-120Hz on the S23). Faster refresh means smoother fast moving visuals, but can use more battery. The advantage of adaptive is that it will manage that battery demand for you. You can find the options in settings> display> motion smoothness.
Change the display resolution: The Galaxy S23 Ultra has the option to change the resolution between three options: WQHD+ (3088 x 1440), FHD+ (2316 x 1080), HD+ (1544 x 720). Head into settings> display> screen resolution and you’ll find these options. Resolution options for the base S22 and S22+ differ of course.
Engage dark mode: Open the settings menu and select display. It’s the first thing you’ll see at the top of the page at ‘Light’ and ‘Dark’. You can schedule dark mode by selecting the ‘Dark mode settings’ below these visual illustrations.
Change the display colours: Head into settings> display> screen mode. Here you’ll get the option to change the way the display looks, from Vivid to Natural, with warm/cool white balance also available for manual tweaking. There are advanced settings, to control the red, green and blue channels individually, too, if you want to really deep dive.
Turn on the video enhancer: There’s a video enhancer hiding on the S23 that aims to boost your video watching experience. It works with a range of apps, including Netflix, Prime Video and YouTube. Head into settings> advanced features> video brightness. There are options for Normal or Bright.
Turn on the eye comfort shield: This changes the colour of the display to reduce blue light, avoid eye strain and help you sleep better, notionally. Head into settings> display and toggle on ‘Eye comfort shield’. Clicking into this setting and you can find adaptive or custom modes, so you can opt to have it on all the time or just from a specific time.
One-handed mode: Head into settings> advanced features> and toggle on ‘One-handed mode’. This will shrink the display to give you easier access to things nearer the top – great for small hands on large phones. Once in one-handed mode, you can switch from left to right by tapping the arrows. To exit one-handed mode, just tap on the black area.
Add or remove edge panels: Head into settings> display> edge panels. Tap on Panels within this and you’ll see the selection of panels available and you can add and remove those you don’t want. Stick to the useful, otherwise you’ll spend more time navigating and less time doing.
Move the edge panel handle to anywhere you want: You can move the edge handle (where you have to swipe to open the edge panels) to anywhere on the left or right of the screen. Just press and hold it and you can drag it around. If you don’t want to be able to move it, you can lock the position in the settings, as below.
Change the size and transparency of the edge panel handle: Head into settings> display> edge panels> handle. Within these settings you can change the handle – including making it invisible, changing the colour, size and, if you want, have it to vibrate when it’s touched.
Turn off edge panels: Head into settings> display> edge panel. Just toggle it off and the shortcut will vanish.
How to use the S Pen with the S23 Ultra: The S23 Ultra comes with a built-in S Pen. Pop it out and you can use it to interact with the display instead of a finger. To load its various compatible apps there’s a little transparent launcher that floats to the centre right, which opens access to Create note, View all notes, Smart select, Screen write, Live messages, AR Doodle, Translate, PENUP, and the option to add more interactions.
Notifications tips and tricks
To turn off notifications for an app: Go to settings> notifications> app notifications. Here you’ll see a full list of apps and you can toggle off notifications for each app.
Show app icon badges: Icon badges are a feature of Android, letting each app tell you how many notifications you have. Samsung applies this across the entire device. Head into settings> notifications> advanced settings and toggle ‘App icon badges’ off if you don’t want it. Tap into this setting if you want to shift between the notification showing as just or dot or a dot with numbers to signify how many notifications.
View your app notifications with a long press on an app shortcut: This is quite an advanced extension of the icon badges. You can press and hold on an app icon that’s showing a badge and the notifications will be revealed in a pop-up menu. Head into settings> notifications> app icon badges and you’ll find this option at the bottom of the page as a toggle.
Disable a notification you’ve received: This is a standard Android feature. If you got a notification and you want to disable future notifications or change how they are delivered, press and hold on that notification. It will expand to give you options, including “turn off notifications”. Selecting ‘Settings’ will take you into a detailed menu where every aspect available can be changed.
Volume controls, sound and do not disturb
Master the media volume toggle: Within the volume settings (settings> sounds and vibrations> volume) you’ll find the option ‘Use Volume keys for media’. This is on by default and means that when you press the volume buttons, only the media volume moves, such as your music. Turn it off and it controls ringer volume, but switches to media volume when you have media playing, for example in Netflix or Spotify.
Change the vibration levels for everything: Head into settings> sounds and vibration> vibration intensity and you can individually change the vibration levels for calls, notifications and touch interaction.
Turn off the charging noise, unlocking noise, keyboard sounds: Samsung would have your Galaxy beep and vibrate on every action and touch. Head into settings> sound and vibration> system sounds/vibration control and you can turn them off.
Enable and control Dolby Atmos: This can be toggled on in quick settings, or head into settings> sounds and vibration> sound quality and effects. Click into the Dolby Atmos section and you have the option for auto, movie, music or voice as individual enhancements. Before getting into this menu there’s also a separate ‘Dolby Atmos for gaming’ toggle, so you can just have it fire-up when you begin a game.
Adjust the EQ (equaliser): Don’t like the default sound profile? You can change it. Head into settings> sounds and vibration> sound quality and effects> equaliser. This offers five presets and one Custom option, so you can adjust through nine linear bands to tweak the sound profile as you please (from 63Hz to 16kHz).
Personalise the sound output with Adapt sound: Head into settings> sounds and vibration> sound quality and effects> adapt sound. This offers frequency boosts based on age, the assumption being that given frequency bands are diminished in particular age groups. You can also use ‘Test my hearing’ to assess which boost to use.
Engage do not disturb: Do not disturb is an Android feature that lets you silence your phone, but you can setup a range of exceptions. Swipe down quick settings and tap the do not disturb button to turn it on. You can also press-and-hold it in order to set a schedule and permit specific disturbances from calls, alarms, apps and so forth. You can also access this through settings> notifications> do not disturb.
Allow alarms and exceptions in do not disturb: As per the tip above.
Allow notifications in do not disturb: While sounds and vibrations are silenced, you can still have silent notifications. Go to settings> notifications> do not disturb> hide notifications. Here you can control whether to hide all, if you want full-screen notifications, app icon badges, display in the notification panel, to cease pop-up notifications, and to hide status bar icons.
Set up sleep mode: Samsung has its own modes. Head to settings> modes and routines. Here you’ll find options, including sleep. This will let you set do not disturb, shift your phone to greyscale and other options to help you disconnect from your phone at bedtime.
Game Booster tips
Limit the refresh rate to save battery: Open the Game Launcher app the triple line menu to the bottom right. Hit ‘Game Booster’ from the options that come up. You can then access ‘Low refresh rate’, which will fix the refresh rate to 48Hz during games to save on battery life.
Block navigation gestures in games: This is a big deal to stop you accidentally leaving a game when playing because your swipes were wrongly interpreted. Go to the Game Booster settings as detailed above, then select ‘Block during game’. Here you can toggle off navigation gestures (it’ll be greyed out if you’re using Android’s softkeys of course). To exit a game you’ll have to swipe twice.
Turn off adaptive brightness during games: There’s nothing more annoying than your brightness dimming when you’re gaming. In the menu detailed above you can also opt to block autobrightness to avoid this problem.
Turn on Dolby Atmos for gaming: Head into settings> sounds and vibrations> sound quality and effects. You’ll see the ‘Dolby Atmos for gaming’ toggle here.
How to use the screenrecorder: There’s built-in screen recorder on the S23 series, accessed via quick settings. Just swipe down, then swipe again to open the fuller 18 buttons, where you can select Screen recorder. Press-and-hold this icon to adjust its specifics, such as video quality and sound (from media and/or mic or none).
Camera and photo tricks
The cameras on the S23 devices are quite different, the S23 Ultra being the king of the trio. But there’s a lot that they have in common and a lot to get to grips with.
Engage the 200MP mode (S23 Ultra only): The S23 Ultra has a 200-megapixel camera, but by default it’s set to output at 12-megapixels. If you want the full resolution, tap the aspect ratio button in the Camera app and you’ll see the ‘3:4 200MP’ option. Note: you can’t shoot at 200MP in the S23 and S23+ as they have 50MP main sensors.
Turn on 8K video capture: If you want to capture video in the highest resolution, head into the video mode within the Camera app and tap the quality icon – you’ll see the option for 8K 30.
Turn on the shot suggestions mode: A feature introduced way back on the S10, it will analyse the scene and suggest the best composition. The camera will suggest the best shot you can take and help you line it up using a guide on the screen. Open the Camera app and tap the settings cog and you’ll find the option to turn on.
Use scene optimiser to improve your photos: The scene optimiser uses artificial intelligence (AI) to improve your photos, as well as allowing longer handheld night photos. In the Camera app select the settings code top left, then toggle ‘Scene optimiser’ on.
Use night mode for better low light shots: Night mode takes long exposures in low light and automatically switches on – which you can see when a crest moon symbol is showing in yellow in the corner of the Camera app’s viewfinder. Tap this moon icon, turning the outline white, and it’s switched off.
How to get out of a mode: If you select a camera mode – from the ‘More’ menu, for example – and want to go back to default, it’s not immediately obvious how this words. If you have gesture control activated then you’ll have to swipe back to return to the normal viewfinder, or tap the arrow next to the camera mode to return to normal.
Quick launch the camera: By default, a double press on the side button will launch the camera. If you want to change this to, say, open another app, then head into settings> advanced features> side key.
Switch camera modes: You can swipe through modes from the Camera app’s viewfinder: Photo is default, with Video and More to the right, Portrait to the left.
Edit the available camera modes: You don’t have to stick to the default options above – you can add or remove modes that you find more useful. Head into More where you’ll see an ‘Add+’ appear at the bottom right. Tap that and it will allow you to drag those modes you want onto the swipeable bar, so you needn’t open More to select.
Quickly switch from rear to front camera: Simply swipe up or down when in the Camera app and it’ll toggle between rear and front camera views. Or you can double press the power button again and the cameras will switch.
Enable RAW capture: If you want the DNG files saved as well as regular JPEG, head into the Camera app’s settings> advanced picture options> pro mode picture format. You can opt have RAW options saved when shooting in the pro mode.
Shoot in Expert RAW mode: Samsung has a separate Export RAW mode that is designed to be used with Lightroom to give you fine control. It offers 12MP RAW files – or on the S23 Ultra, 50MP RAW. Head into the camera app and swipe through the modes to more. You’ll see Expert RAW as an option – you might have to download the app from the Galaxy Store. Images shot in RAW will be labelled in both Samsung Gallery and Google Photo apps.
How to turn on sky guide for shooting stars: There’s an astral map hiding in the Expert RAW mode. Open Expert RAW, tap on the stars icon and then tap ‘show’ in the box that appears. Point the phone at the sky and you can line-up with star constellations so you know what you’re taking a photo of.
Enable video stabilisation: There are two versions of stabilisation: one in the camera settings that appears to apply to everything, or ‘Super Steady’, the latter being much more dramatic. When in Video you’ll see a hand with wiggly lines around it icon – tap this, it’ll outline yellow to show it’s active. Note: with Super Steady active your capture resolution tops out at QHD60. If you’ve selected 8K or UHD (4K) then the camera will automatically switch to QHD.
Shoot in HDR10+ video: Open the Camera app, hit the settings cog, then select ‘Advanced video options’. In here you’ll see the option for the high dynamic range capture format, but it’s only available if you’re shooting FHD30 or FHD60 – any higher resolution or frame rate and it will be greyed out.
Take a selfie portrait: Just switch to the front camera and select Portrait from the menu. There are six different effects and backgrounds to try, opened via the little circular symbol to the bottom right of the viewfinder. Some of these options can now also be used in portrait videos.
Use autoframing in selfie videos: You can have the camera track you in the frame, so keep it better centred on your face. When shooting using the front camera, tap the on-screen icon with a frame around a dot. It will now track you better.
How to take a screenshot
There are lots of ways to take a screenshot on the Galaxy S23, you can find a complete guide here, or just use those suggested below.
Take a screen shot: Press the volume down and standby buttons at the same time – but not for too long otherwise it’ll activate the power-off screen.
Palm swipe for a screenshot: If you don’t want to press the buttons, swipe the edge of your hand across the screen instead. This can be switched off in settings> advanced features> motions and gestures> Palm swipe to capture.

Samsung / Pocket-lint
Samsung Galaxy S23 Ultra
Battery tips
Lower the display brightness: It’s no surprise that the brightness of the display is one of the biggest battery uses. Swipe down to see the notification shade and adapt the brightness slider as fits.
Switch resolution: The more resolution you’re serving the more battery drain you’ll suffer. Again, the instructions are further up page, but head to settings> display to find the option.
Turn on dark mode across your device: There’s some evidence that using dark mode lowers the power the phone needs to illuminate all those white backgrounds. Again, it’s in the display settings as the first thing you’ll see.
Turn off features you aren’t using: Samsung phones come fully loaded with features and you’re not going to use them all. In many cases you can turn them off. That might include everything to do with Bixby, NFC, the second SIM card slot, edge panels, edge illumination, all the vibration notifications, and so on.
View what’s eating battery: Head into settings> battery and device care. Tap ‘Battery’. Scroll down and you can see which apps have been eating the battery life the most – you may find some surprises in here that are running in the background, so you can then seek them out in app settings to remove certain permissions or background operation.
Look at your battery usage history: On the battery usage page detailed above, you can tab through to “last 7 days”. Scrolling down the page will reveal the apps that used the most battery in the past week, further helping to identify the worst culprits – some will surprise, others just reflect your usage habits.
Engage power saving mode: Either hit the shortcut in quick settings, or head into settings> battery and device care> battery. Here you can turn on power saving mode, with some options for what actions are taken to save your battery. It will limit background network usage, syncing, location access, and drop motion smoothness to 60Hz. There are also separate user-selected options to deactivate always-on display, limit CPU speed to 70%, decrease brightness by 10%, switch off 5G connectivity.
Time till fully charged: Charge time is displayed when connected to a charger. Look at the bottom of the lockscreen and in the battery status screen. If you’re fast charging, it will say so, and the estimated time left.