
![]()
Using Quick Steps in Microsoft Outlook, you can click a button to run one or more automated actions on an email you select. While Outlook gives you some handy premade Quick Steps, you may want to create your own.
By setting up a custom Quick Step, you can do things like move an email, create a task, and set up a meeting with a single click.
How to Create a Custom Quick Step
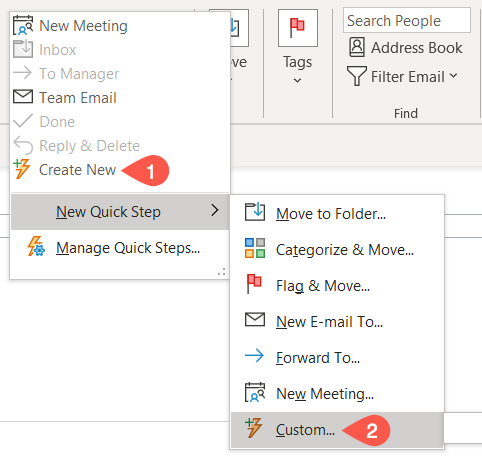
To create your own Quick Step, head to the Home tab and select the bottom arrow in the Quick Steps box.

Choose “Create New.” Alternatively, move your cursor to New Quick Step and pick “Custom” in the pop-out menu.
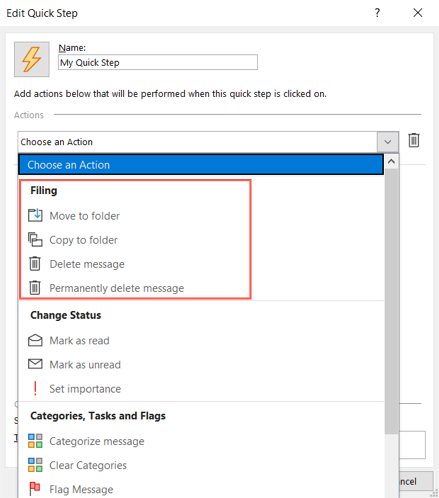
There are several categories to pick from when creating a custom Quick Step. Each offers a useful automation that can truly save you time.
1. File Your Message
You can set up a Quick Step with the Filing category, which allows you to move, copy, or delete an email quickly.
Select the Choose an Action drop-down box and pick an option in the Filing section. Give your Quick Step a name at the top of the window.
If you choose one of the deletion options, you don’t have to pick anything else.

If you pick Move to Folder or Copy to Folder, use the subsequent box to select the folder you want. This is handy if you often move or copy emails to the same folder.
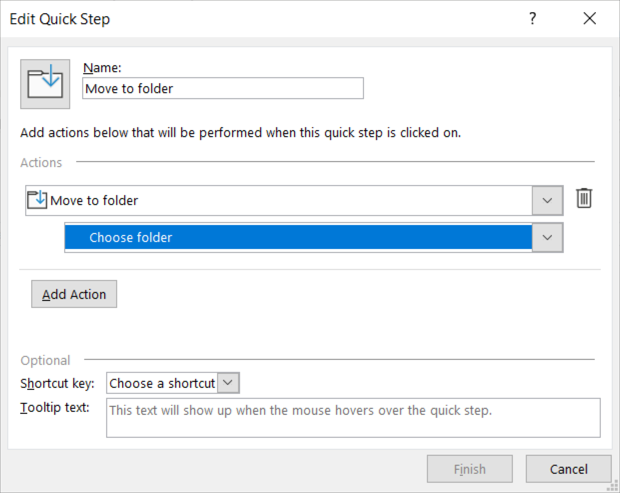
Optionally, you can assign a Shortcut Key using that drop-down box at the bottom as well as insert Tooltip Text so you know what the Quick Step does when you hover your cursor over it.
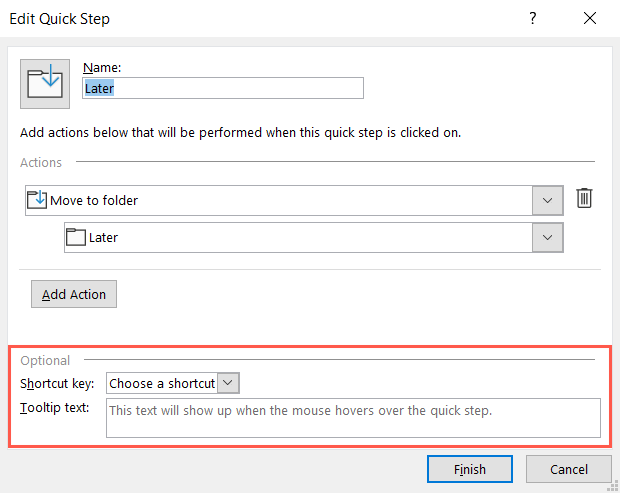
Click “Finish” to save your new Quick Step.
2. Change the Email Status
If you’d like to change the status of an email to read or unread or set the importance, you can use a Change Status Quick Step.
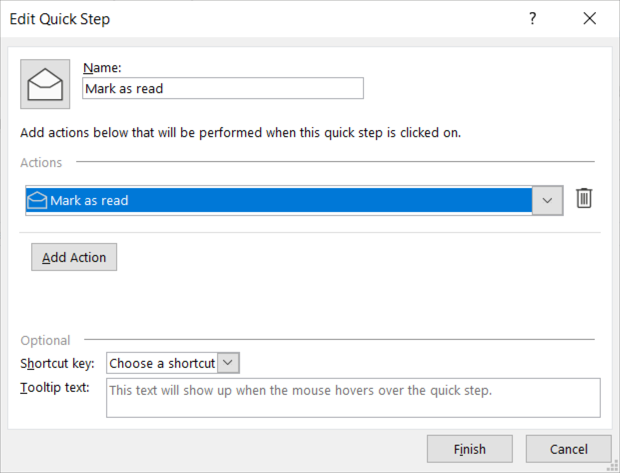
Select the Choose an Action drop-down box and pick an option in the Change Status section. Then, give your Quick Step a name.
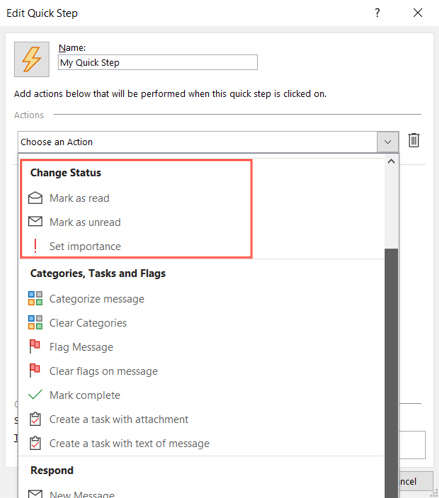
If you pick Mark as Read or Mark as Unread, you don’t have to select anything else.
If you pick Set Importance, pick the priority in the subsequent drop-down box that appears. This is convenient for quickly marking messages as Important.
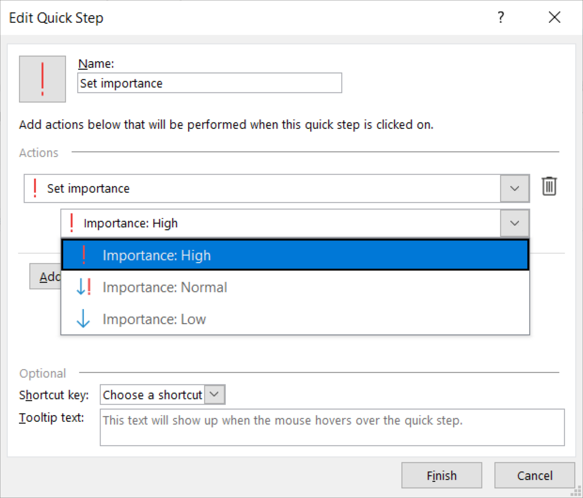
Optionally, assign a shortcut and add a tooltip, then click “Finish” to save the Quick Step.
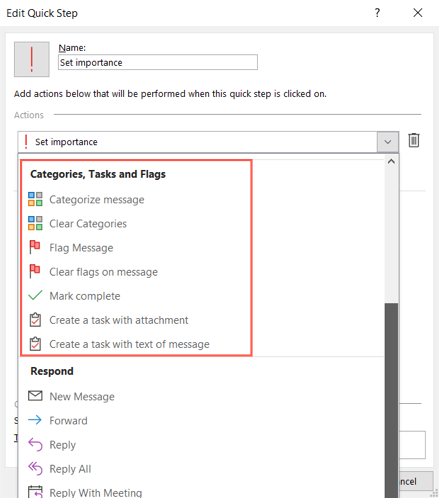
3. Manage Categories, Tasks, and Flags
Using categories, tasks, and flags, you can do a number of things with your email. Assign a category, attach a flag, or create a task. You can also clear the categories or tags or mark the message complete.
Select the Choose an Action drop-down box and pick an option in the Categories, Tasks, and Flags section. Then, name the Quick Step.
As an example, we’ll pick the Categorize Message action. Next, select the category in the subsequent drop-down box. Then with a click, you can assign a category to the message.

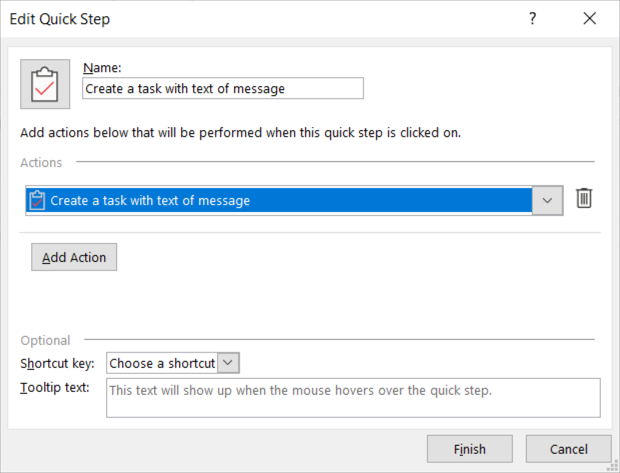
As another example, we’ll use the Create a Task With Text of Message action. This is a terrific action to use if you manage your to-dos in Outlook. Then, just select the Quick Step and you’ll see a new task window open with the email in the body.
Optionally, assign a shortcut and add a tooltip, then click “Finish” to save your Quick Step.
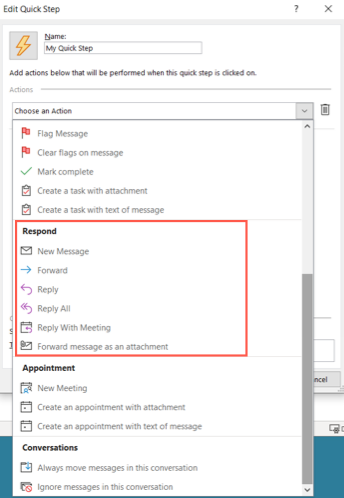
4. Respond, Reply, or Forward
Using the Respond category, you can compose a new message, forward, reply, or reply all, reply with a meeting, or forward the email as an attachment.
Select the Choose an Action drop-down box and pick an option in the Respond section.
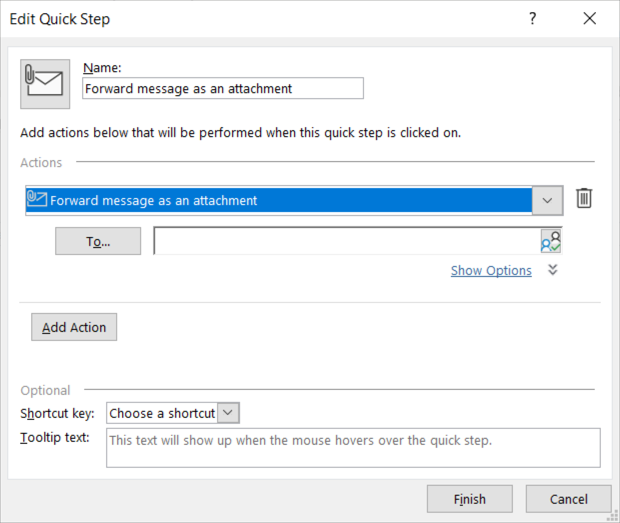
A good example here is to forward the message as an attachment. This is perfect if you tend to receive emails that you often forward to someone else. Pick Forward Message as an Attachment in the Choose an Action box. To complete the remaining details at the time, you don’t have to select anything else.
To prefill the details for the email you forward, select “Show Options.”
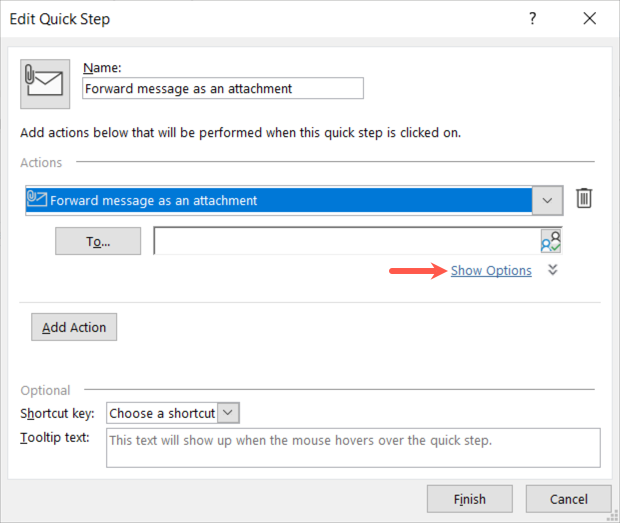
You can then add as much or little as you like for the email including to, subject, flag, importance, and text. Just remember, these details apply every time you use the Quick Step.
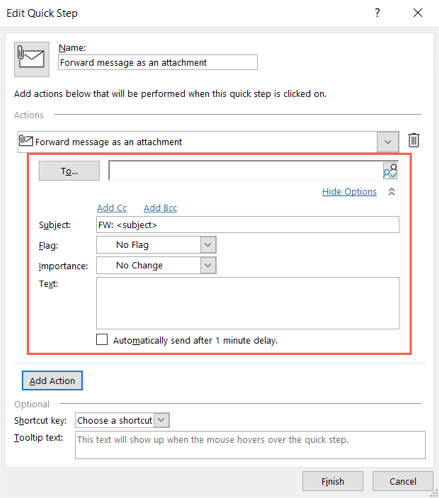
Be sure to name the Quick Step and select any additional options at the bottom. Click “Finish.”
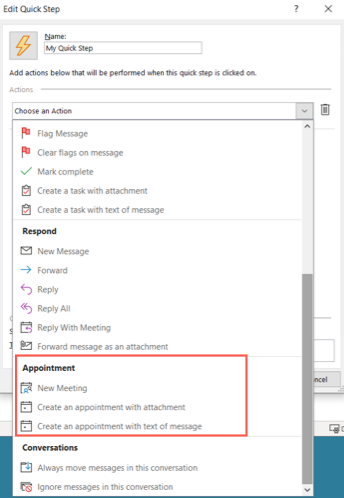
5. Create an Appointment
The Appointment category is ideal for those messages you receive that often prompt get-togethers. You can set up a new meeting or create an appointment.
One awesome example is creating a new meeting.
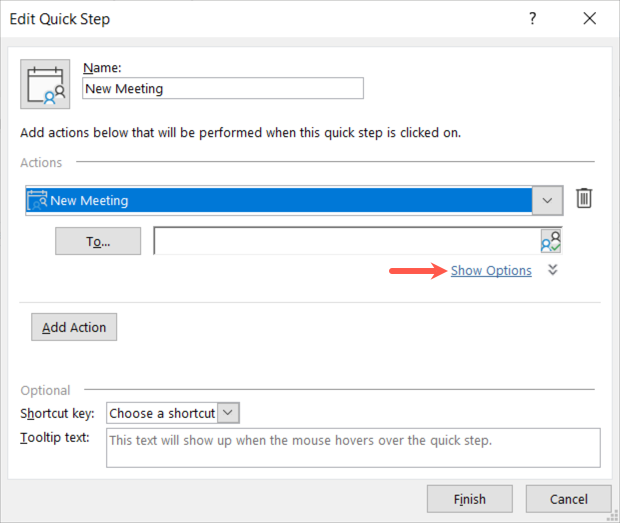
To set up a blank meeting request that you fill out on the spot, simply select New Meeting in the Choose an Action drop-down box and nothing else. To prefill the meeting details, select “Show Options.”
Like the Respond Quick Step above, you can add optional details like attendees, subject, location, importance, and text. Again, these details apply each time you use the Quick Step.
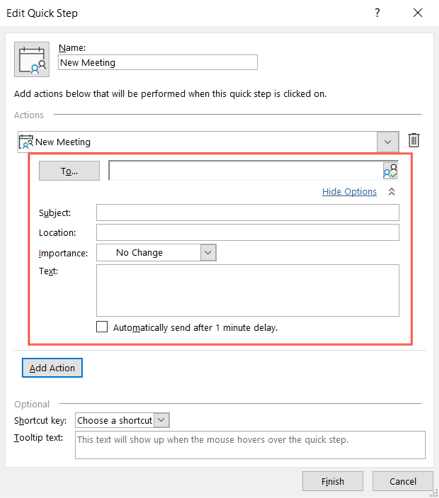
Give your Quick Step a name and select any additional options at the bottom. Click “Finish.”
6. Handle Conversations
The last Quick Step category for custom actions is Conversations. With it, you can always move messages in the conversation or simply ignore them.
Select the Choose an Action drop-down box and pick an option in the Conversation section.
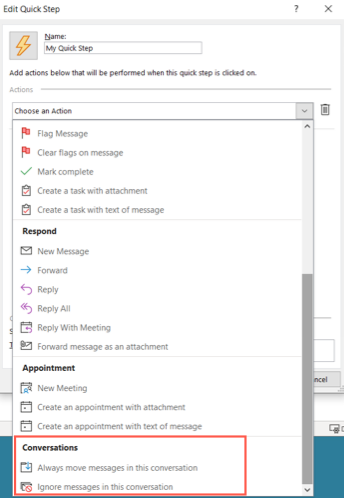
If you choose to move the messages, select the location in the subsequent drop-down box. If you choose to ignore the messages, you don’t have to select anything else.
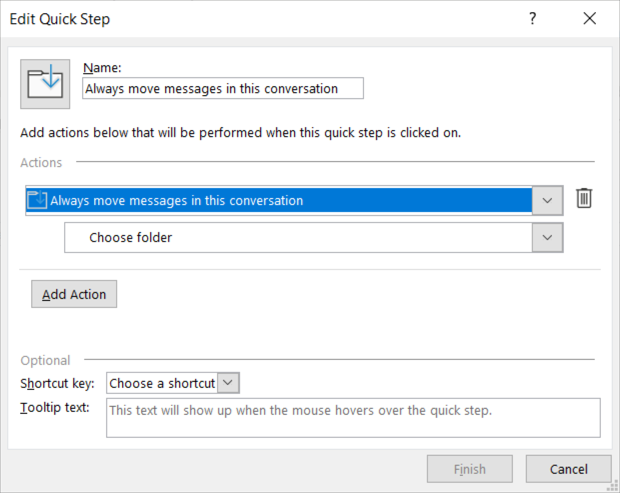
Name your Quick Step, pick an option at the bottom if you like, and click “Finish.”
How to Use Your Quick Step
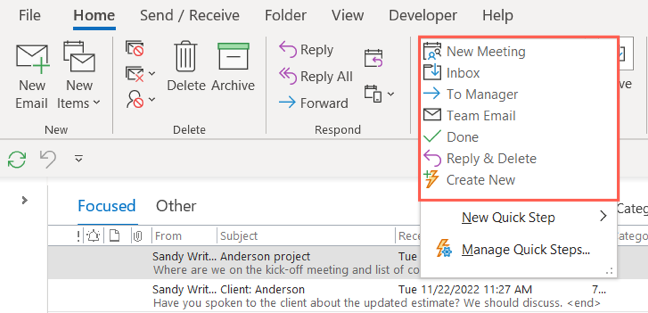
After you create a custom Quick Step, you can use it just like the premade options. Select the email and head to the Home tab. Choose the action in the Quick Step box in the same named section of the ribbon. And that’s all there is to it!
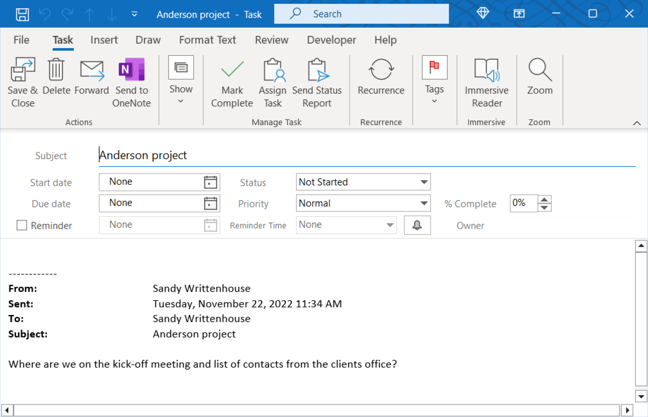
If the Quick Step moves, marks, or responds, it’ll happen automatically when you click the button. If you set up a Quick Step for forwarding a message, creating a task, or setting up an appointment, you’ll see the corresponding box appear, like the Quick Step shown below to create a task.
While rules in Outlook are great for automating tasks without lifting a finger, you may want to take an action to perform repetitive tasks on particular emails. This is the ideal time to use Quick Steps.