
“Where’d my email go? It just disappeared.” It’s shocking how many times I’ve heard this over my career. But not as shocking as how many people who don’t realize that they can easily search for a specific email in Outlook.
After reading this guide on how to search Outlook email by date, sender, keyword, and more, you’ll be able to find any email in Outlook too. We’re going to give you all the Outlook email search tips you can handle.

Are Your Emails Indexed?
For the best email search results, let’s make sure Outlook has indexed everything.
What’s indexing? Just like the index of a book has all the topics listed and where to find them, Outlook indexing creates a database like that. It’s easier for programs to search through a database than a bunch of freeform text.
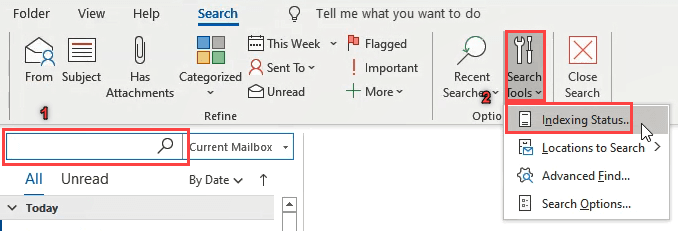
- Put the cursor in the Search Current Mailbox field, also known as the Instant Search box. This will bring up the Search tools bar.
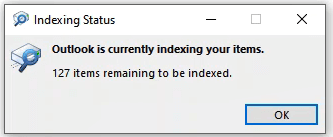
- Click on the Search Tools button and then on Indexing Status. A small window will open showing how many emails are left to be indexed.
If the number of items to be indexed is anything but zero, give it a few minutes. That will ensure that the search is as complete as possible.
Indexing does take some resources. If you find that it slows down Outlook or your computer too much, you can turn off indexing to get better computer performance.
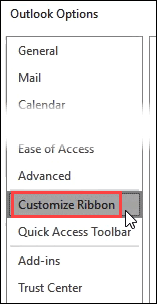
Permanently Add Search Tab
Wouldn’t it be great if we could easily get into the search tab without having to click in the search bar every time? Let’s do that.
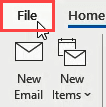
- Click on File.
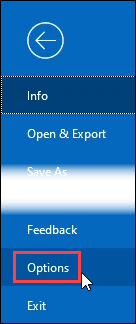
- Click on Options on the left side, about halfway down.
- In the Options window, click on Customize Ribbon.
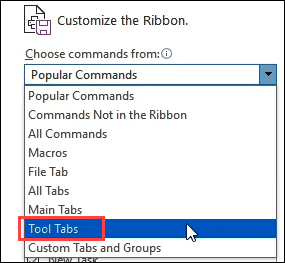
- In the Customize Ribbon pane, click on the dropdown menu under Choose commands from: and select Tool Tabs.
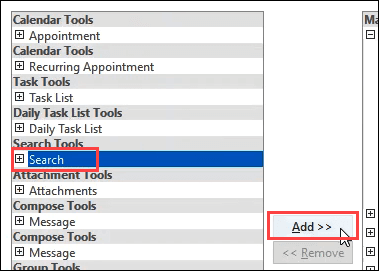
- Look for Search Tools and select it. Then click on the Add>> button.
- Search Tools will appear in the Main Tabs area. Use the up and down arrows beside this area to determine where it will appear in the ribbon, or leave it where it is. Then click OK to commit the change.
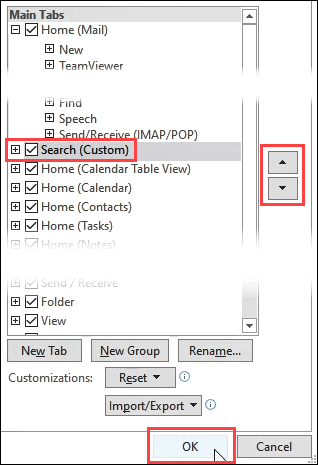
- Look for the Search Tools tab. Now we can access all the search tools easily anytime.
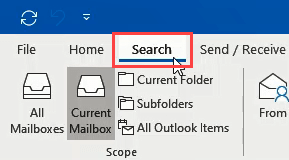
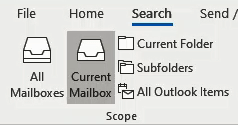
Set The Scope Of The Search
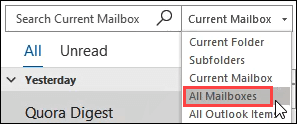
In the Search Tools tab, we can easily set the scope of the search. On the left side, we’ll see that we can set the scope to All Mailboxes, Current Mailbox, Current Folder, Subfolders,or All Outlook Items.
All Mailboxes – choose this scope if we have shared mailboxes or other accounts in Outlook. Some people may have both their work and personal email accounts in Outlook.
Current Mailbox – choose this scope to keep the search within just the one mailbox. Ensure that the mailbox is selected in the left pane of Outlook.
Current Folder – this scope will limit the search to the folder that is currently selected in the left pane of Outlook.
Subfolders – this limits the scope to the folders under whatever folder is selected in the left pane.
All Outlook Items – The most open scope will apply the search to all emails, contacts, calendar items, and tasks. Because of the large amount of data, searches on this scope can be slow and yield unnecessary results. Use this scope sparingly.
Search Operators In Outlook
Search results can be made more specific by using search operators.
To find a specific phrase, put double quote marks around the search phrase.
Example: “TPS report”

To find items that must have two or more words in it, but not necessarily right next to each other or in the order written, use the AND operator.
Example: work AND weekend

To find items containing a keyword and exclude items that contain a different keyword, use the NOT operator.
Example: saturday NOT great

Looking for something that could have one word or another? Try the OR operator.
Example: giraffe OR product

All these operators can be combined to make the search as specific as we’d like. We could have something as complex as “TPS report” AND weekend OR giraffe NOT great.
Search Outlook By Keyword
The easiest search Outlook email is the keyword search. It’s most simply done from the Instant Search field at the top of our inbox.
- Set the scope in the drop-down box next to the Instant Search field, or in the Search tab.
- Type the keyword, or words, into the search field and tap the Enter key. The search operators can be used here to help make the search more specific.

Search Outlook By Sender
To search Outlook email by sender:
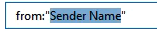
- Go to the Search tab and click on the From button.
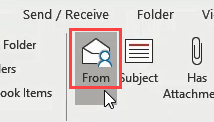
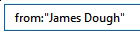
- That will enter <pre>from:”Sender Name”</pre> in the Instant Search field.
- Remove Sender Name from between the double-quotes and type in the name of the person we’re looking for. We can also just type the whole term directly into the Instant Search. Tap the Enter key to search.
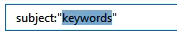
Search Outlook By Subject
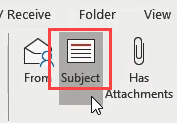
To search Outlook email by subject:
- Under the Search tab, click on Subject.
- This puts <pre>subject:”keywords”</pre> in the Instant Search field.
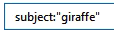
- Replace keywords with the subject we’re looking for. The whole phrase can be typed into Instant Search too. Tap the Enter key to search.
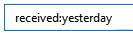
Search Outlook By Date
To search Outlook emails by date:
- In the Search tab, click on This Week. It will show the options; Today, Yesterday, This Week, Last Week, This Month, Last Month, This Year, Last Year.
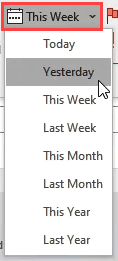
- Whatever is selected it will be entered in the Instant Search field like; <pre>received:today, received:yesterday, received:this week, received:last week, received:this month, received:last month, received:this year, received:last year</pre> Hit the Enter key to search.
We can also use the received: operator with calendar dates (<pre>received:dd/mm/yyyy</pre>) or day names (<pre>received:tuesday</pre>). When a day name is used, Outlook will search only on the most recent of that day. So just this past Tuesday, not all the Tuesdays ever.
Search Outlook For Items With Attachments
To search Outlook email by attachments:
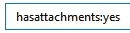
- Under the Search tab, click on Has Attachments.
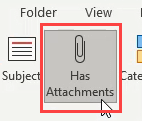
- That will enter <pre>hasttachments:yes</pre> in the Instant Search field. This should be combined with another type of search to narrow the field. Tap Enter to search.
We could also type <pre>hasattachments:no</pre> to exclude results that have attachments from the results.
Search Outlook By Category
Using the Category tool to organize emails is under-utilized.
- We can search by category using the Categorized button under the search tab.
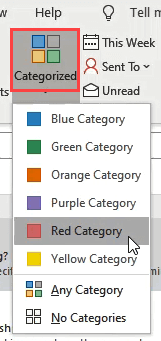
- It will enter <pre>category:=”Color Category”</pre> in the Instant Search field. Press Enter to search.
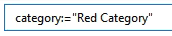
This can also be typed in manually. Just change the color to suit the category. For example, to search the red category, we’d type <pre>category:=”Red Category”</pre>. For blue, we’d type <pre>category:=”Blue Category”</pre> and so on.
Search Outlook Email By Recipient
This is the way to search for emails based on who they were sent to.
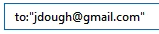
- Clicking on the Sent To button will show us the options; Sent To: Me or CC: Me, Not Sent Directly to Me, and Sent to Another Recipient.
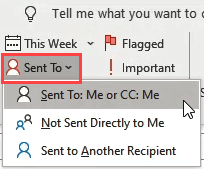
- It will enter the search text like (to:”[email protected]“ OR cc:”[email protected]”). Tap Enter to search.

- If we choose Sent to Another Recipient, we’ll need to edit the text in the search bar. It will look like <pre>to:”Recipient Name”</pre>.
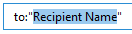
- Delete the Recipient Name part and enter the name we’re looking for. Hit Enter to search.
Search By Read Or Not Read
You can search Outlook emails by whether they’ve been read or unread.
- Clicking on the Unread button in the Search tab will find all emails that haven’t been read yet.
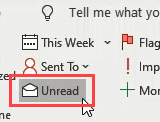
- It enters <pre>isread:no</pre> in the search bar. Press Enter to search.

- To find email that has been read change it to <pre>isread:yes</pre> and press Enter to search.

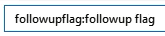
Search By Flagged
Using flags to mark important emails helps stay on top of things.
- To find emails that are flagged, click on the Flagged button in the Search tab.
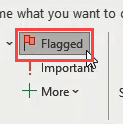
- It will search with <pre>followupflag:followup flag</pre>. Other options are <pre>followupflag:unflagged</pre> and <pre>followupflag:completed</pre>. Tap Enter to search.
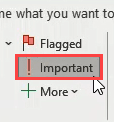
Search By Importance
See only important emails in Outlook as follows.
- Under the flagged button in the Search tab, there’s the Important button. Clicking on that will return any items that are marked important.
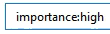
- The search query looks like <pre>importance:high</pre>. We can change high to be low or normal as well. Click on the magnifying glass or hit Enter to search.
Combining Search Options
All of the above search options can be combined. For example, if we’re looking for items that are important and flagged, we can enter <pre>importance:high followupflag:followup</pre> flag in the search bar.
This could either be typed in or just click on the Important button and then the Flagged button.
More Search Options
Click on the More button in the Search tab and we’ll see over 20 more ways to search.
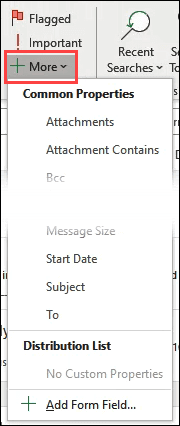
Mostly, it will put a drop-down menu under the search bar with the options that the specific search type supports.
more-added-drop-down.png
Advanced Search Options
We can access well over a hundred different search options going far beyond what we’ve covered. We might never use this, but it’s good to know it’s here.
- Click on Search Tools then Advanced Find.
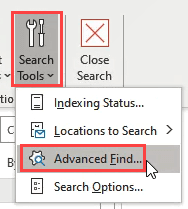
- The Advanced Find window will open.
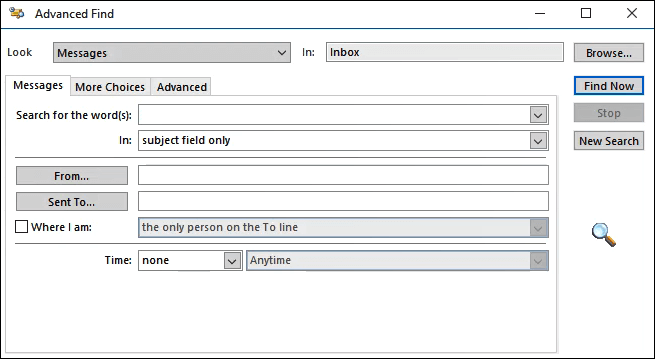
Take some time and look around here. It’s overwhelming how much can be done. We can search based on any field of any Outlook item. There are a few hundred different things we can search on.
The Power Of Outlook Search
Aren’t you amazed at how extensive and powerful Outlook’s search capabilities are? Did you even know that was all possible? Most people probably never use a tenth of all the things that Outlook can do. Use this as a springboard into learning what else Outlook can do for you.
You can create your own Outlook shortcuts for email tasks. Set up Outlook rules to organize email into folders. Or even schedule an email to be sent at a specific time! Having Outlook just read emails is a bit like using a Ferrari to get groceries.