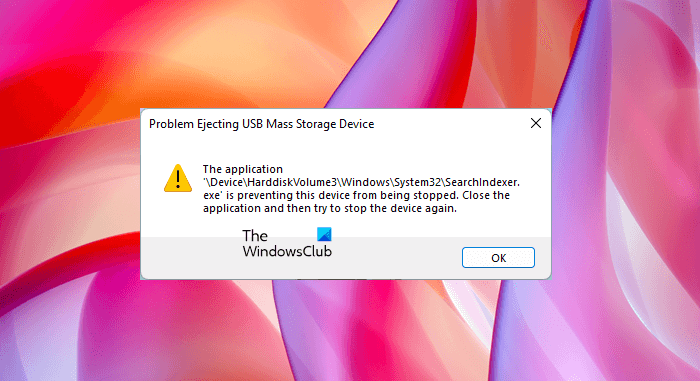
Safely Remove Hardware is a useful feature in Windows operating systems that lets users disconnect their external storage devices safely. To use this feature, right-click on your storage device in the File Explorer and select Eject. The same option is also available in the System Tray. If your USB device is busy, you will get a warning message while ejecting it. But some users are getting the warning message even when their USB device is not busy. According to them, whenever they eject their USB device, the The application SearchIndexer.exe is preventing this device from being stopped message pops up on their screens.

The complete message is as follows:
The ‘applicationdeviceharddiskvolume3windowssystem32searchindexer.exe’ is preventing this device from being stopped. Close the application and then try to stop the device again.
The application SearchIndexer.exe is preventing this device from being stopped
You can disconnect your external storage device from your computer directly but it is not recommended. Disconnecting the storage device without using the Safely Remove Hardware feature may not only result in the loss of data (if you are writing data on it) but also corrupt your storage device.
If you are receiving the error message written above while ejecting your USB storage device, you can try the following fixes:
- Restart Windows Explorer
- Disable Search Indexing on your external storage device
- Rebuild Search Index
- Change Device Removal Policy
Below, we have explained all these fixes in detail.
1] Restart Windows Explorer
Restarting Windows Explorer can fix performance and other minor issues. The steps to restart Windows Explorer are simple.
- Press Win + R keys. This will launch the Run command box.
- Type
taskmgrand click OK. - Select the Processes tab in the Task Manager.
- Scroll down and right-click on the Windows Explorer process. Select Restart.
After restarting Windows Explorer, eject your USB storage device and check if the issue persists.
2] Disable Search Indexing on your external storage device
It is clear from the error message that the problem is occurring due to the Windows Search Indexing. Therefore, disabling the Search Indexing on the external device can fix the problem. Check if Search Indexing is enabled for your USB storage device. If yes, disable it. The following instructions will guide you on this.
- Click Windows Search and type Indexing Options.
- Select Indexing Options from the search results.
- Check if your USB storage device is listed under Included Locations on the Indexing Options window. If yes, you have to remove it.
- Click Modify and uncheck the checkbox for your USB storage device.
- Click OK.
After that, you will see that Windows has started indexing the files. Wait till the Indexing gets completed. After that, close the Indexing Options window and eject your USB storage device.
Read: Can’t eject External Hard drive Drive or USB.
3] Rebuild Search Index
If the above methods did not solve your problem, rebuilding the Search Index should work. I also experienced this issue on my PC while ejecting the Sony Pendrive and I was able to fix it by rebuilding the Search Index.
The steps to rebuild Search Index are as follows:
- Launch Indexing Options window by typing indexing options in Windows Search.
- Click Advanced. The Advanced Options window will appear.
- Now, click on the Rebuild button.
- Click OK in the confirmation box.
The rebuilding Search Index will take some time. When the process gets completed, you will receive the Indexing complete message on the Indexing Options window.
After the completion of the rebuild process, you will be able to eject your external device.
Read: Fix A device which does not exist was specified Disk error.
4] Change Device Removal Policy
If none of the above methods work for you, change the Device Removal Policy so that you will remove it without using the Safely Remove Hardware feature. The following instructions will guide you on this:
- Press Win + R keys to launch the Run command box.
- Type
diskmgmt.mscand click OK. This will launch the Disk Management app. - Right-click on your USB storage device and select Properties.
- Select the Policies tab.
- Select the Quick Removal option and click OK.
The Quick Removal policy manages the storage operations in such a manner that users can remove their storage devices anytime without using the Safely Remove Hardware feature.
Related: USB Quick removal vs. Better performance.
Can’t eject hard drive because a program is using it Windows 11/10
You may get the following error message while ejecting your USB storage device by using the Safely Remove Hardware feature.
Windows can’t stop your Generic volume’ device because a program is still using it. Close any programs that might be using the device, and then try again later.
The error message shows that a program is running on your system and is preventing the device from being ejected. The fix to this problem is simple. You have to close all the running programs. If this does not work, restart Windows Explorer.
You can also try some other methods like configuring the Device Removal Policy, using Diskpart to get the drive offline, etc.
TIP: USB Disk Ejector and USB Disk Ejector are free tools that can help you eject external drives.
How do I stop a Generic volume device?
Restarting Windows Explorer may help you stop the generic volume device. You will also get the “Windows can’t stop your ‘Generic volume’ device…” error if your antivirus is scanning it. Let your antivirus finish the scan. After that, you will be able to remove the device safely. But if you are in a hurry, you can stop your Generic volume device by terminating the antivirus scan.
If you have opened multiple programs, one of those programs might be using the Generic volume device. In this case, closing the running programs will stop the Generic volume device.
Related: Cannot remove USB because Windows says This device is currently in use.
Hope this helps.
