
Ever encountered the “Critical Process Died” BSOD on your Windows 11 computer? I have, and it’s as frustrating as it sounds.
Last week, I booted up my PC, only to be greeted by this error. With my experience in troubleshooting and deep diving into various Windows forums, I found some effective solutions to fix it.
Below, I’ll share the insights and solutions that helped me overcome this issue.
What Is the “Critical Process Died” in Windows 11 Error?
The “Critical Process Died” error means that a crucial component of your Windows operating system has unexpectedly crashed or stopped working. This component could be a software process or an essential driver.
This error typically results in a BSOD, which is Windows’ way of saying, “Something went seriously wrong, and I need to stop everything to prevent further damage.” It’s like a circuit breaker in your home tripping to prevent an electrical fire. This specific error is unique to Windows 10 and 11.
What Causes “Critical Process Died”?
The main culprit behind the “Critical Process Died” error is typically a process failure within the operating system.
Here are the typical causes for that:
- Faulty or Outdated Drivers: Incompatible or outdated drivers can often lead to system conflicts.
- Corrupted System Files: These are essential files for Windows operations. If they get corrupted, it can cause this error.
- Bad Sectors on the Hard Drive: Physical issues with your hard drive can also trigger this BSOD.
- Faulty Hardware Components: Sometimes, the problem could be with the hardware, like RAM or the motherboard.
- Malware or Viruses: These malicious programs can interfere with system processes.
- Windows Update Issues: Occasionally, a Windows update might not install correctly, leading to system instability.
How To Fix “Critical Process Died” Blue Screen of Death on Windows 11?
Most of these solutions will also work with Windows 10 systems with little changes in the steps. Remember, if you’re feeling overwhelmed, you can use one of the BSOD repair tools to make your task easier.
When Windows Is Unable to Boot
When you can’t boot your computer, I found that starting the system in Automatic Repair Mode was an effective solution.
Let’s start with some preliminary checks.
1. Preliminary Checks
- Restart Your PC: Often, temporary software glitches can cause major errors. A restart clears the system’s memory and can resolve transient issues. Simply turn off your PC and turn it back on.
- Unplug and Plug the External Hardware: External devices can sometimes conflict with your system, particularly if they have outdated or incompatible drivers. Disconnect all peripherals (USB drives, external hard drives, printers, etc.) and restart your computer. If your PC boots successfully, reconnect devices one by one to identify the culprit.
2. Restart Your PC into Automatic Repair Mode
To apply further fixes, you need to launch Repair Mode on Windows. This is a recovery environment that allows you to access troubleshooting tools.
Here are the steps for that:
- Fully shut down your PC.
- Power it on and, as the Windows logo appears, hold the power button down until it turns off.
- Repeat this twice. On the third start, Windows should enter Automatic Repair Mode.
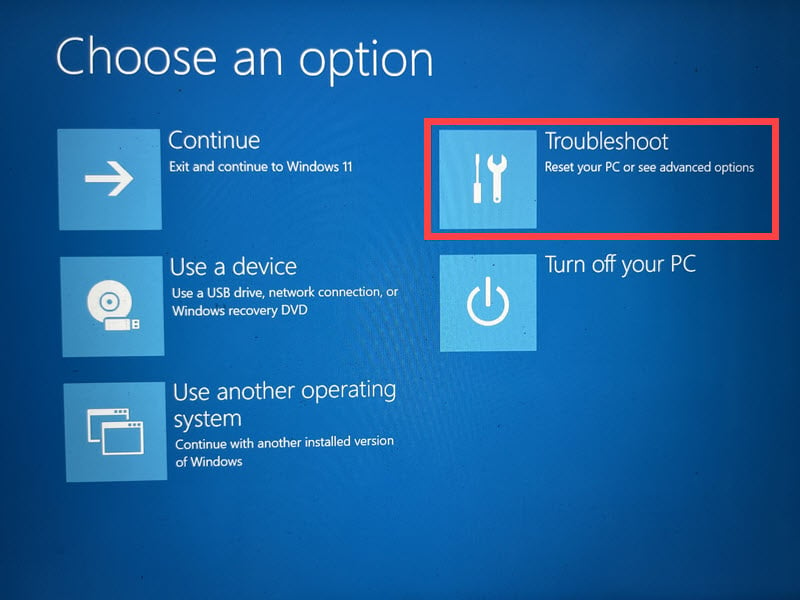
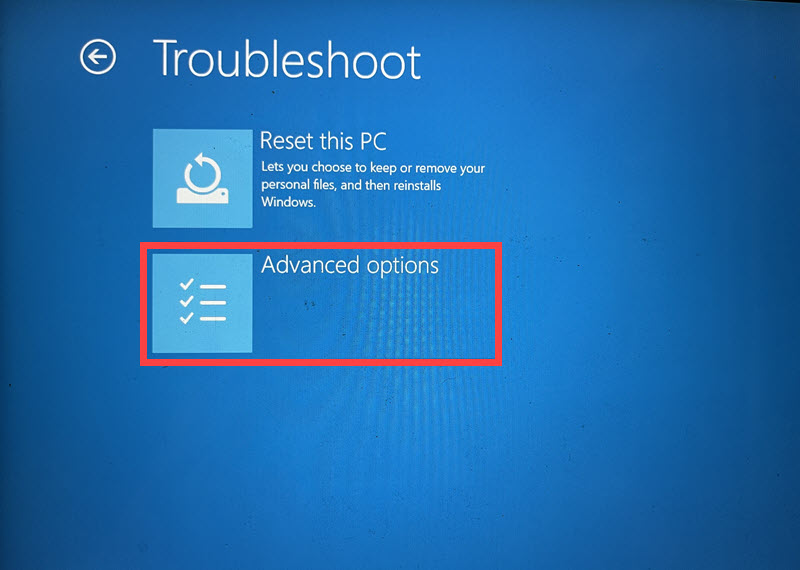
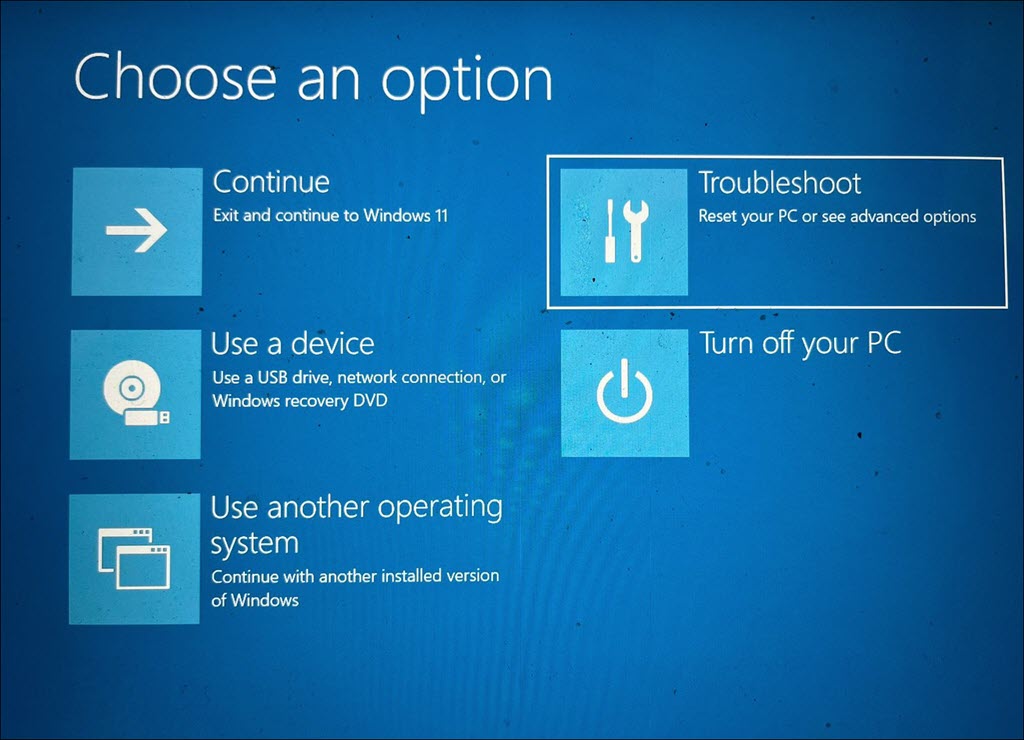
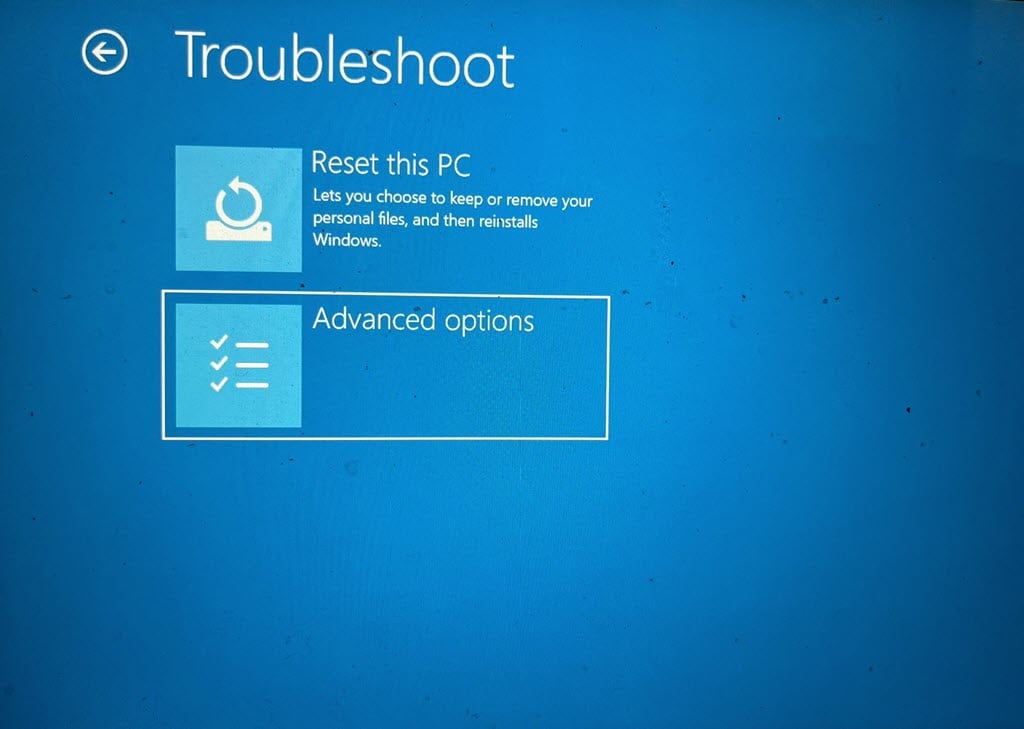
- Choose Troubleshoot and then Advanced options.
Alternatively, you can use a bootable USB or DVD drive loaded with the Windows installation files.
Here’s how to do that:
- Place the USB into your device and reboot it.
- A prompt saying, “Press any key to continue..” will appear. Press any key to open the Windows Setup Window.
- Set your preferred options – choose the Language for installation, Time & Currency format, and Keyboard or input method. Click Next to proceed.
- In the following window, select Repair your computer at the bottom.
- After that, choose the Troubleshoot option.
- Next, go to the Advanced options.
- This will take you to the Repair Mode.
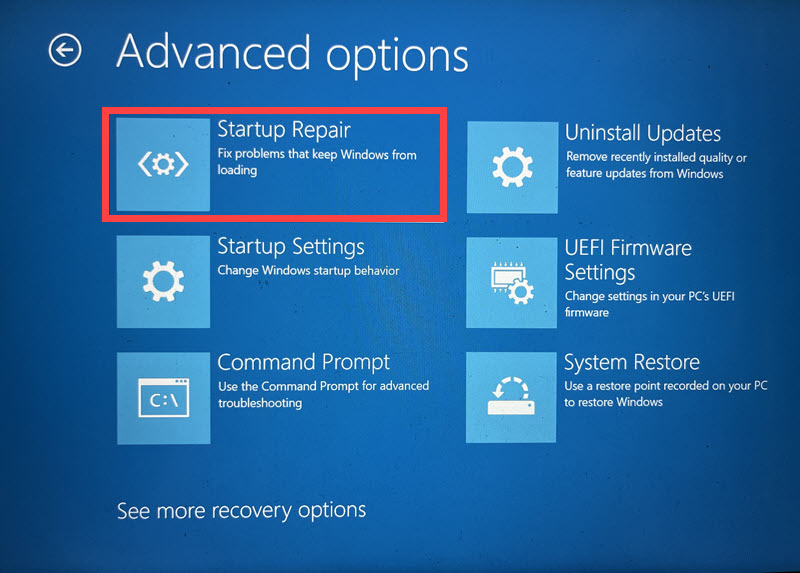
3. Apply Startup Repair Option
Startup Repair is a tool specifically designed to fix issues that are preventing Windows from booting. It can resolve problems caused by corrupted system files or misconfigured settings.
- In the Advanced options menu, select the Startup Repair option.
- Your system will then undergo a restart.
- Choose an account to proceed. If you have more than one account, it’s best to choose the one with administrative privileges.
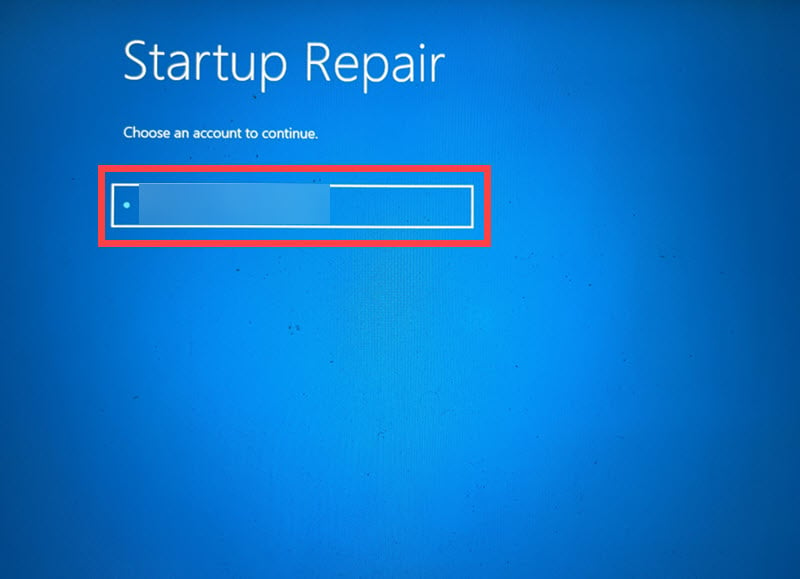
- Enter the password for the chosen account.
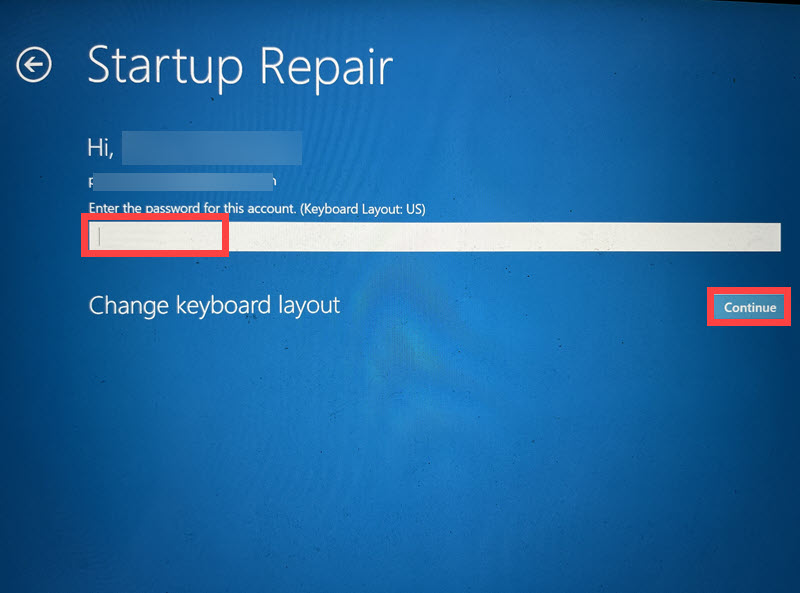
- Complete the Startup Repair by following the instructions that appear on the screen.
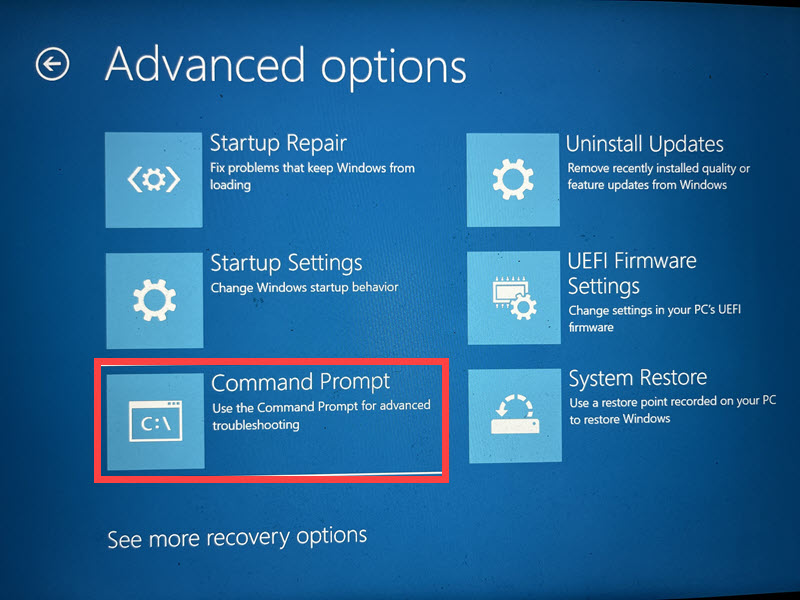
4. Run SFC and DISM Commands
System File Checker (SFC) and Deployment Image Servicing and Management (DISM) are advanced tools for repairing system files. These commands help restore the health of your system’s image and fix issues such as “Critical Process Died.”
- Select Command Prompt under the “Advanced options.”
- Type
sfc /scannowand press Enter. This will scan for and attempt to repair corrupt system files.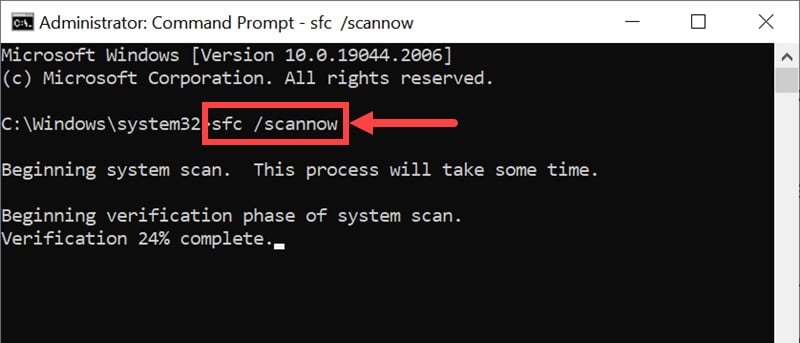
- After SFC completes, run DISM by typing
DISM /Online /Cleanup-Image /RestoreHealthand pressing Enter.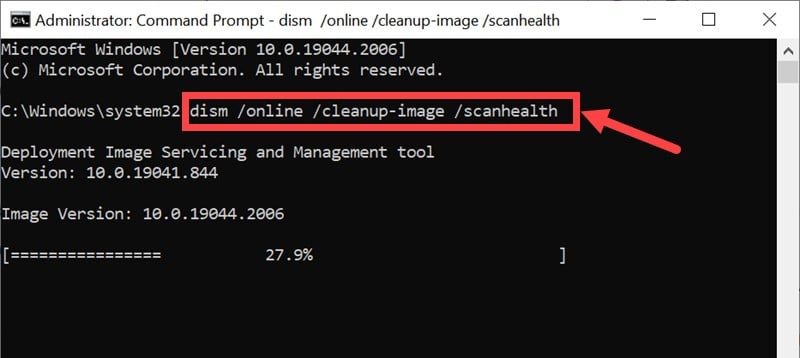
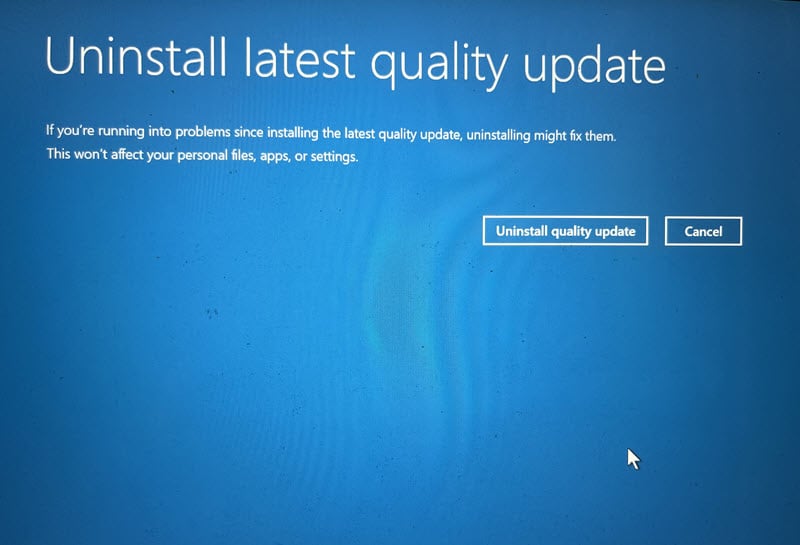
5. Uninstall Recent Windows Updates
Occasionally, a Windows update might cause system instability. Removing recent updates can reverse changes that might be causing the error.
- In Automatic Repair Mode, go to Advanced options > Uninstall Updates.
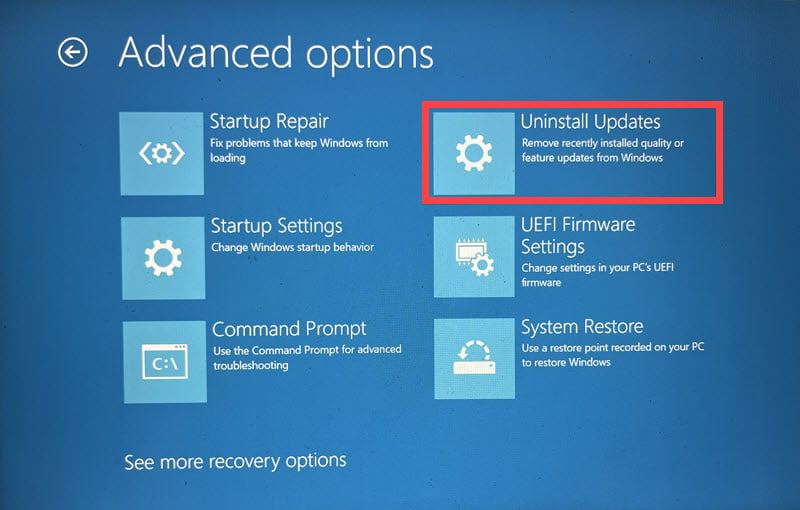
- Choose between Uninstall latest quality update or Uninstall latest feature update.
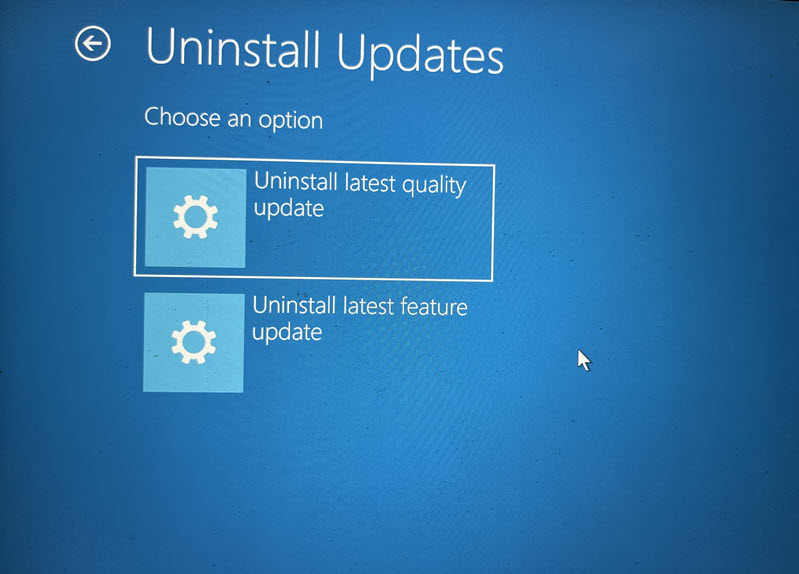
- Follow the on-screen instructions to remove the update.
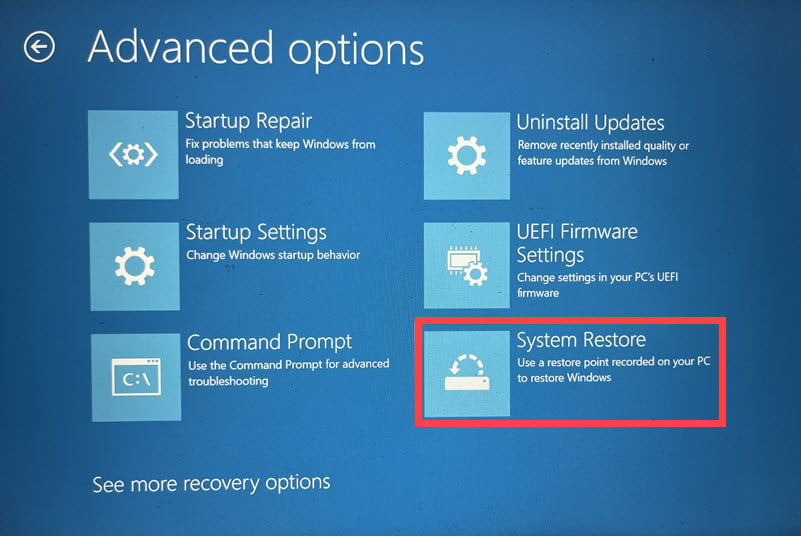
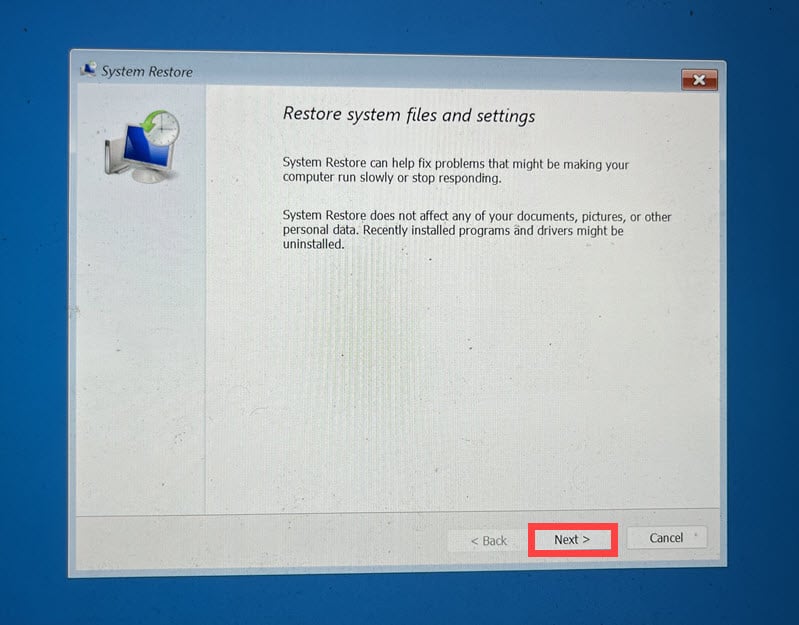
6. Restore Windows
System Restore can revert your system settings to a previous state, potentially fixing the “Critical Process Died” error. This method is particularly useful if a recent change to system settings caused the issue.
- Under Advanced options, choose System Restore.
- Click Next to begin the process.
- Select a restore point from before the error occurred.
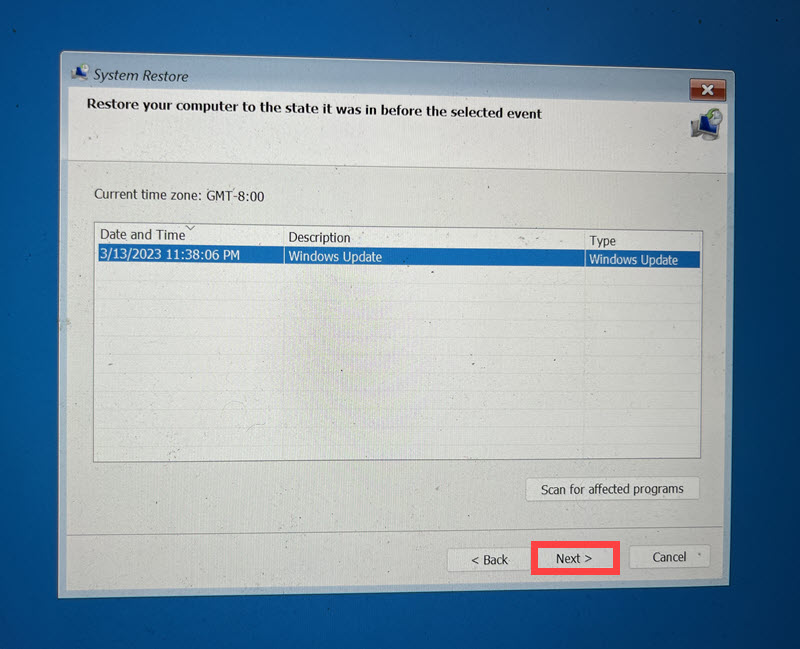
- Confirm the restore point and click Finish.
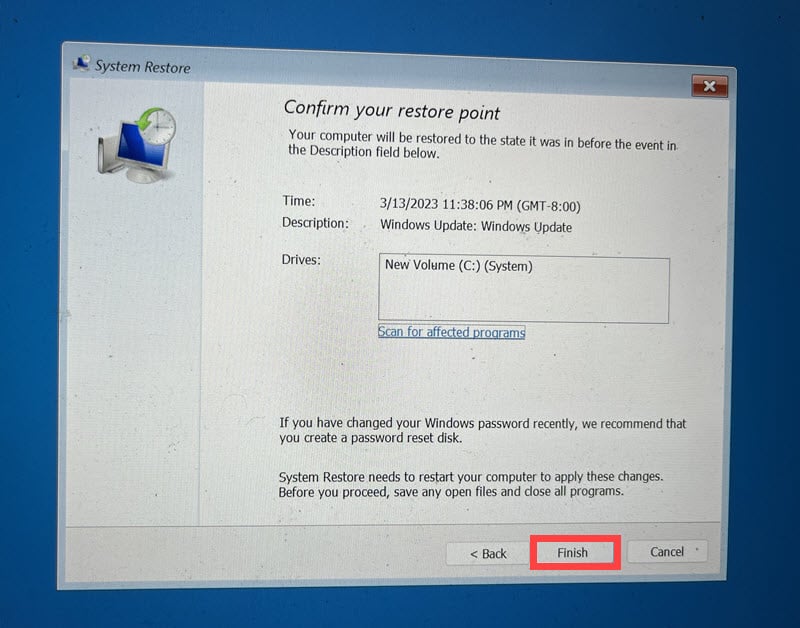
- Follow the on-screen prompts to complete the restoration.
7. Reset Windows
Resetting Windows reinstalls the operating system, which can resolve deeper issues but might result in the loss of installed software.
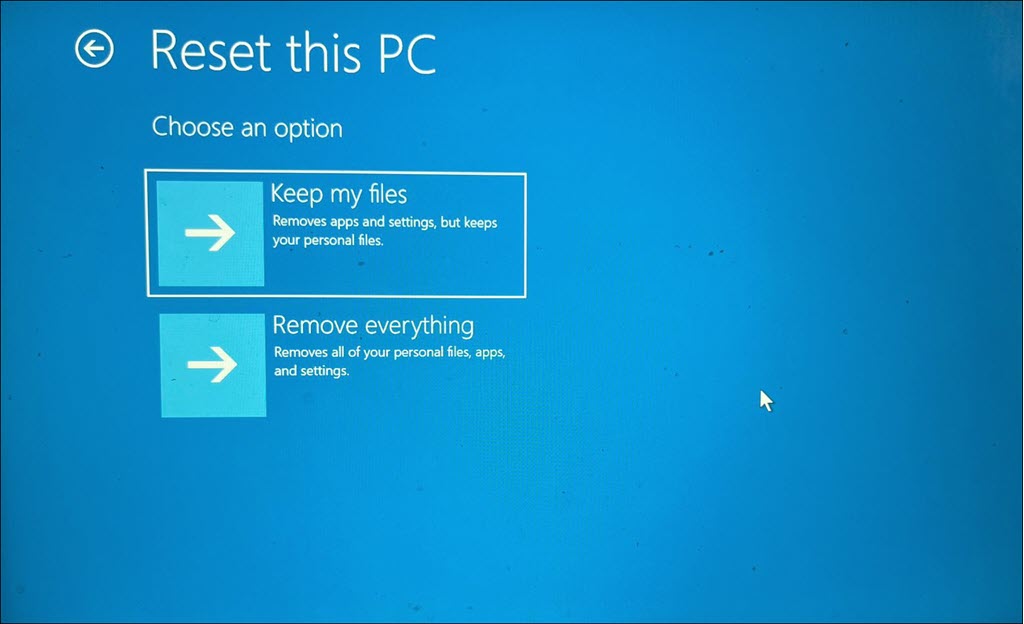
- Under Advanced options, choose Reset this PC.
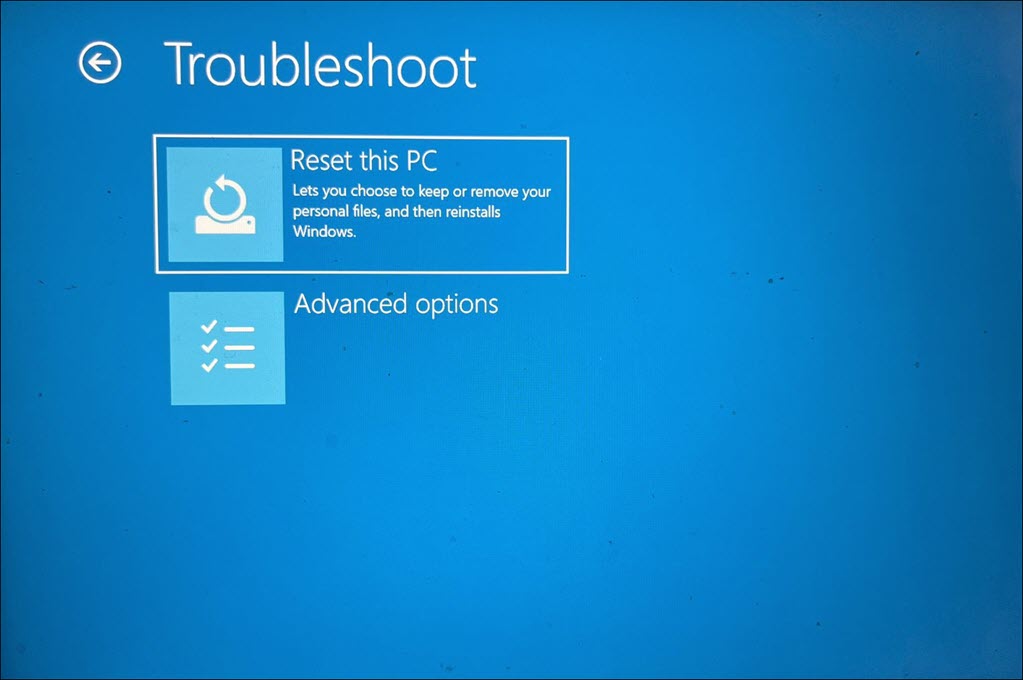
- Decide whether to keep your files or remove everything.
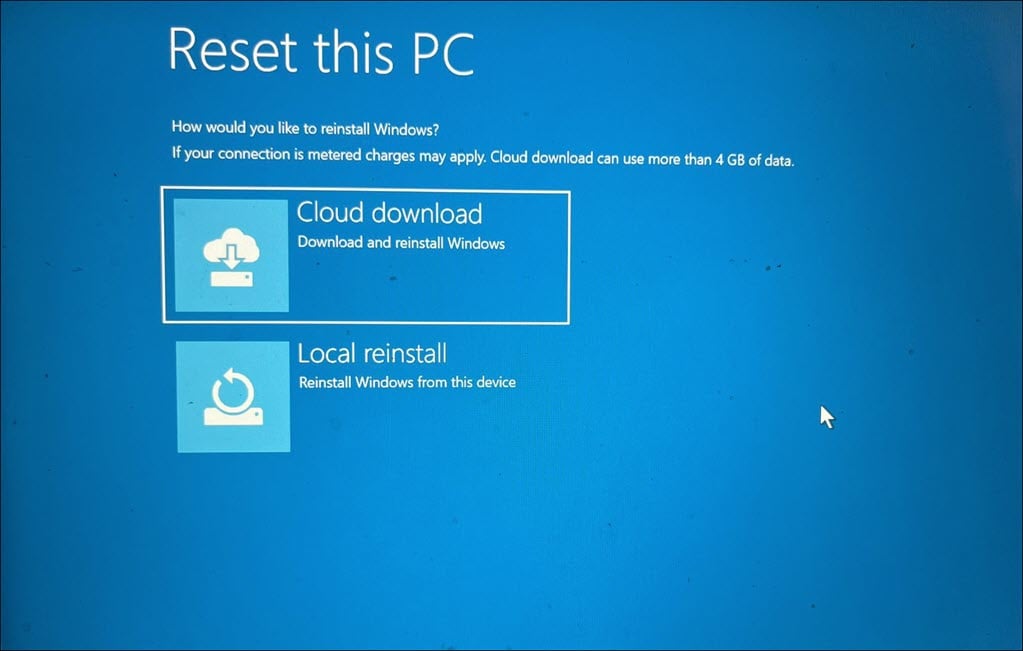
- Select how you want to reinstall the Windows – Local or Cloud reinstall.
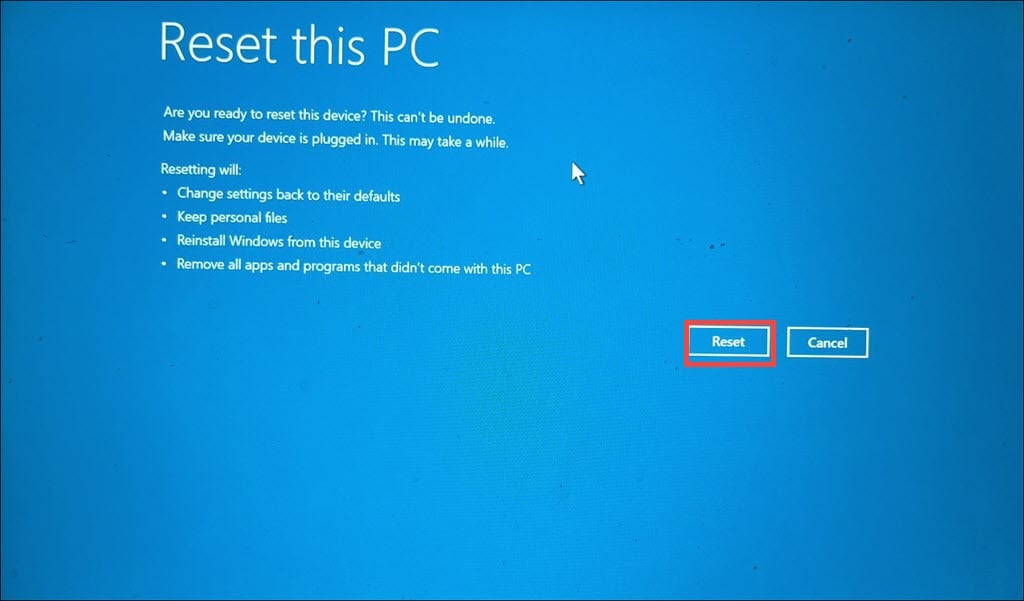
- Finally click the Reset button and follow the on-screen instructions to reset.
When Windows Can Boot
If you’re able to boot into Windows, you have more options to troubleshoot and fix the “Critical Process Died” error.
1. Restart the PC in Safe Mode
The first thing you should do is boot the system in Safe Mode. It’s a diagnostic mode in Windows that starts your computer with a minimal set of drivers and services. It’s useful for troubleshooting as it can help you determine whether a background program is causing your system to crash.
- Open the Start Menu, hold down the Shift key, choose the Power icon, then click on Restart.

- Once your system restarts, select Troubleshoot.
- Then, choose Advanced options.
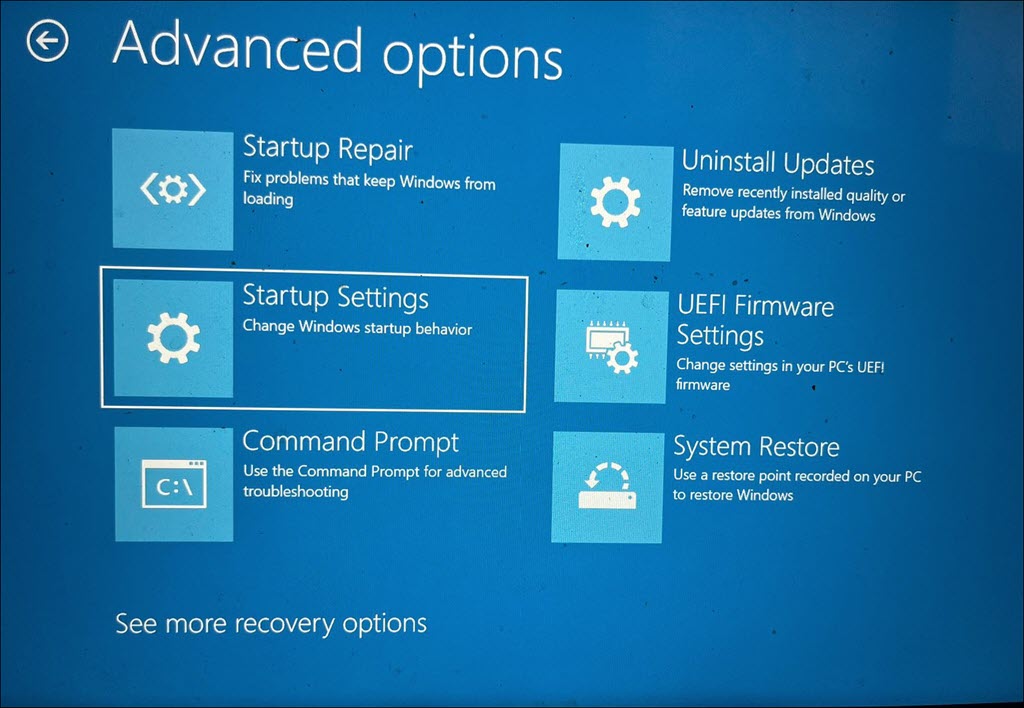
- Within Advanced options, select Startup Settings.
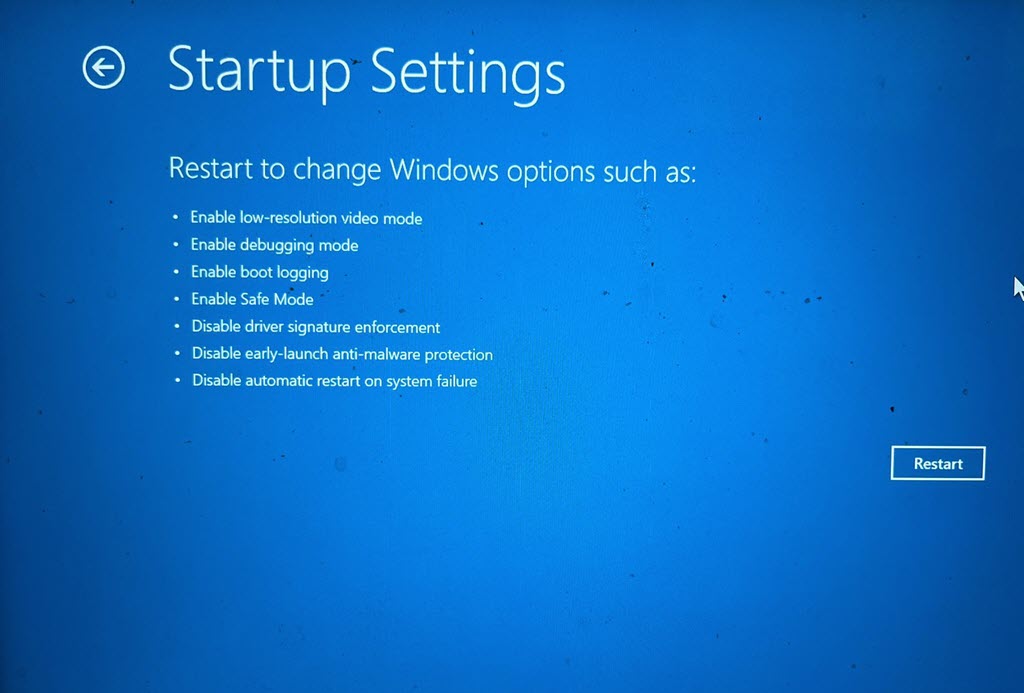
- On the following screen, click the Restart button.
- After the system restarts again, press F5 on your keyboard to start Windows in Safe Mode with Networking.
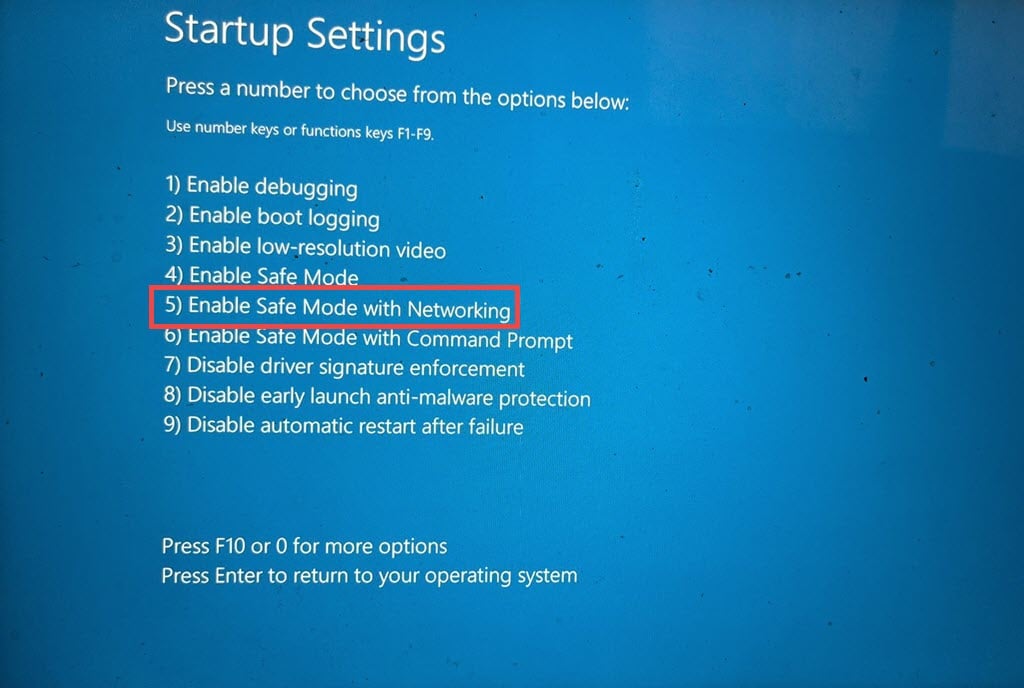
- Your system should now be operating in Safe Mode.

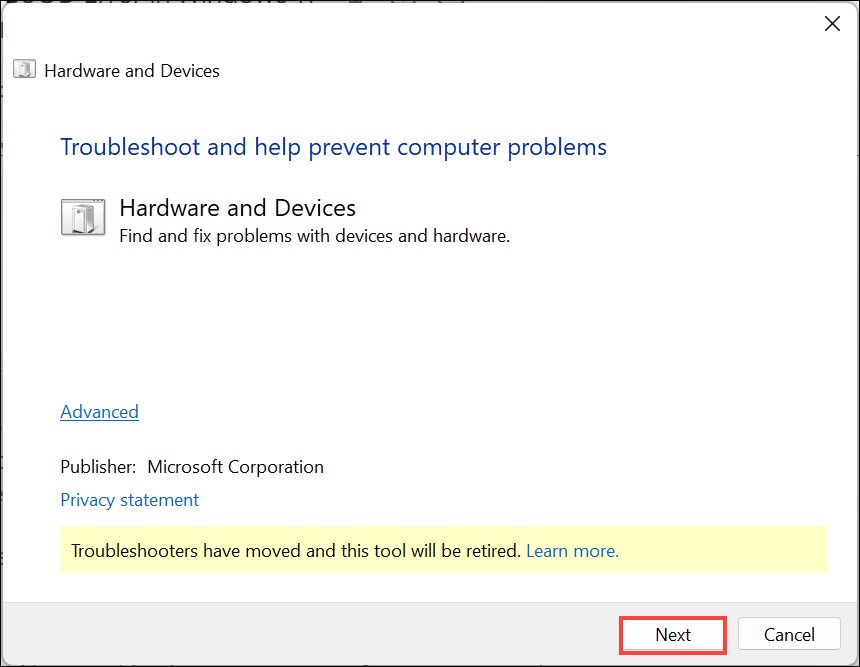
2. Run the Hardware and Device Troubleshooting Tool
Windows includes a built-in tool to diagnose and fix issues with hardware and devices.
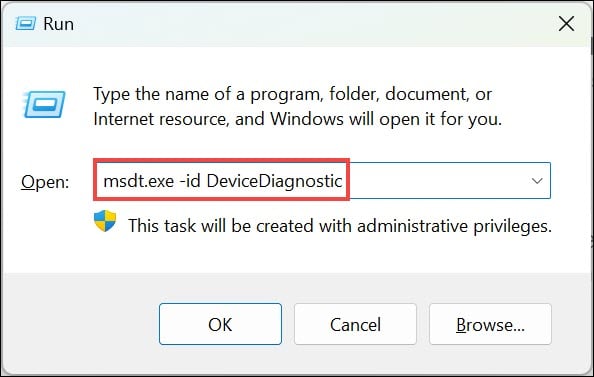
- Press the Windows + R keys to launch the Run Command window.
- Type or copy & paste the following command and press Enter:
msdt.exe -id DeviceDiagnostic
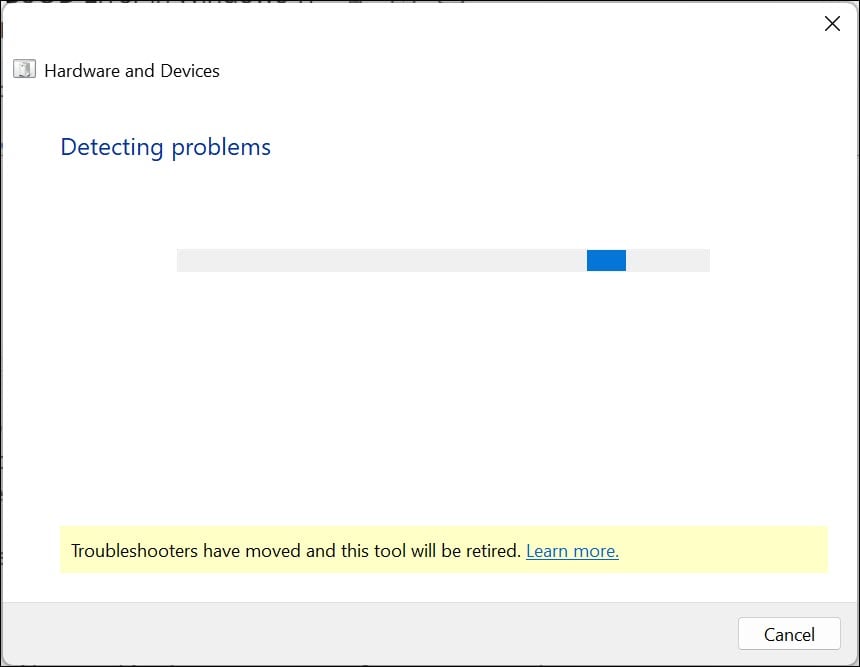
- Click Next to begin troubleshooting.
- Windows will start looking for problems.
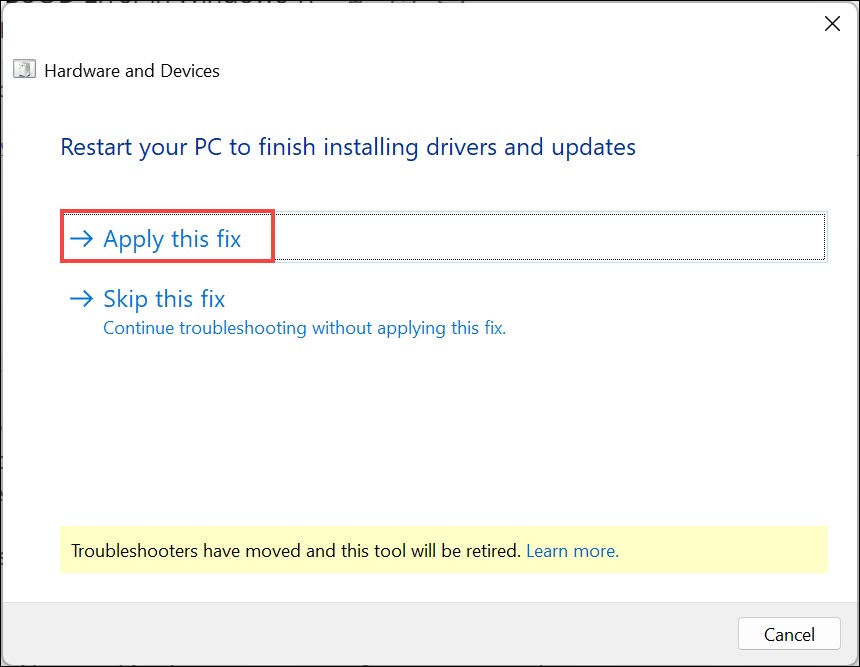
- Finally, click the Apply this fix option to solve any hardware-related issue.
3. Run SFC and DISM Commands
- Right-click on the Start button and select Terminal (Admin) from the list.
- Type
sfc /scannowand press Enter. - After SFC finishes, type
DISM /Online /Cleanup-Image /RestoreHealthand press Enter.
4. Update Essential Drivers
Keeping drivers up-to-date ensures compatibility and can resolve conflicts that might cause BSOD errors.
- Right-click on the Start button and select Device Manager.
- Right-click on each device and select Update driver.
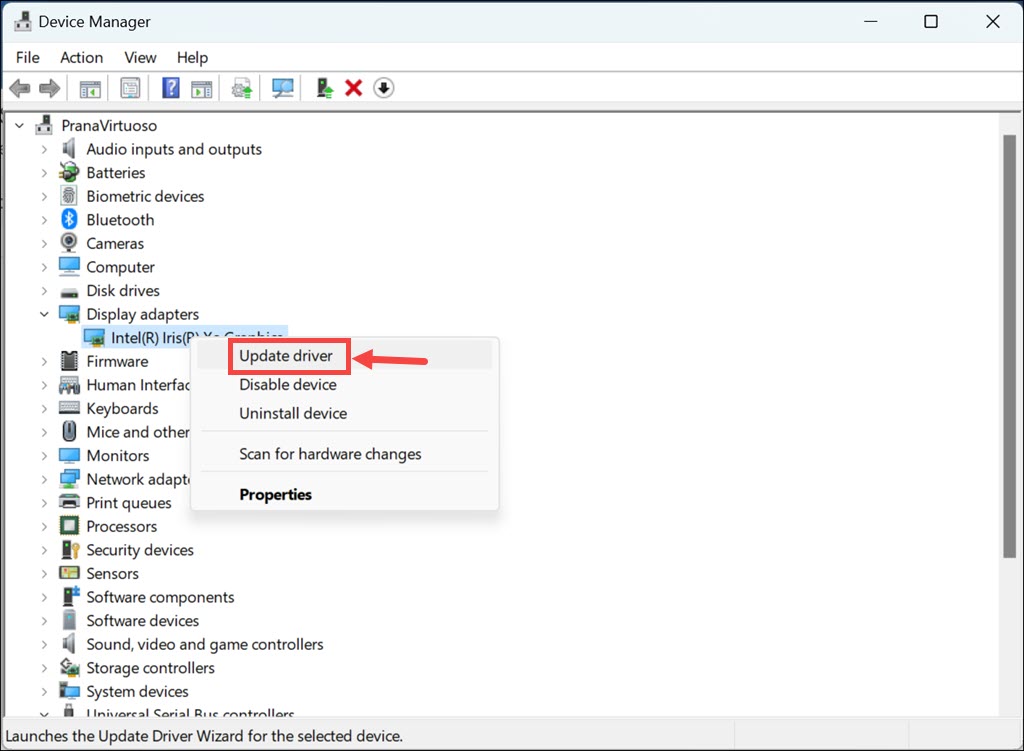
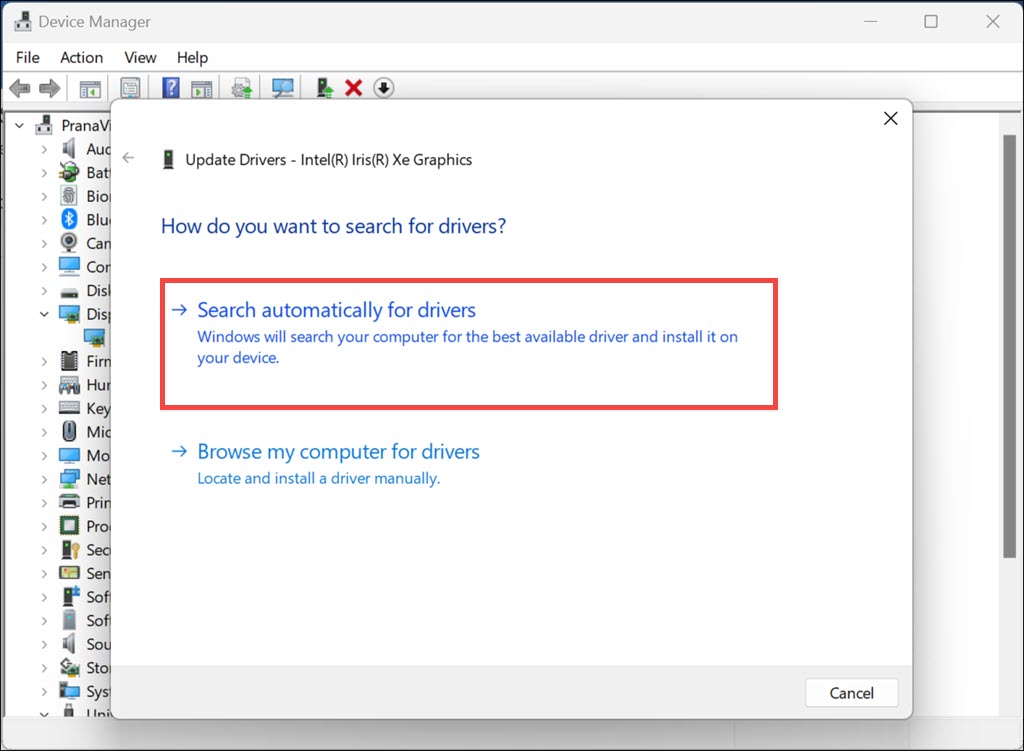
- Choose Search automatically for drivers and follow the prompts.
5. Uninstall Recent Updates
To uninstall recent updates via the Control Panel, here are the revised steps:
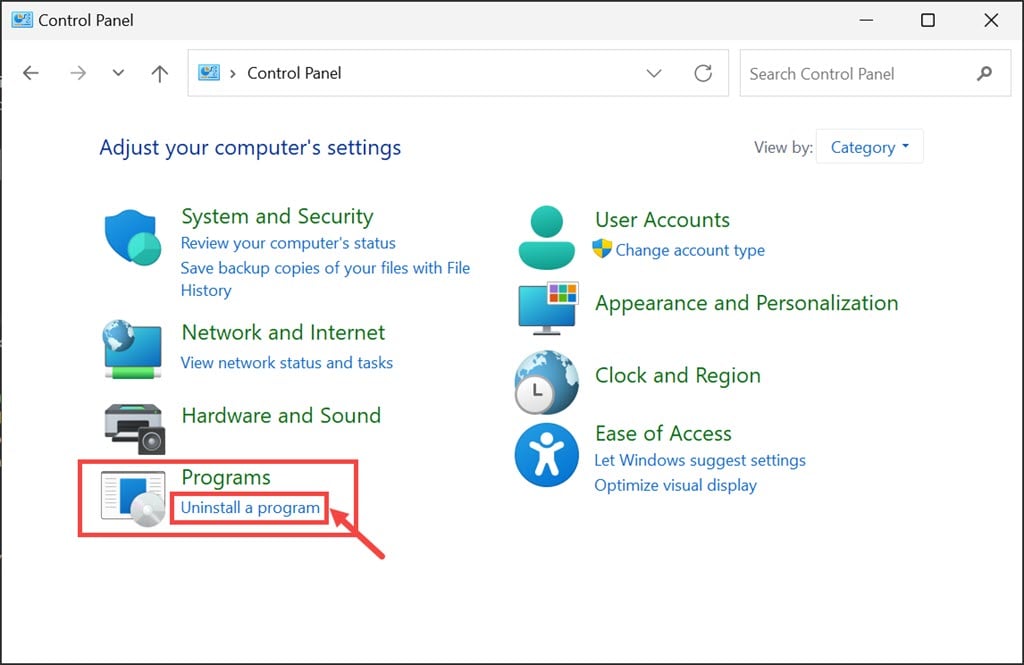
- In the Windows search box, enter Control Panel and open it.
- Within the Control Panel, under the “Programs” section, select Uninstall a program.
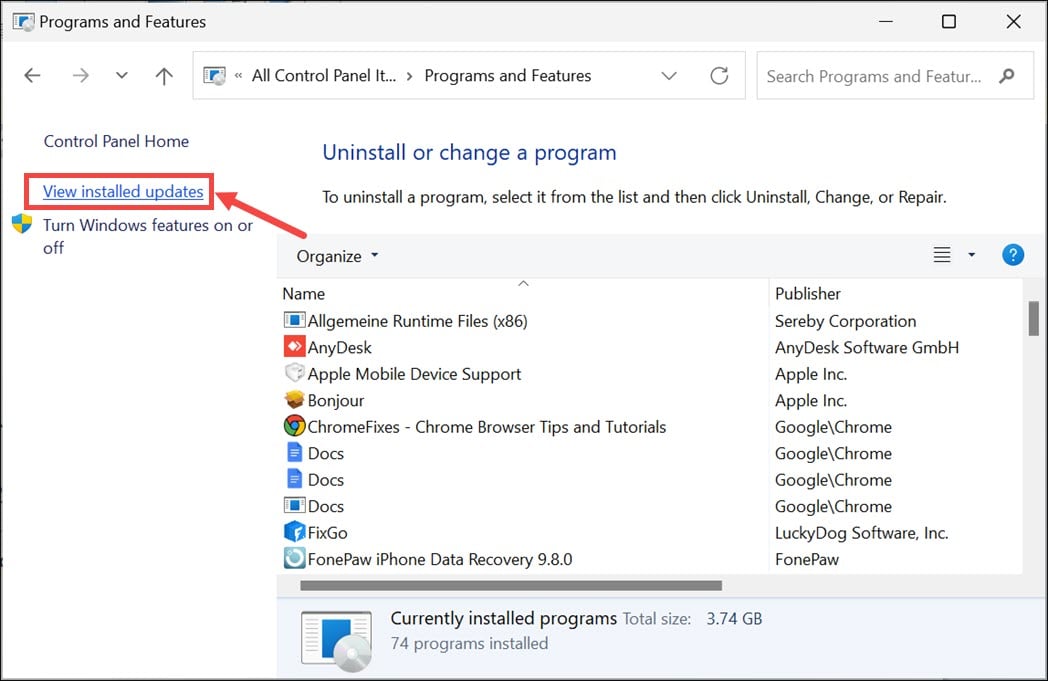
- Then, click on View installed updates located on the left side.
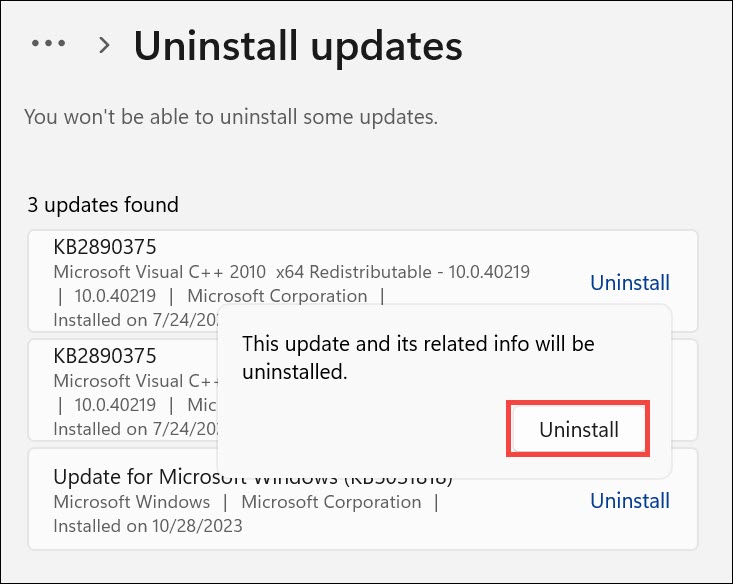
- Search for and select any recently installed updates, then click the Uninstall button.
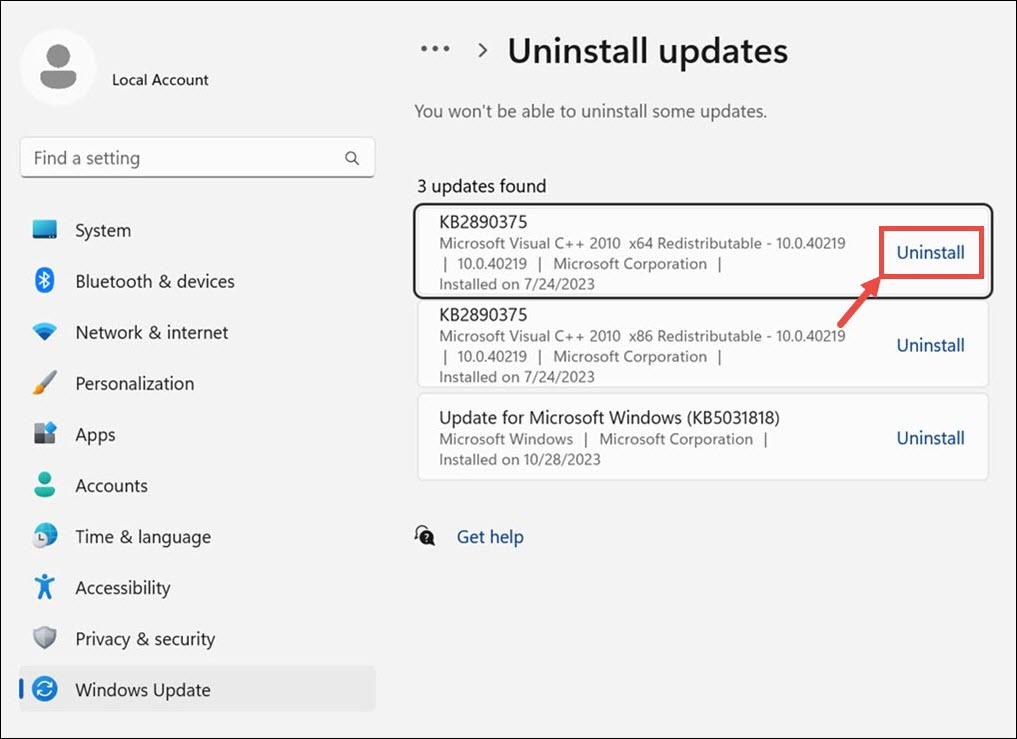
- A confirmation pop-up will appear; click Uninstall again to proceed with the uninstallation.
6. Scan for Malware
Regular scans can detect and remove harmful software that might interfere with system processes.
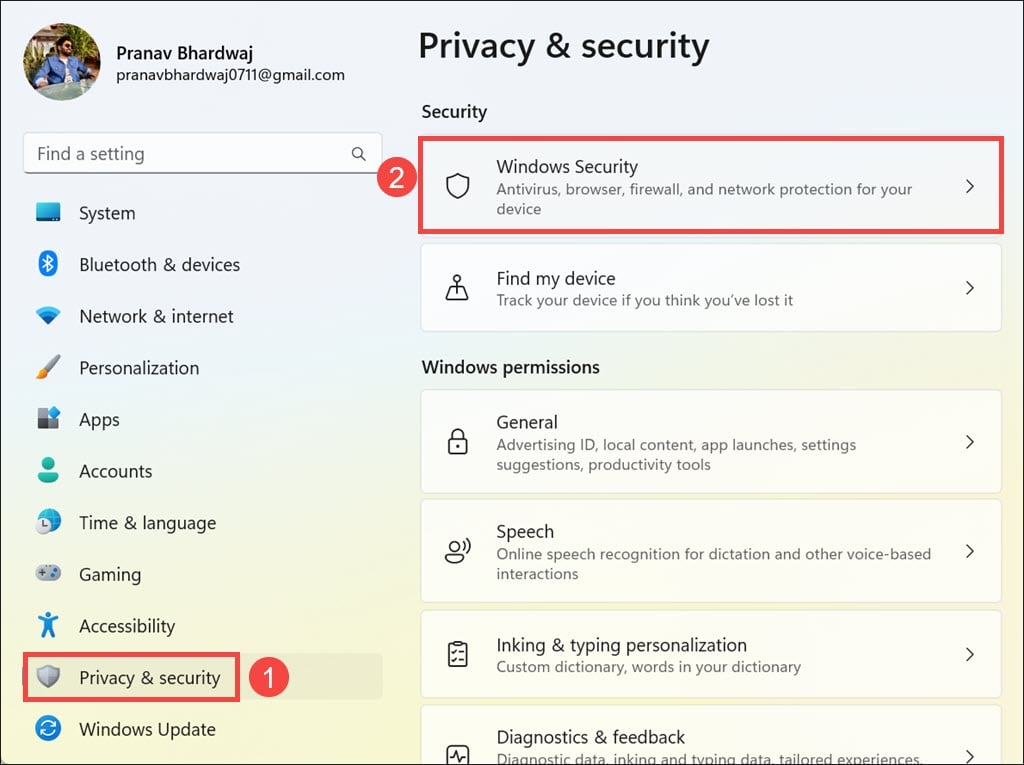
- Press Windows + I to open Windows settings.
- In the settings, go to the Privacy & security section on the left and then select Windows Security on the right.
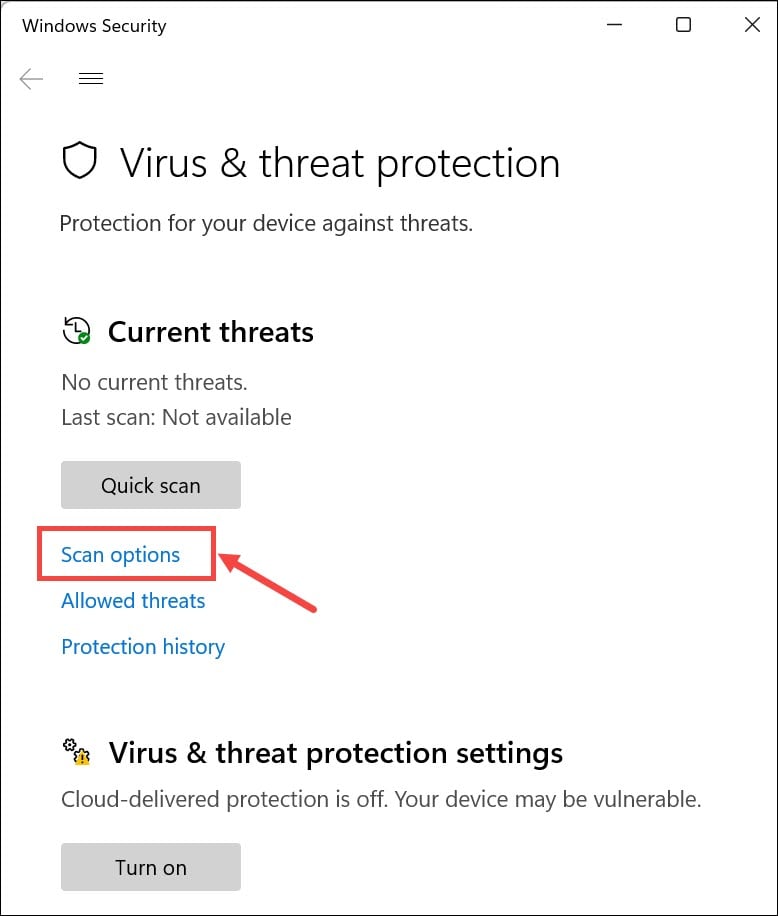
- Within “Windows Security,” choose the Virus & threat protection option.
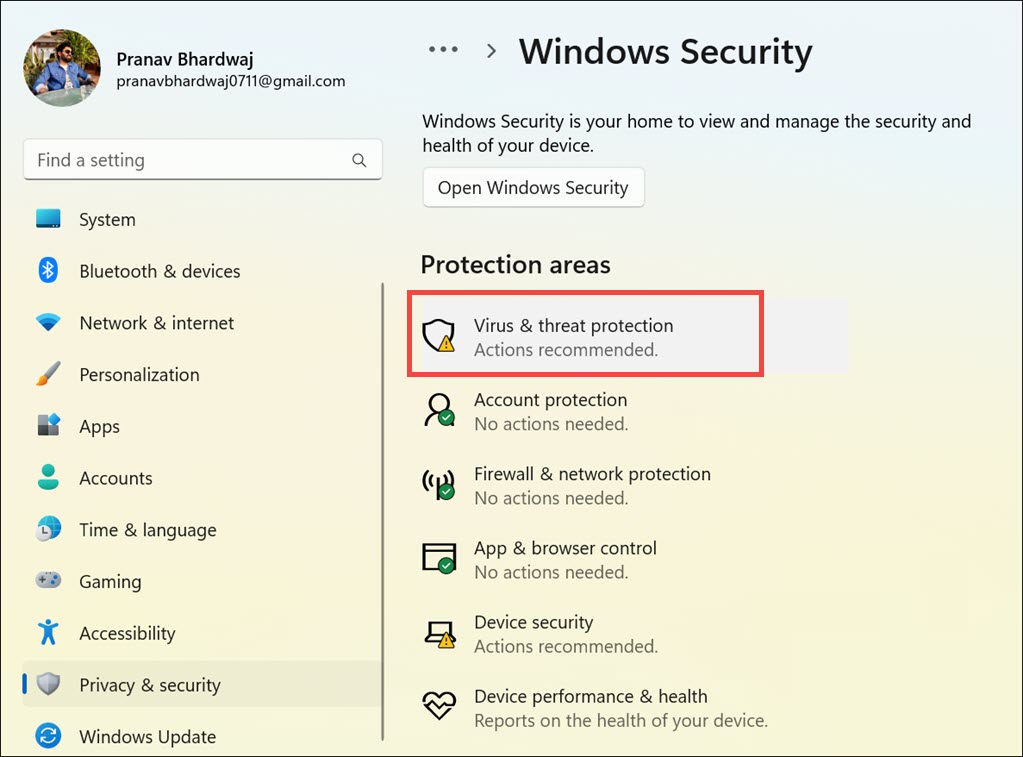
- Click on Scan options.
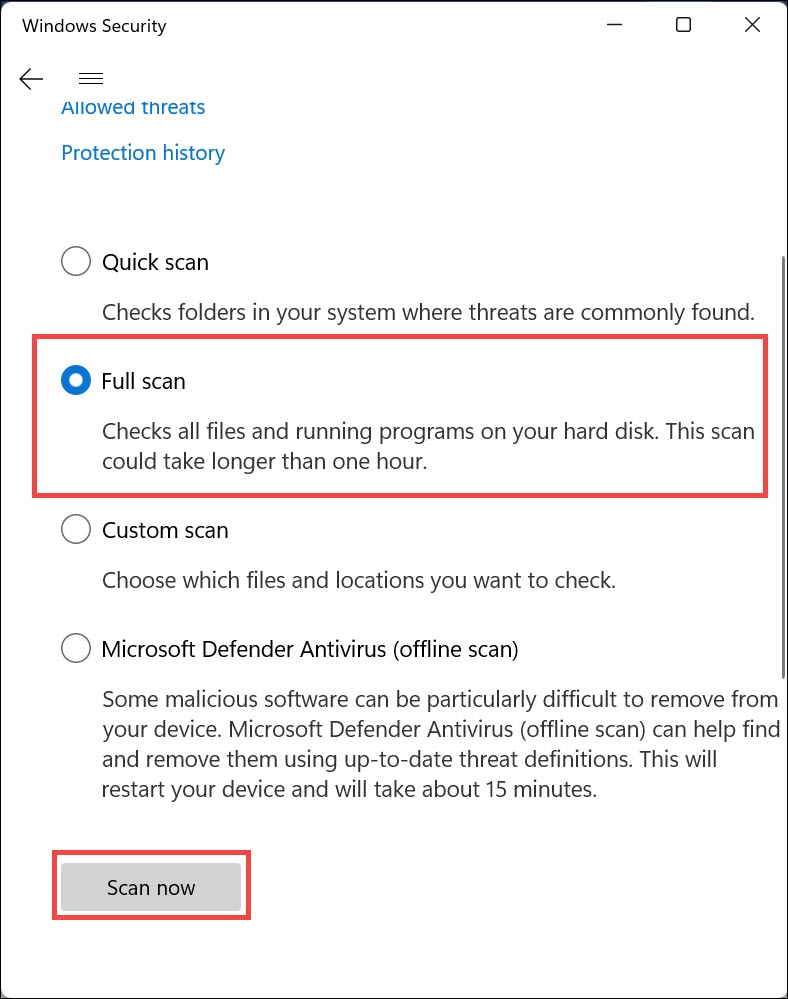
- Select Full scan and then click the Scan now button to initiate a comprehensive scan of your entire system.
Summary
Tackling the “Critical Process Died” BSOD error in Windows 11 can be challenging, but with the right steps, it’s often fixable. I have listed a range of solutions, from simple reboots and system scans to more in-depth fixes like restoring and performing system reset.
If these solutions don’t resolve the issue, seeking professional assistance is a wise next step.