
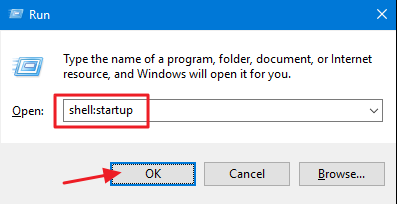
- Press Windows+R to open the “Run” dialog box.
- Type “shell:startup” and then hit Enter to open the “Startup” folder.
- Create a shortcut in the “Startup” folder to any file, folder, or program’s executable file. It will open on startup the next time you boot.
Some Windows apps configure themselves to automatically start whenever Windows boots. But you can make any app, file, or folder start with Windows by adding it to the Windows “Startup” folder.
Some apps already have a built-in setting for this, but if they don’t, this method is what you want. You can also make any file or folder open when Windows starts—just in case there’s something you find yourself using regularly. All you have to do is create a shortcut to whatever you want to start in a special “Startup” folder—one of Windows’ hidden system folders. This technique will work with just about any version of Windows from Vista on up through Windows 7, 8, 10, or even 11.
Note also, though, that the more programs you start on boot, the longer the startup process will appear to take. If there are any apps you don’t want to start on boot, you can disable certain startup programs too.
Step One: Open the Windows Startup Folder
“Startup” is a hidden system folder that you can navigate to in File Explorer (provided you’re showing hidden files). Technically, it’s located in %APPDATA%MicrosoftWindowsStart MenuProgramsStartup, but you don’t need to open up File Explorer and start browsing—there’s a much easier way to get there.
You can open many of Windows’ hidden and special folders directly using the “shell” command if you know the folders’ names. And you can launch the “shell” command right from the “Run” dialog box.
To open the “Startup” folder the easy way, just hit Windows+R to open the “Run” box, type “shell:startup,” and then press Enter.
This will open a File Explorer window right to the “Startup” folder.
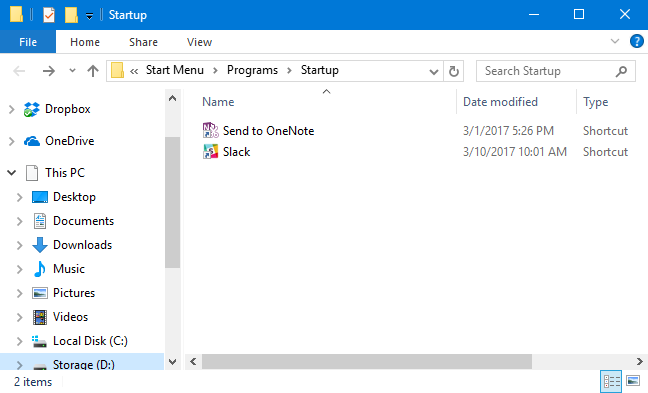
Go ahead and leave that window open, because we’re going to be working with it in the next section.
Step Two: Create a Shortcut in the “Startup” Folder
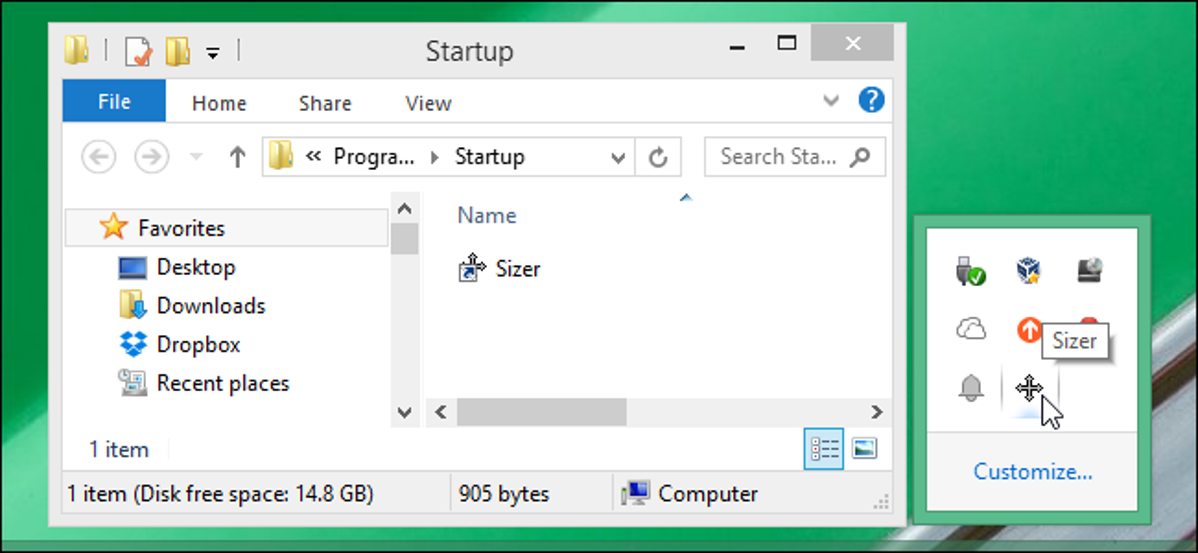
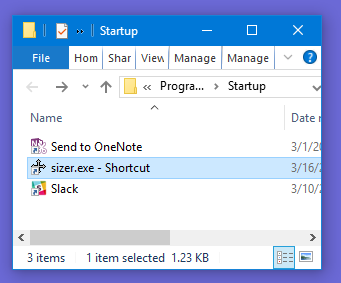
To make an app, file, or folder start with Windows, all you have to do is create a shortcut to the item inside the “Startup” folder. We’re going to be working with a handy little app named Sizer as our example, but this technique applies no matter what you’re creating a shortcut to.
First, locate the item to which you want create your shortcut. Just open a second File Explorer window and find the executable, file, or folder you want to start at boot. There are different ways to create shortcuts in Windows, but we’re fans of the super quick right-drag method: hold your right mouse button down and drag the item you want to create the shortcut for to the “Startup”folder. When you release the button, a popup menu with a few options appears. Click “Create shortcut here.”
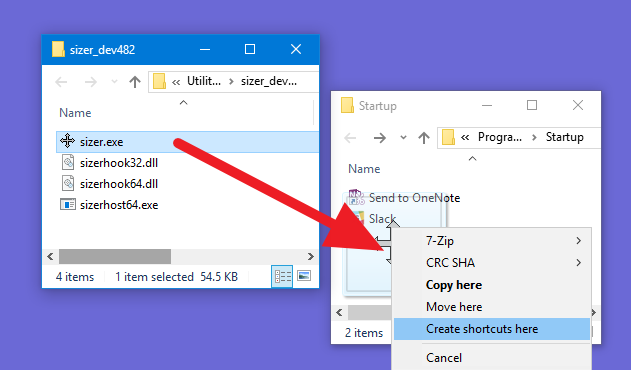
That’s all you have to do. You’ll now see a shortcut to your item in the “Startup” folder.
The next time you start Windows, your app, file, or folder will launch right along with it. This method even works for launching Windows Store Apps at startup.
How to Make Startup Programs Load Faster
When you’re using Windows 10 or 11, there’s a delay before your startup programs actually start to launch, which is probably there to help everything feel like it’s functional earlier in the startup process and allow for all of the internal Windows features to fully start running. But if you’ve got a really fast PC, you might not need to bother with that delay.
You can remove the delay by opening up Registry Editor and browsing down to the following key:
HKEY_CURRENT_USERSOFTWAREMicrosoftWindowsCurrentVersionExplorer
Once there, create a key named Serialize, and then a new 32-bit DWORD called StartupDelayInMSec underneath it with the value set to 0.

Or you could just head over to our article on removing the Windows 10 startup delay and grab the registry hack files that automate it for you. Up to you!
Alternative Method for Power Users: Use Task Scheduler for More Control
While we certainly would recommend simply using the shell:startup trick, you can also use Task Scheduler to run processes at system startup, when you log on, during idle times, or even when you lock or unlock your screen. It’s an incredibly powerful tool for more advanced users who want to automate their computer to do things like creating System Restore Points at startup or automatically waking up at a certain time.
To launch a program at Startup using Task Scheduler, you can open up Task Scheduler using the Start menu search box, go to Action and then Create Basic Task, and follow the prompts. You should actually use the “Log on” option if you’re trying to run a regular program.

For more, make sure to read our detailed guide to using Task Scheduler to launch processes later.