
If you’ve followed my previous few posts on CPU upgrades, you’ve learned that updating your motherboard’s BIOS is critical to having a successful upgrade. Regardless of your reason for BIOS updates, here are few different ways I want to share with you when it comes to upgrading a Gigabyte motherboard’s BIOS.
Method One: Install Gigabyte App Center and @BIOS app
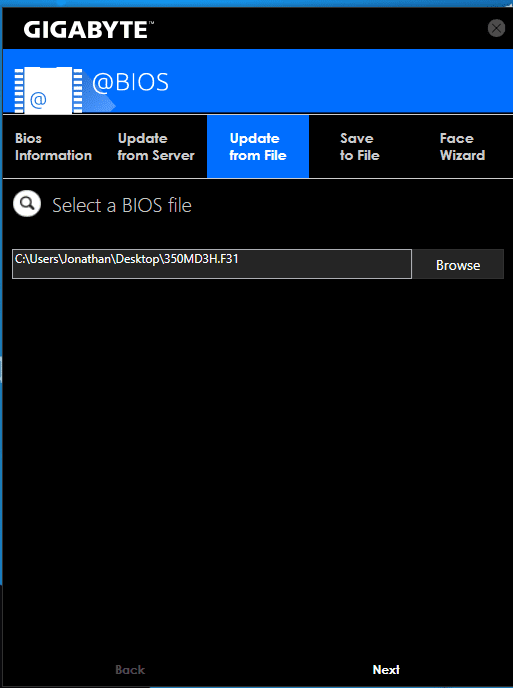
The most straightforward method that allows you to update BIOS all within Windows and I recommend most folks use this method. All you need to do is download the utility and run the installer. Follow the onboard instruction to update the BIOS. In order to install @BIOS you need to first have the Gigabyte’s App Center installed.
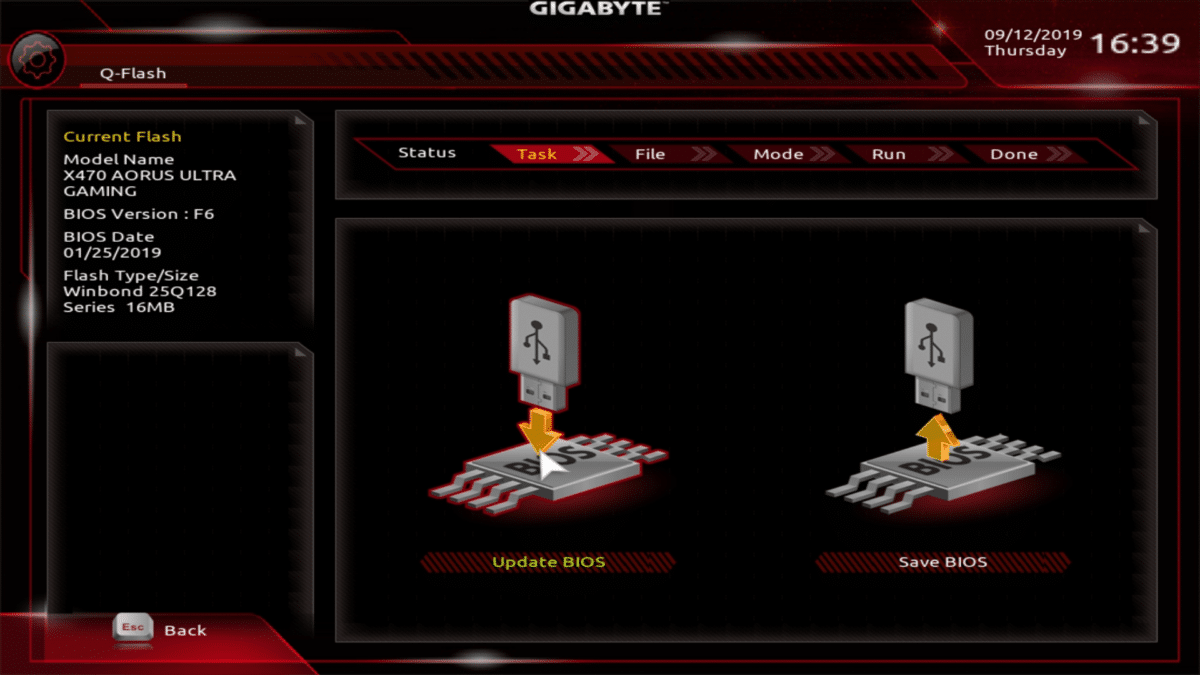
Method Two: BIOS Q-Flash
The traditional method is to go to the BIOS screen and flash the BIOS version from there. For Gigabyte, the flash tool is called Q-Flash. You download the binary and put it on your USB, boot into the BIOS screen and find the version from USB to proceed with the upgrade.
Method Three: Q-Flash via Dedicated USB Plug Directly
Almost all modern Gigabyte supports this; you need to read and check the instruction menu for your specific motherboard. It would help if you looked for a USB that’s dedicated to Q-FLASH to update BIOS. The most recent one, it’s a USB slot with white strips on the tongue.

Unplug everything else and power on the motherboard, and it will proceed with the BIOS upgrade. For this method to work properly, you want to have a USB drive with LED read/write an indicator to tell when the update is finished. This is a good method to proceed if you have lots of hardware need to perform the same update. It requires no supervision, just the right binary for the bios in the root drive of the USB, and it will proceed with the upgrade.
The post Three Ways to Upgrade a Gigabyte Motherboard BIOS appeared first on Next of Windows.