
Virtualization is a widely used technology that allows users to run multiple operating systems, like Windows, Linux, etc., on a single physical machine. Virtual machines are the platforms or instances on the physical machine on which multiple OS’s are installed and operated. However, there are instances when these virtual machines display errors mentioning that the system cannot boot without the ISO file. This article explores the possible causes and suggests what you can do if your Virtual Machine won’t boot without the ISO file.

Why won’t Virtual Machine boot without the ISO file?
Before we dig deep into the reasons and factors responsible for the error, let us understand what an ISO file is! ISO files happen to be the installer files for the OSs that are installed on the virtual machines. It is similar to a bootable USB drive or a DVD used to install an OS on a physical machine. Hence, this error, in simple terms, would indicate that the virtual machine won’t boot without its installer file, which could be caused due to the below-mentioned reasons:
- Boot Order Configuration: The primary cause for the error could be a misconfigured boot file for the virtual machine. If the VM is set to boot from the ISO file first and no OS’s installed on the virtual hard disk, it could lead to the error.
- Corrupted Boot Loader: The boot loader is responsible for loading the OS into the If the boot loader of the VM is corrupted or missing. A corrupted or missing bootloader would, therefore, be unable to load the OS into memory, leading to the error.
- No Operating System Installed: If the VM has no OS installed on its hard drive or the OS is corrupted, it could also lead to an error.
- ISO image mounted: Even after the completion of the installation, if the user does not unmount the ISO image, the VM will attempt to boot from it, leading to the said error even though the OS is perfectly installed and running.
- Misconfigured Virtualization Software Settings: There may be misconfigurations or issues in the virtualization software settings. Check the settings related to the VM’s boot process, virtual hardware, and storage configurations.
- Insufficient system resources: In some cases, the VM may not have sufficient resources allocated to it. Ensure the virtual machine has enough RAM, CPU, and storage resources to run the operating system.
Fix VM won’t boot without ISO file
Here is the list of checks and solutions to help you if your Virtual Machine won’t boot without the ISO file:
- Check boot order
- Unmount ISO image
- Check Virtual Disk configuration
- Verify ISO integrity
- Review Virtualization software settings
Make sure to create a copy of the ISO file to ensure there is no data lost, and you have another chance to test if something goes wrong in between.
1] Check boot order
The very first and primary step toward resolving the error would involve checking the boot order of the VM. Hence, setting the boot order to the virtual hard drive as the first boot device ensures that the VM attempts to boot from where the OS is installed. To set the virtual hard drive as the first boot device:
- Open the Virtual Machine Application on the host system
- In the application’s main window, select the VM for which the boot order needs to be checked, and then click on the Settings option.
- In the Settings Window, click on the Systems.
- Click on the Hard Disk option, followed by the up-arrow, to set the hard drive as the first boot device.
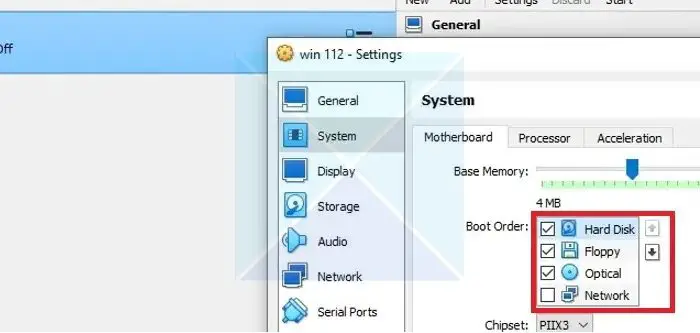
- Alternatively, the checkboxes beside the other boot devices can also be unchecked, except the hard drive, to ensure that the VM boots from the hard drive only.
- Click on OK for the changes to take effect.
2] Unmount ISO image

If the above step fails to resolve the issue, removing or unmounting the ISO file image from the virtual optical or USB drive can be handy. Unmounting the ISO image eliminates any configuration issue, thereby helping resolve the issue.
- Open the Virtual Machine application and click Settings > Storage after selecting the relevant VM.
- Click on the ISO image in the Storage Devices.
- In the Attribute section, click the drop-down below the disk icon and select Remove Disk from Virtual Drive, followed by OK.
Read: An operating system was not found. Try disconnecting any drives that don’t contain an operating system.
3] Check Virtual Disk configuration
If the issue persists, even after setting the bot order correctly and unmounting the ISO image, checking the virtual hard drive settings can be tried as the next step. This step can confirm that there are no connectivity issues between the VM and the virtual storage device where the OS is installed. To check the connectivity of the virtual hard drive and the VM,
- Open the Virtual Machine Application on the host system
- In the application’s main window, select the VM for which the connectivity needs to be checked, then click Settings.
- Click on the Storage Tab under the Settings window and check whether the Virtual Hard Drive Attributes and Information are displayed. If the virtual hard drive is not connected correctly, no details about the drive will be displayed under Storage.

4] Verify ISO integrity
The ISO file is invalid or corrupted if the error occurs while installing or immediately after installing the OS. Hence, the ISO file needs to be recreated or re-downloaded to avoid the error from occurring again.
5] Review Virtualization software settings
Reviewing the virtualization software settings would involve resetting the VM configuration to its default settings and inspecting the virtualization software logs. Restoring the default settings can help fix any misconfiguration in the VM that may have led to the error.
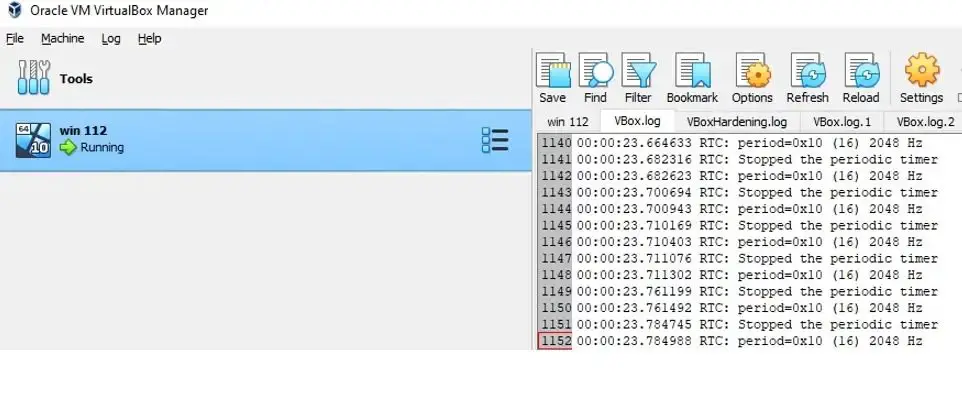
If the issue is still unresolved, checking the VM software logs can help identify specific issues that may have led to the error. Resetting the VM would involve a fresh addition or installation of the virtual OS, and hence, it can be tried out only as a last resort. However, to open the VM Logs,
- Open the Virtual Machine Application on the host system and click on the icon with three squares followed by the black lines beside them.
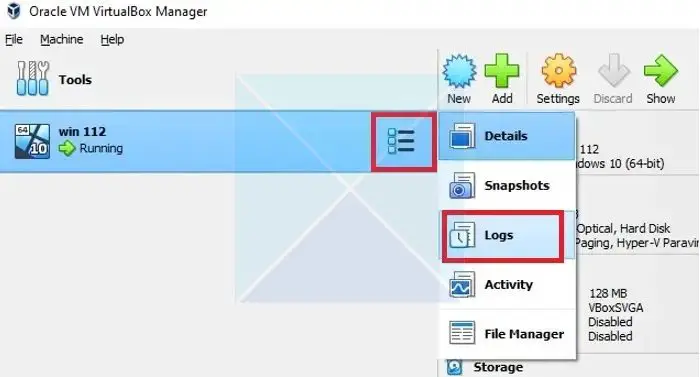
- Click on Logs from the ensuing options to open the Log file.
Generally, the problem is known to occur due to misconfigurations in the boot order, virtual hard drive connectivity, or a corrupt ISO file. Hence, approaching the resolution to the problem by checking the boot order followed by the hard drive connectivity and ISO integrity is said to resolve the issue in most cases.
How do you boot a VM in UEFI mode?
To configure a virtual machine (VM) to boot in UEFI mode, access the VM’s settings and select UEFI/EFI instead of the Legacy BIOS option. This ensures that the system prioritizes UEFI-compatible devices during startup.
How to set boot delay in VMWare?
To adjust the boot delay in VMware Workstation, ensure the virtual machine is powered off. Then, access its settings, click on the Options tab, select Power, and adjust the Power on Boot Delay setting to the desired duration in seconds. Save changes by clicking OK or Apply.