
Recently I upgraded my motherboard (to MSI Gaming Plus Max b450) with a newer chipset to have better support my previous upgraded Ryzen 3700X CPU. Obviously, when you ‘upgrade’ a motherboard, it’s rather a full new build again just with existing parts and that the only scenario you are expecting is everything turns back on and hopes it works again. Sadly this isn’t the case, and it is by far the most frustrating build I’ve done!
I hope this tip can save you endless re-tries or hours of reading and watching videos online or even making the wrong decision to RMA your motherboard when things don’t work out.
So what doesn’t work out?
No virtualization.
Unlike what this motherboard’s name suggests, I don’t plan to use it for gaming. I need it to speed up my daily work, and my work involves running docker containers and running virtualized OS. And by default, the setting for AMD’s Ryzen virtualization technology (SVM mode) is disabled.
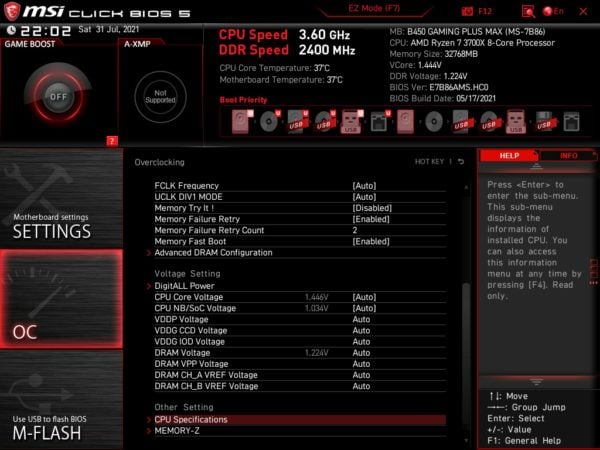
So let’s enable it in the BIOS. But you will soon realize if you follow most other guide out there by going to Advanced > OC > Other Settings > (looking for CPU features). The setting is missing from my motherboard. What?!
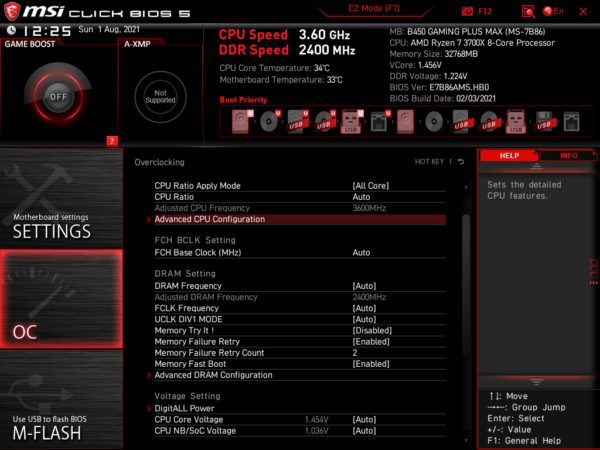
Long story short, after more digging and countless BIOS version flash, the answer lies in the above menu. The SVM mode setting has been moved under OC > Overclocking > Advanced CPU Configurations.
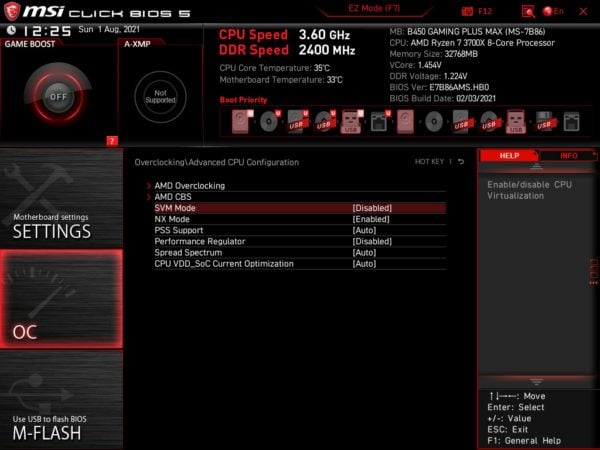
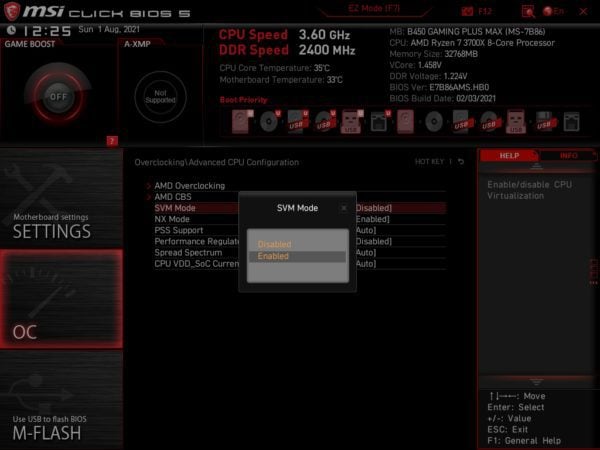
This is where you can change the SVM Mode from Disabled to Enabled.
I hope this solves your issue of enabling virtualization with the MSI B450 Gaming Plus Max motherboard. Unfortunately, there are more headaches for me with this motherboard that I have yet to figure out. The board would sometimes think CPU is not detected. As a result, nothing boots up.
The post Troubleshoot Where To Enable MSI Gaming Plus Max B450 Virtualization appeared first on Next of Windows.