

Oracle VirtualBox is a free open source virtualization software that allows the users to run virtual machines on Windows and other platforms. However, if you are using a Wi-Fi connection, you may not be able to access it on VirtualBox.
This is because VirtualBox by default does not support Wi-Fi connectivity unless the users have a USB Wi-Fi adapter installed. However, as a workaround, you can bridge to a Wi-Fi network card on the host.
In this article, we discuss how to enable Wi-Fi on VirtualBox to access the Internet on your virtual machine.
How do I fix Wi-Fi errors on VirtualBox?
1. Bridge Wi-Fi network adapter
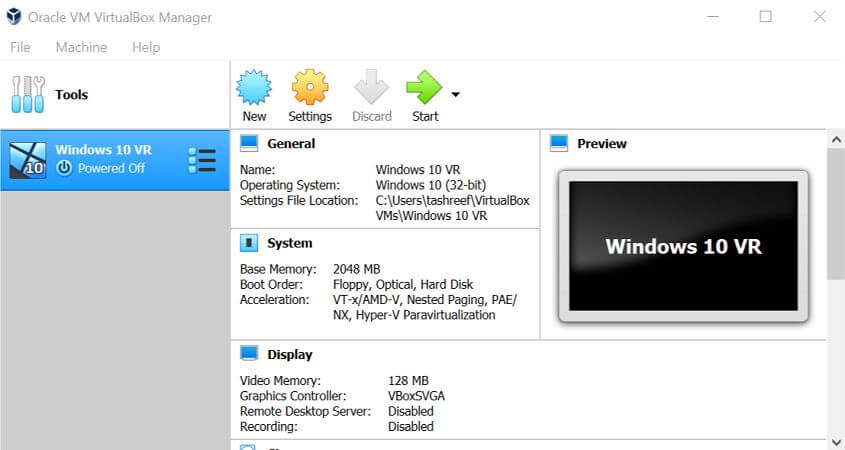
- Start VirtualBox if it’s not already running.
- Open VirtualBox Manager.
- Select the machine you cannot get internet on in the left pane.
- From the top menu, select the Settings button.
- From the left pane, click on Network under the Settings window.
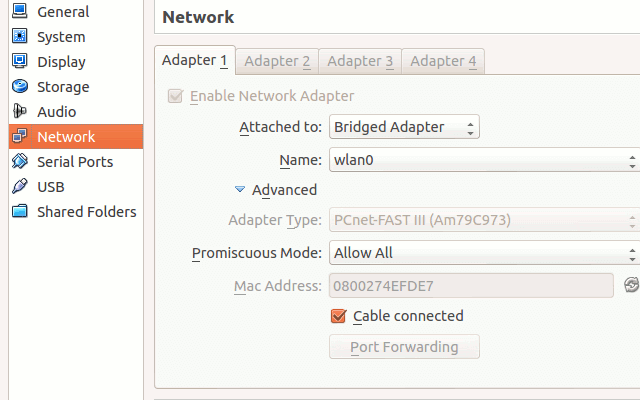
- Next, switch to Bridged Adapter in the Attached to the drop-down menu.
- Now you need to select the name of the network adapter you are currently using on the host machine.
- Under the Advanced section, make sure the machine is set to use Dekstop Adapter Type.
- Make sure Promiscuous Mode is sent to Allow VMs under Advanced section.
- Again under the Advanced section, make sure Cable connected option is checked.
- Click OK to save the changes and exit the settings window.
- Restart VirtualBox and open a web browser and you should be able to access the internet now.
After configuring the VirtualBox settings, you can access the Wi-Fi network on your virtual machine. If the issue persists, get the MAC address information of your network adapter and enter it in the MAC address filed of the guests’ network configuration dialogue box.
Here is how to get the MAC address of your host machine’s network adapter.

- Click on the Internet Access icon in the taskbar.
- Select your WiFi network and click on Properties.
- Scroll down to the Properties section.
- Note down the Physical address (MAC):
- Enter the MAC address in the VirtualBox‘s network configuration dialogue.
2. Enable and Disable Network Adapter
- Right-click on the network for the virtual machine in the taskbar (bottom right corner).
- Toggle the switch to disable Connect Network Adapter option.
- Wait for a minute or two.
- Toggle the switch again to enable Connect Network Adapter option again.
- Try to access the Internet.
This will only work if the Wi-Fi connection was working earlier and suddenly stopped.
3. Run network troubleshooter
- Press Windows Key + R to open Run.
- Type control and click OK.
- Click on Network and Internet.
- Click on Network and Sharing Center.
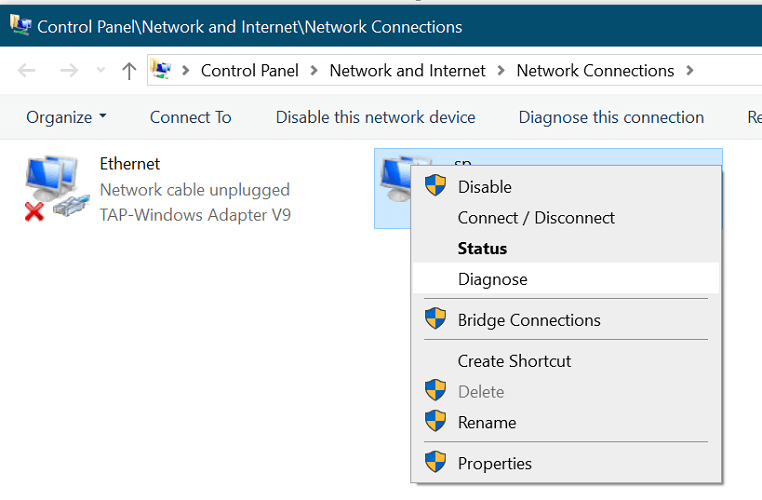
- Choose Change Adapter Settings from the left pane.
- Right-click on the Virtual Network Adapter and select Diagnose.
- Follow the on-screen instructions to complete the troubleshooting process.
- Click on Apply the recommended solutions/changes if prompted.
- Try accessing the internet from your virtual machine and check for any improvements.
You can’t open Control Panel? Take a look at this step-by-step guide to find a solution.
4. Set NAT adapter
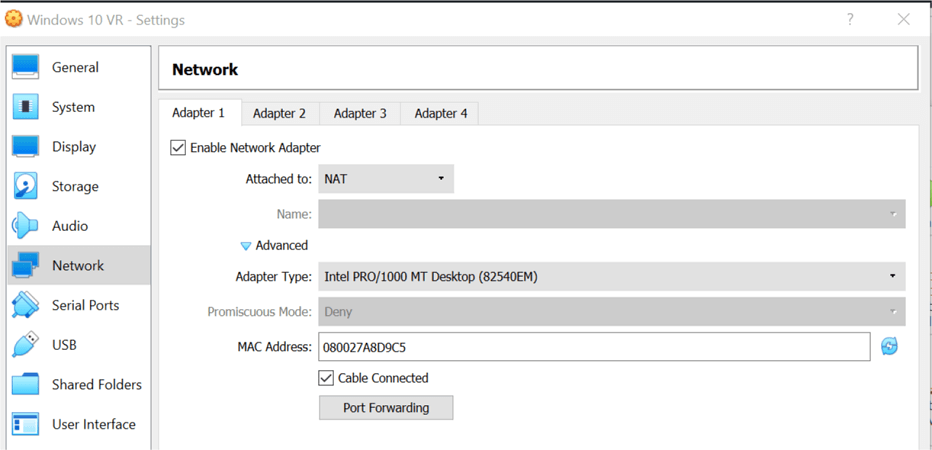
- Start VirtualBox if not running.
- Click on Settings and select Network Settings.
- In the network adapter add the following:
“BOOTPRO=DHCP“ - Check the Allow internet sharing option in the host machine adapter.
- Try to access the Internet and check if the Wi-Fi is working.
To be able to access Wi-Fi on your virtual machine, you need to make some tweaks to your host and the guest system. Follow the steps in this article to resolve any Wi-Fi-related issues that you encounter with Oracle VirtualBox.
If you have any other questions or suggestions, drop them in the comments section below.