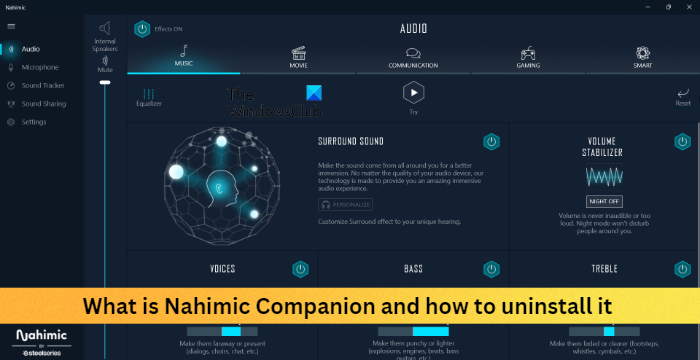
If you find that Nahimic Companion keeps reinstalling on Windows 11/10, then this post will interest you. We explain what is Nahimic Companion and how to completely uninstall Nahimic Companion from your Windows 11/10 computer if you need to.

What is Nahimic Companion? Is it good for Gaming?
Nahimic companion is an audio driver that aims to enhance the uses audio experience. This application is only available to people having motherboards and devices from MSI, Aorus, Dell, etc.
This audio driver brings various features and a unique sound technology that supports High-Definition 7.1 audio. It also helps users to improve their audio and speech quality. Nahimic ensures users have a better gaming experience with immersive 3D audio and exciting features.
Besides bringing all these unique features, the application has some downsides. It can crash unexpectedly and is very difficult to uninstall. Reinstalling it can help if you feel the need.
How to uninstall Nahimic Companion on Windows 11/10
To completely uninstall Nahimic Companion from your Windows 11/10 computer, follow these multiple metyhods or steps:
- Uninstall Nahimic Companion and delete residual files/services
- Disable App and it’s Services at Startup
- Delete Nahimic tasks in Task Scheduler
- Delete Nahimic Registry keys in the Registry Editor
- Disable HD Audio Controller in BIOS
Now let us see these in detail.
1] Uninstall Nahimic Companion and delete residual files/services
Before using other methods, we will simply try to uninstall Nahimic Companion. After uninstalling it, all the residual files and services should be removed using the command prompt. Here’s how:
- Press the Windows key + I to open Settings.
- Navigate to Apps > Installed Apps.
- Click on the three dots beside Nahimic Companion and select Uninstall.
- Once the procedure is complete, run Command Prompt as an administrator.
- Type the following command and press Enter.
Program Files (x86)MSIOne Dragon CenterNahimic%localappdata%/NhNotifSys
- Then click on Uninstall and follow the instructions on the screen.
- Restart your device and check if Nahimic is uninstalled or not.
2] Disable Nahimic and its Services at Startup
If Nahimic keeps reinstalling, try disabling the application and its services at startup.
- Open Nahmic Companion and uncheck the Run Nahmahic Companion as startup option.
To disable the Nahimic Service, you can follow these steps:
- Open Nahimic Companion and uncheck the option of Run companion at Startup.
- Now open Services as an administrator.
- Scroll down and double-click on the Nahimic Service. Then change its Startup Type to Disabled.
- Click on the Stop button and navigate to the Recovery tab.
- Now expand the dropdown of First Failure and select Take no action.
- Repeat the same for both Second Failure and Subsequent Failure. Then close the window.
- Now search for System Configuration in the search bar and open it.
- Navigate to Services, uncheck Nahimic Service and click on Apply.
- Navigate to the StartUp tab and click on open Task Manager.
- Disable all processes related to Nahimic.
Now open Windows PowerShell as an admin.
Type the following command and press Enter.
sc.exe delete "NahimicService."
Restart your device and check if Nahimic is uninstalled or not.
3] Delete tasks related to Nahimic in Task Scheduler
It’s possible that Nahimic Companion keeps reinstalling due to tasks related to Nahimic running in the task scheduler. Delete all tasks related to the service and check if the issue is fixed. Here is how you can do it:
- Click on the Windows button, search for Task Scheduler and select Open.
- Now right-click on all tasks related to Nahimic and select Delete. Below are some Nahimic-related tasks you will find.
NahimicTask32
NahimicSvc64Run
NahimicSvc32Run
- Once done, follow the first method and uninstall Nahimic from Apps and Features.
4] Delete Nahimic Registry keys in the Registry Editor
The next step requires you to delete the Nahimic Registry keys in the registry editor. Make sure to create a restore point, as even a single mistake can crash your device. Here is how you can delete Nahimic Registry keys:
- Press the Windows key + R to open the Run dialog box.
- Type regedit and hit Enter.
- Click on Edit at the top right corner and select Find.
- Type Nahimic in the Find dialog box and select Find Next.
- Once the Registry Editor finds the first Nahimic Registry, right-click on it and select Delete.
- Once you have deleted the key, click on F3 to search for more keys related to Nahimic.
- Repeat the same process to delete all the keys related to Nahimic.
- Restart your device and check if Nahimic Companion is uninstalled.
5] Disable HD Audio Controller in BIOS
If none of these steps could help you disable the HD audio controller in your device’s BIOS. As mentioned, Nahimic is an audio driver installed on selected devices and can be disabled in the BIOS. Here’s how:
- Press the Windows key + I to open Settings.
- Navigate to System > Recovery and select Restart now beside Advanced Startup.
- Once your system reboots, click on Troubleshoot > Advanced Options > UEFI Firmware Settings > Restart.
- In system BIOS, navigate to the Advanced tab and select Integrated Peripherals.
- Now click on Disable HD audio controller.
- Save the changes and restart your device.
