
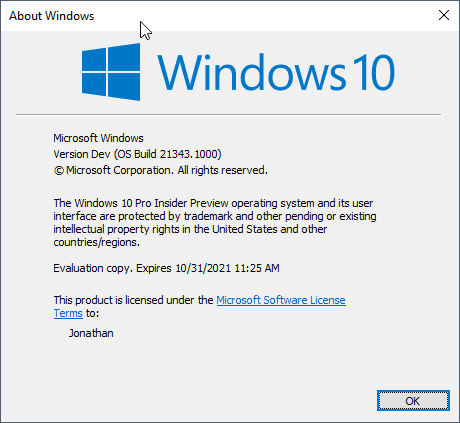
Microsoft has rolled out the latest Windows 10 insider build, which contained the largest visual change since Windows 10 six years ago. With build 21343, you can experience the latest change; the most notable change will be within Windows explorer.
New Icons
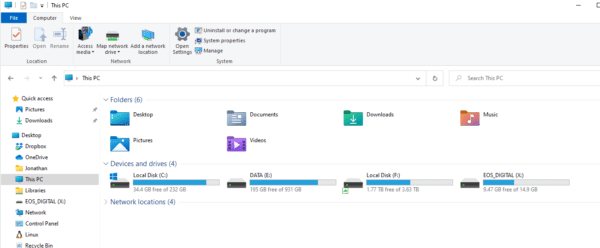
Microsoft has made a major icon change with this new build. At first glance, it looks as if this is something out of a third-party theme, but as you go through the rest of Windows Explorer you will notice subtle changes are all over the place. I’m not sure if anyone would like this new look from the start. With any UI change, there is no right or wrong, it’s just different. This is essentially planned obsolescence by style. As more folks upgrade to the latest Windows 10 with the new icon, new screenshots will be shared and as a result, it will mark a clear distinction between the older version vs the latest Windows 10.
Quick Access reset (only in this build)
By upgrade to this build, you will lose all the quick access folders you’ve previously pinned to Windows Explorer. To fix it, you have to either re-pin them back to the Quick Access or hold off this build and wait for the next release, which Microsoft has said they will fix this issue during an upgrade.
Windows Explorer Visual Changes
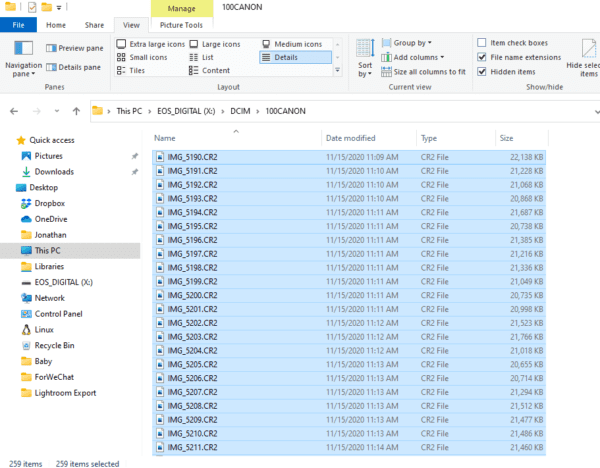
One thing you will soon notice if your default view for listing folders and files is in “detail” mode. Normally the file listed in detail view renders each row without not have any padding. With the new change, the default view introduced padding (or margin) and made the entire list much longer and, more importantly, within the same screen real estate, a much smaller number of files are shown. Personally, this was the biggest annoying part with the new build, but thankfully there is a fix to address this.
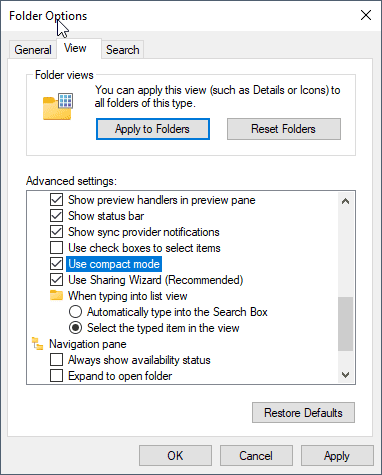
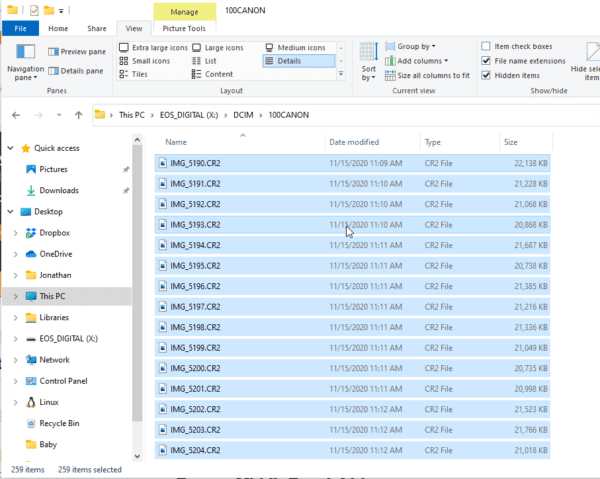
Go to Explorer > View > Options. Under the View tab, find a new setting named “Use compact mode.” This is unchecked by default; if you want to restore to any previous Windows’ behaviour, you have to check this and Apply the setting. This will turn your Detailed view into the previous rendering where no gap (or padding) for each row. I’m not sure why Microsoft left the default to be unchecked. The only use case I would see that benefits from the extra padding are using Windows 10 on a tablet mode.
Hope this helps with your new Windows 10 build and enjoy the latest upgrade.
The post Windows 10 Icon and UI Overhaul Walkthrough – Build 21343 (Tips and Tricks) appeared first on Next of Windows.