
- If your PC fails to connect to the wireless N network, there might be a problem with the adapter.
- Read below to find a whole list of solutions that you can apply yourself to fix this issue.
- Whenever you experience trouble with your PC, check our Troubleshooting Hub for helpful advice.
- In the Windows 10 page, you’ll find many guides and recommendations for your Windows 10 devices.

You might have experienced problems with the Wi-Fi connection, more specific your PC sometimes won’t recognize the wireless network.
As it happens, the system connects to the wireless G networks but it keeps disconnecting after a few seconds if you connect to the wireless N network in Windows 10.
Usually, when Windows 10 disconnects you from the wireless network it will also give you a pop-up message where you need to write the network information.
This can get very annoying, therefore we will first try to install the network card driver. If this fails, we’ll troubleshoot the connection settings.
So carefully follow the steps posted below and you should be able to fix the connection to the wireless N network.
How do I fix a wireless network connection in Windows 10?
1. Reinstall the adapter driver

- Go to the manufacturer’s website and download the latest wireless card driver compatible with your PC.
- Go to the directory where it was saved.
- Right-click or hold tap on the driver’s executable file.
- Click on Properties.
- Now click on the Compatibility tab situated in the upper side of the window.
- Check the box next to Run this program in compatibility mode for.
- From the drop-down menu, select the Windows 7 and click OK.
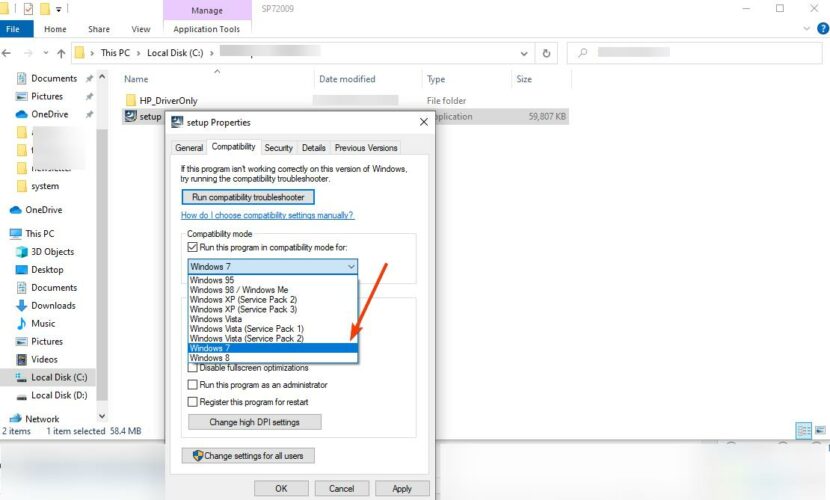
- Right-click on the driver executable and select Run as Administrator. (If an additional account control window pops up, click Yes to proceed).
- Follow the instructions on the screen to finish the driver installation.
- After you successfully installed the driver, reboot your Windows 10 operating system.
- Check if you can connect to the wireless N network properly.
Alternatively, to save time and to make sure you’re downloading the right driver, use a third-party dedicated tools that will do the job for you.
DriverFix is such a tool. It scans the system for outdated drivers, then suggests actions that you should take depending on what it finds on the system.
Besides, this simple software can help you with both detecting outdated drivers and recommending the latest compatible components to download.

DriverFix
Avoid network errors and keep your connection settings up and running by updating all your drivers with DriverFix.
Free trial Visit website
2. Temporarily disable your antivirus

This step is quite intuitive. If you have an antivirus icon in the lower right side of the screen, next to the clock, right-click on it. Then choose Disable.
Try connecting again to the wireless N network of your Windows 10 to see if it works.
However, this is only a workaround and we don’t recommend disabling the antivirus while online. Rather use a software that does not interfere with other processes, while also offering full-time protection.
Bitdefender is such an antivirus, highly ranked for its detection rates and low interference with other apps or processes while scanning your PC.
To get the best results, you can choose three working modes, and Bitdefender will optimize the resources it uses to protect your system. This does not mean that the protection quality is affected in any way.
We suggest running a deep system scan once you download the product, then enable real-time protection and let the tool do its job. A full scan is recommended once in a while.
![]()
Bitdefender Antivirus Plus
Malware can affect network connectivity, but with Bitdefender you’re safe from any type of online attacks.
Free trial Visit website
3. Troubleshoot Internet Connections
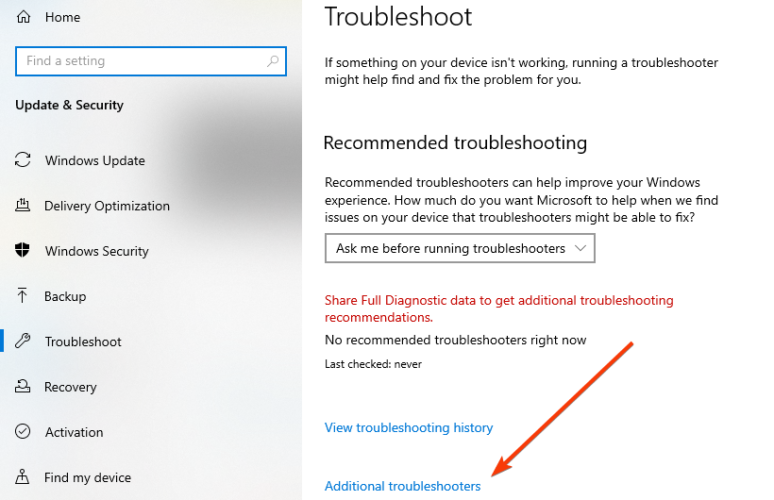
- Type Troubleshooting in the home screen search bar and open the menu.
- Go to Troubleshoot and click on Additional troubleshooters.
- Click on Internet Connections.
- Now click on Run the troubleshooter.
- Follow the instructions on the screen to finish the troubleshooting steps.
- Afterward, reboot your device.
- When the device starts try connecting to your wireless N network and see if it works.
4. Troubleshoot your network adapter
- Follow the first two steps in the previous solution.
- Inside Additional troubleshooters, click on Network Adapter.
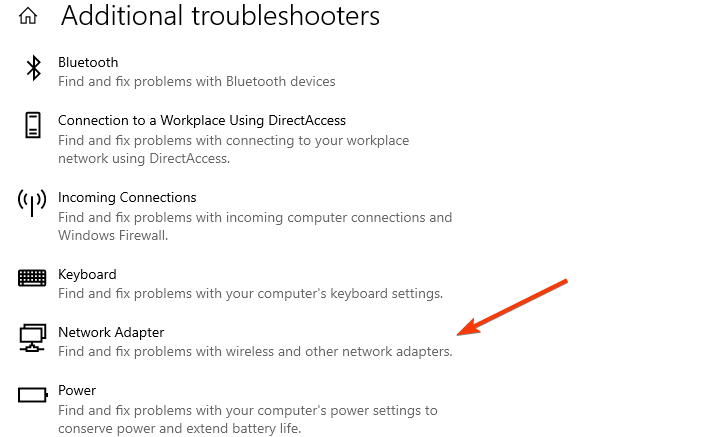
- If you have multiple adapters, the process asks which one you want to troubleshoot.
- Select the adapter, and follow the instructions on the screen to finish the process.
- Reboot the device and check again the wireless N network connection.
5. Uninstall the driver from Device Manager and reinstall it
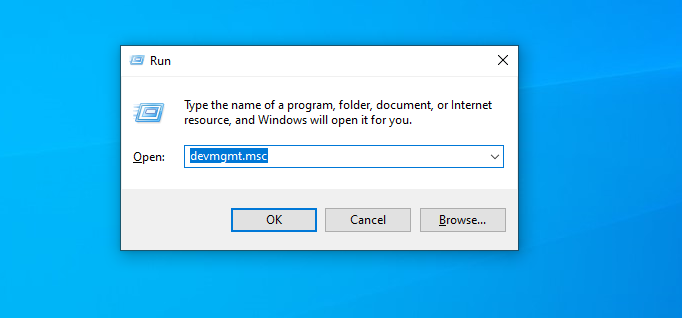
- Press simultaneously the Windows logo and the R keys.
- In the run dialog box, write devmgmt.msc and click OK.
- On the left side panel search for the Network Adapter you are using.
- Now right-click on the driver and select Uninstall.
- Follow the instructions on the screen to finish the uninstall process.
- Now install again the driver as you did in the third method above.
6. Use Command Prompt
- In the search dialog box write cmd and open Command Prompt as administrator.
- In the command prompt window, write the following and press Enter:
netsh interface tcp set global rss=disabled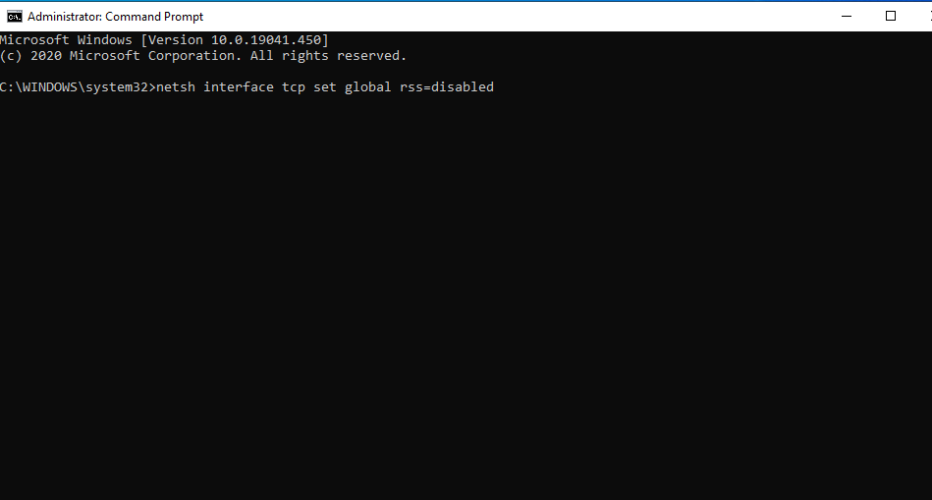
- Then write:
netsh interface tcp set global autotuninglevel=disabled - Again, press Enter.
- Next, you will need to write the following and Enter:
netsh int ip set global taskoffload=disabled - Close the Command prompt window and try connecting again to the wireless network.
7. Fix general wireless adapter issues
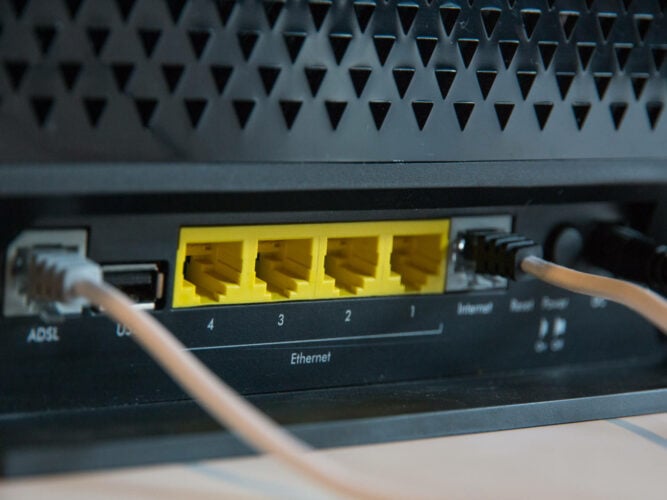
Your computer may simply have problems because of the access point or wireless adapter.
In this case, you will have to do more checks, like seeing if all the cables are plugged correctly, update wireless drivers, reset the router, and changing your password.
For a Belkin Wireless adapter, use our dedicated guide to fix connection problems.
And there you go, these are a few methods that will solve your wireless connection in Windows 10. If you run into any more issues or you have other questions related to this article please don’t hesitate to write to us in the comments section below.